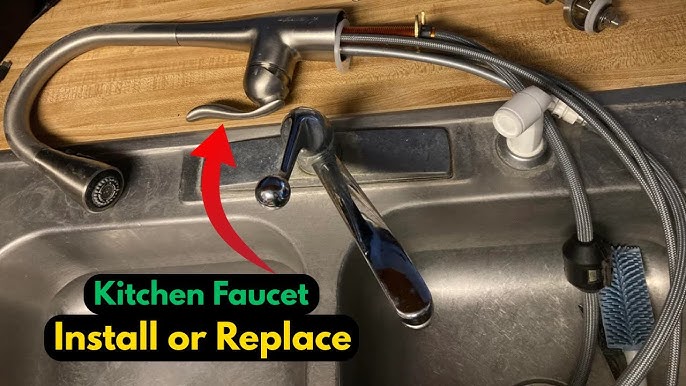
Are you tired of that old, leaky kitchen faucet? Installing a new one might seem tricky, but it’s easier than you think.
With the right steps, you can save money and add a fresh look to your kitchen. In this guide, you’ll discover how to install a kitchen faucet quickly and confidently. By the end, you’ll know exactly what to do—no plumber needed.
Ready to upgrade your kitchen? Let’s dive in and make it happen!
Tools And Materials Needed
Essential tools include a adjustable wrench, screwdriver, and plumber’s tape. A basin wrench helps reach tight spots under the sink. A bucket or towel is useful to catch water drips.
Choosing the right faucet depends on your sink type and style preference. Measure the number of holes on your sink before buying. Single-handle faucets are easier to use and install. Double-handle faucets give more control over water temperature.
Additional supplies may include silicone sealantto prevent leaks and new water supply linesif old ones are worn. Keep a flashlight handy to see under the sink clearly.
Preparing The Sink Area
Turn off the water supplyto avoid leaks. Locate the shut-off valves under the sink. Twist them clockwise until tight. Test by turning on the faucet to ensure no water flows.
Clear the workspacearound the sink. Remove any items like soap, sponges, or dishes. This gives enough room to work safely and comfortably.
To remove the old faucet, start by disconnecting the water lines. Use a wrench to loosen the nuts under the sink. Carefully lift the faucet out once all connections are free.
Installing The New Faucet
Gather all the faucet parts. Ensure everything is in the package. Attach the supply lines to the faucet. Check the hot and cold indicators. Tighten the connections with your hands. Avoid using tools that might damage them. Follow the manual for any specific instructions. Make sure the gaskets are in place.
Insert the faucet into the sink hole. Ensure it is upright and centered. Adjust the base plate if needed. This will help it sit flat. Double-check the alignment from above. Make sure the faucet is facing the right direction.
Tighten the mounting nuts under the sink. Use a wrench if needed. Ensure the faucet is stable. Do not over-tighten to avoid damage. Check the faucet’s position once more. Verify that it does not move easily. Connect the water supply lines to the valves. Turn them gently to avoid damage.

Credit: www.youtube.com
Connecting Water Lines
Attach the water supply linesto the faucet’s threaded connectors. Use plumber’s tapeon threads to prevent leaks. Hand-tighten the connections first, then use a wrench for a snug fit. Avoid overtightening to stop damage.
Turn on the water supply slowly. Watch all connections closely for any water leaks. Check around the base of the faucet and under the sink. Small drips may appear at first.
- Tighten any loose connections carefully with a wrench.
- Do not force; a little tightening usually stops leaks.
- If leaks persist, remove and reapply plumber’s tape.
After tightening, run water through the faucet. Observe if leaks stop completely. Properly sealed connections prevent water damage and ensure smooth faucet use.
Testing And Final Adjustments
Turn on the main water supply slowly. Watch for leaks around the faucet and under the sink. Open the faucet handles and let water flow for a few minutes. This clears air and debris from the pipes. Check both hot and cold water flows evenly. Adjust the water pressure if needed.
If water drips or leaks appear, tighten connections gently. Use a wrench without over-tightening to avoid damage. For low water flow, check if the aerator is clogged. Remove it and clean with vinegar or a brush. Ensure the supply valves under the sink are fully open.
- Inspect all joints for leaks.
- Clean faucet aerators for smooth flow.
- Open supply valves completely.
- Tighten loose connections carefully.

Credit: www.youtube.com
Maintenance Tips
Regular cleaningkeeps the faucet working well and looking new. Use a soft cloth and mild soap to wipe the faucet. Avoid harsh chemicals that can damage the finish. Clean the aerator to remove dirt and improve water flow.
Preventing leakssaves water and money. Check the faucet base and connections often for drips. Tighten loose parts gently to stop leaks. Replace worn-out washers and O-rings to keep seals tight.
When to replace partsdepends on wear and damage. Change parts if water pressure drops or leaks continue. Look for cracks or rust on handles and spouts. Replace parts promptly to avoid bigger problems later.

Credit: www.youtube.com
Frequently Asked Questions
How Do I Install A Kitchen Faucet Step-by-step?
Start by turning off the water supply. Remove the old faucet carefully. Position the new faucet and secure it underneath. Connect water lines tightly. Test for leaks and ensure proper water flow. Follow the manufacturer’s instructions for specific models.
What Tools Are Needed To Install A Kitchen Faucet?
You typically need an adjustable wrench, basin wrench, plumber’s tape, screwdriver, and a bucket. These tools help remove the old faucet and secure the new one. Having a flashlight and towels handy can also make the process easier and cleaner.
How Long Does It Take To Install A Kitchen Faucet?
Installation usually takes between 30 minutes to 1 hour. Time varies based on faucet complexity and your experience. Simple models install quicker, while pull-out faucets might require more time. Preparation and careful work can reduce overall time.
Can I Install A Kitchen Faucet Without Professional Help?
Yes, many kitchen faucets are DIY-friendly. Following clear video tutorials and instructions helps. Basic plumbing knowledge is beneficial. However, complex plumbing or unusual fittings might need professional assistance to avoid leaks or damage.
Conclusion
Installing a kitchen faucet can be simple with clear steps. Watch the video carefully and follow each part slowly. Use the right tools to avoid problems. Take your time and check all connections for leaks. You will save money by doing it yourself.
Enjoy your new faucet and a fresh kitchen look. Keep this guide handy for future repairs or upgrades. Small projects like this build your confidence over time. Ready to try it? You can do it!


