If you love homemade ice cream, you know how exciting it is to create your favorite flavors right in your kitchen. But before you can start, you need to attach your ice cream maker to your KitchenAid stand mixer properly.
It might seem tricky at first, but once you know the simple steps, it’s quick and easy. In this guide, you’ll learn exactly how to connect your ice cream maker so you can start whipping up delicious treats in no time.
Keep reading—you’re just moments away from your next perfect batch of ice cream!

Credit: www.neweggbusiness.com
Preparing Your Kitchenaid Mixer
Before attaching the ice cream maker, gather all the necessary parts. These include the ice cream maker bowl, dasher, and the Kitchenaid attachment hub. Check if the bowl is fully frozenas it helps in making creamy ice cream. The dasher fits inside the bowl to churn the mixture properly.
Ensure your Kitchenaid mixer is on a stable, flat surface. This avoids any movement during mixing. Use the locking leveron the mixer to secure the ice cream maker attachment tightly. Stability is key to smooth operation and safety.
Attaching The Ice Cream Maker Bowl
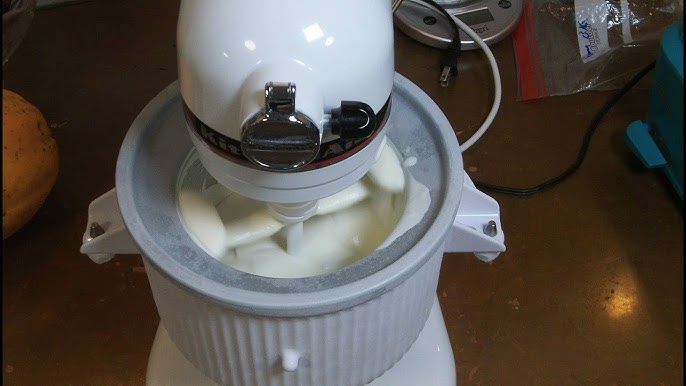
Place the ice cream maker bowlon a flat surface. Align the bowl’s tabs with the slots on the Kitchenaid mixer base. The bowl should fit snugly without forcing it.
- Turn the bowl slightly until it locks into place.
- Make sure the bowl does not wobble or move.
- The bowl should sit level and firm on the base.
Check that the bowl is securely locked. This prevents spills and ensures even mixing. Press down gently to confirm the lock.
Installing The Dasher Paddle
Attach the Dasher paddle by aligning it with the ice cream maker’s spindle. Push it gently until it fits securely. Ensure it spins freely before starting the machine.
Selecting The Right Paddle
Choose a paddle that fits your Kitchenaid model. Some paddles are for specific models. Make sure it is the correct size. The paddle must reach the bowl’s edges. This ensures smooth ice cream. A paddle too small won’t mix well. A big paddle may not fit. Always check the paddle’s label. This helps you select the right one.
Securing The Paddle Properly
Place the paddle inside the bowl. Align it with the bowl’s center. Push it down gently. Turn it until it clicks. This locks the paddle in place. Check if it moves smoothly. It should not wobble. If it does, try again. A secure paddle makes better ice cream. Always double-check before starting the machine.

Credit: www.amazon.ca
Connecting The Freezer Bowl
Attach the freezer bowl by aligning it with the base of the KitchenAid mixer. Twist the bowl until it locks securely in place. Ensure it fits tightly to keep the ice cream mixture cold during churning.
Fitting The Freezer Bowl Onto The Dasher
Place the freezer bowl on a flat surface before attaching it. Align the bowl’s tabs with the slots on the dasher. Gently press down until you hear a click. This means the bowl is secure. Be careful not to force it, as it might damage the parts.
Checking For Proper Attachment
Once attached, try to lift the bowl slightly. It should not move or wobble. The dasher should rotate smoothly inside the bowl. If it sticks or feels loose, detach and try again. Proper fitting ensures the ice cream freezes evenly.
Starting The Ice Cream Maker
Choose the correct speed setting on the KitchenAid mixer before attaching the ice cream maker. Use the slow speedto prevent splashing and ensure smooth mixing. The ice cream maker works best between speed 2 and 4. Too fast may cause the mixture to spill or not freeze well.
Keep an eye on the mixing process. The ice cream should start to thicken after about 20-30 minutes. Stir gently if needed, but avoid opening the lid too often. This keeps the cold air inside and helps the ice cream freeze evenly.
- Attach the ice cream maker securely to the mixer.
- Set the mixer to low speed(2-4).
- Mix for 20-30 minutes until thick.
- Watch for splashing or uneven freezing.

Credit: www.aallyandsons.com
Troubleshooting Attachment Issues
Common attachment problems include the ice cream maker not fitting properly, the machine not locking in place, and the paddle not turning. These issues often happen if parts are dirty or misaligned.
- Check that the mixer is off and unplugged before attaching.
- Clean the attachment hub and ice cream maker parts to remove dust or food bits.
- Align the ice cream maker’s shaft with the mixer’s hub slot carefully.
- Push the attachment firmly until it clicks or locks into place.
- Make sure the paddle inside the ice cream maker is correctly seated.
- If the attachment feels loose, try removing and reattaching it.
These quick tips can help avoid most common problems and ensure smooth operation.
Frequently Asked Questions
How Do I Attach The Ice Cream Maker To A Kitchenaid?
To attach the ice cream maker, first lock the mixer bowl in place. Align the ice cream maker’s hub with the front of the mixer. Tighten the attachment knob securely. Ensure the dasher is inserted correctly before starting.
Can I Use Any Kitchenaid Model With The Ice Cream Maker?
The ice cream maker attachment fits most Kitchenaid stand mixers. Check compatibility with your specific model before purchasing. Older or limited edition mixers may not support the attachment. Always refer to the manufacturer’s guide for compatibility details.
How Do I Secure The Ice Cream Maker For Stable Operation?
Ensure the mixer bowl is locked firmly in place. Attach the ice cream maker hub tightly to avoid wobbling. Use the locking lever if your model has one. This prevents movement during the churning process for smooth operation.
What Steps Ensure Proper Dasher Installation In The Ice Cream Maker?
Insert the dasher into the freezer bowl before attaching it. Align the dasher with the drive shaft carefully. Ensure it fits snugly without forcing. Proper installation helps in even churning and prevents damage.
Conclusion
Attaching the ice cream maker to your KitchenAid is simple and quick. Follow the steps carefully for a secure fit. Make sure all parts are clean before starting. Once attached, you can enjoy homemade ice cream anytime. This tool saves time and effort in making treats.
Try different flavors to find your favorite. Enjoy the fun of creating ice cream at home. This guide helps you get started with ease. Happy ice cream making!


