Do you want more space in your kitchen? A kitchen island can help. It is a great way to add style and function. This guide will teach you how to build one.
Why Build a Kitchen Island?
A kitchen island gives extra counter space. It also offers more storage. You can use it for cooking or eating. It is a practical addition to any kitchen.
Materials Needed
Before you start, gather these materials:
- Wood for the base
- Wood for the countertop
- Wood screws
- Sandpaper
- Wood glue
- Paint or stain
- Paintbrush
- Measuring tape
- Saw
- Drill
- Level
Step 1: Plan Your Island
First, decide on the size. Measure your kitchen space. Make sure there is enough room to move around. A good size for a small kitchen is 4 feet by 2 feet.
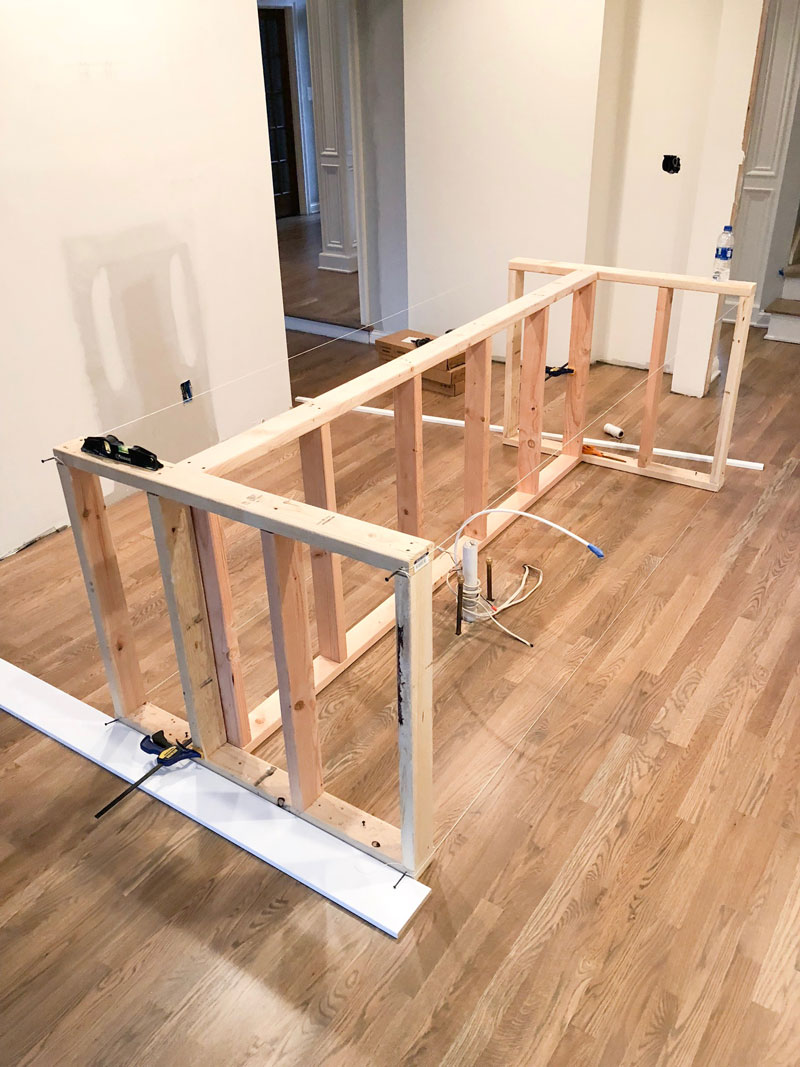
Step 2: Build the Base
Cut the wood for the base. You will need four legs. The legs should be the height you want your island. A standard height is 36 inches. Attach the legs with wood screws.
Next, add the sides. Cut wood to connect the legs. These will be the base sides. Use wood screws to attach them. Make sure the base is stable.
Step 3: Add Shelves
Shelves are useful. You can store pots and pans. Cut wood for the shelves. Attach them between the sides. Use wood screws to secure them.
Step 4: Attach the Countertop
The countertop is important. It is where you will work. Cut wood for the countertop. It should be larger than the base. This gives you more workspace. Secure it with wood screws.
Step 5: Sand and Finish
Sand the wood surfaces. This makes them smooth. It also prepares them for painting or staining. Choose a color you like. Paint or stain the wood. Let it dry completely.

Credit: build-basic.com
Step 6: Check Stability
Use a level to check your island. Make sure it is even. If not, adjust the legs. This will prevent it from wobbling.
Step 7: Add Final Touches
Add hooks for extra storage. You can hang utensils or towels. A small towel rack can be useful too. Make your kitchen island unique. Decorate it to match your kitchen style.
Benefits of a Kitchen Island
A kitchen island is very helpful. It provides more workspace. You can prepare food easily. It also adds storage. You can keep kitchen tools handy.
It can be a place to eat. Add stools for seating. Your family can gather around. It makes cooking a social activity.

Credit: www.classyclutter.net
Frequently Asked Questions
What Tools Are Needed To Build A Kitchen Island?
Basic tools like a saw, drill, and measuring tape are essential. Safety gear too. Simple, but effective.
How Much Does It Cost To Build A Kitchen Island?
Costs vary based on materials and size. Typically, $300 to $1,000. Economical options exist.
Can I Build A Kitchen Island Myself?
Yes, it’s possible with basic DIY skills. Follow detailed guides. Save money and customize.
What Materials Are Best For Kitchen Island Construction?
Wood and metal are popular. Durable and stylish. Choose based on your kitchen style.
Conclusion
Building a kitchen island is a rewarding project. It improves your kitchen. You gain space and style. Follow these steps to build your own. Enjoy your new kitchen island!
Tips for Success
- Measure twice, cut once.
- Use quality wood for durability.
- Ensure screws are tight.
- Ask for help if needed.
- Be patient and take your time.


