Are you tired of dealing with a leaky or clogged kitchen sink drain? Installing a new one might be easier than you think, and you don’t need to be a plumbing expert to get it right.
By learning how to install a kitchen sink drain yourself, you can save money, time, and the hassle of waiting for a professional. Imagine the satisfaction of completing this project on your own, transforming your kitchen into a fully functioning, efficient space.
In this step-by-step guide, we’ll walk you through the entire process, ensuring you feel confident and empowered to tackle this task. So, grab your tools and let’s get started—your kitchen sink is about to become your new favorite DIY success story.

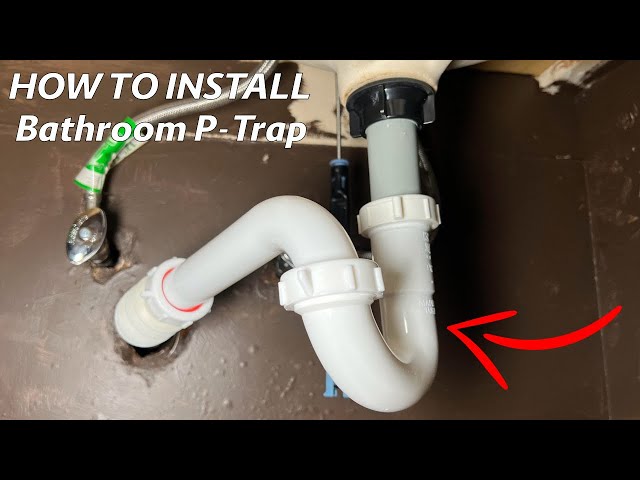
Credit: www.youtube.com
Choosing The Right Drain Kit
Selecting the appropriate drain kit ensures a seamless kitchen sink installation. Consider material compatibility and size for optimal fit. Proper installation prevents leaks and enhances drainage efficiency.
Types Of Drain Kits
Drain kits come in many types. Some are simple, others are complex. Basket strainers are very common. They stop food from going down the drain. Pop-up drains are handy in bathrooms. Push-button drains are easy to use. Each type serves a different need. Choose based on your sink and usage.
Materials And Durability
Drain kits are made from different materials. Stainless steel is strong and lasts long. Plastic is light and cheaper. Brass looks shiny and is sturdy. Check the material before buying. Durable materials save money in the long run. Make sure your drain kit is strong.

Credit: www.tiktok.com
Gathering Necessary Tools
Installing a kitchen sink drain needs simple tools. A wrench is vital to tighten nuts. Pliers help grip parts tightly. Keep a screwdriver for screws in the drain. A bucket will catch any water spills. A tape measure checks distances precisely. Use a putty knife for scraping away old sealant. These tools make the job easier and faster.
Safety is very important. Wear gloves to protect your hands. Safety glasses keep your eyes safe from dust and debris. Use a mask to avoid inhaling any harmful substances. Ear protection can be helpful if there’s loud noise. Make sure to wear sturdy shoes to protect your feet. Safety gear keeps you safe while working.
Preparing The Sink Area
Begin by clearing the area around the sink. Ensure all tools and materials are within easy reach. This preparation makes the installation process smooth and efficient.
Clearing The Workspace
Remove all items around the sink. Clear the countertop. Keep the area tidy. This helps you work easily. It also prevents accidents. Ensure you have enough light. Organize your tools nearby. Use a towel to catch water spills. Be ready to start the task.
Removing Old Drain Components
Loosen the screws. Use a wrench for tight parts. Take out the old drain. Check for damage or rust. Clean the sink hole. Wipe it with a cloth. Ensure no debris is left. Keep the old components aside. They might be useful later.
Assembling The Drain Components
The drain has many important parts. First, there is the strainer. It stops food bits from falling. Next, the gasket seals the drain tightly. The tailpiece connects the sink to the drain pipe. The slip nuts hold everything together. Each part is essentialfor a working drain.
- Alignthe strainer over the sink hole.
- Place the gasket under the strainer.
- Secure with slip nuts tightly.
- Attach the tailpiece to the strainer.
- Connect the tailpiece to the drain pipe.
Make sure each piece is tight and secure. This stops leaks and keeps the sink working. Check each connection twice. A proper setup ensures smooth water flow. Use a wrench for tightening nuts if needed.
Installing The Sink Drain
Begin by placing the drain flange into the sink’s opening. Secure it with plumber’s putty to prevent leaks. Next, connect the drain pipe and tighten the slip nuts using a wrench. Ensure all connections are snug and free of gaps.
Finish by testing for any leaks under the sink.
Positioning The Drain Flange
Place the drain flange in the sink hole. Ensure it fits snugly. Add a bead of plumber’s putty around the flange. This helps seal the area. Press the flange down firmly. Check it’s centered in the hole.
Securing The Drain Assembly
Below the sink, attach the rubber gasket. Follow with a metal washer. Secure with a locknut. Tighten the locknut using a wrench. Ensure all parts are tight and secure. Test for leaks by running water.

Credit: www.sinkple.com
Connecting The Drain Pipes
Align the pipes and secure them with slip nuts. Ensure a tight fit by tightening the connections. Check for leaks by running water through the drain.
Aligning The Pipes
Make sure the pipes are straightand in the right place. Use a wrench to adjust the pipes gently. Check each pipe connection to ensure they fit snugly. If a pipe is off, water might leak. Use a pipe cutter if any pipe is too long. Cut it carefully to fit perfectly. Always wear gloves to keep your hands safe. Proper alignment is very important for a leak-free sink.
Sealing The Connections
Use plumber’s tape to wrap the pipe threads. This helps make a tight seal. Apply the tape clockwise around the threads. Make sure the tape covers all the threads. Use a pipe sealant for extra security. Apply it to the pipe edges. Tighten the connections with a wrench. Don’t make them too tight. Just enough to stop leaks. Check for leaks by running water through the pipes.
Testing For Leaks
Running water tests is an important step. Turn on the faucet. Let the water flow for a few minutes. Check under the sink. Look for any drips or puddles. Use a dry cloth to wipe the pipes. This helps spot small leaks.
Fixing common leak issues is easy. Tighten any loose connections. Use a wrench if needed. Replace worn-out washers. Make sure the drain pipes are aligned. This prevents water from escaping. Use plumber’s tape for a better seal. This helps stop leaks effectively.
Final Touches
Tighten the slip nuts and ensure washers are snug for a leak-free finish. Check alignment and adjust parts as needed. Test the drain by running water to confirm everything is sealed properly.
Cleaning The Area
Wipe the area around the sink. Use a damp cloth to clean. Remove all debris and dirt. Make sure the surface is shiny and clean. Cleaning prevents mold and bad odors. Pay attention to corners and edges.
Inspecting The Installation
Check for leaks under the sink. Inspect the connections closely. Ensure all fittings are tight and secure. Look for any signs of water damage. Ensure that the drain functions properly. Listen for unusual sounds while running water.
Frequently Asked Questions
How Do I Remove The Old Sink Drain?
To remove the old sink drain, first, disconnect any pipes. Next, loosen the nuts holding the drain in place. Once loose, you can pull the drain out gently. Ensure you clean the area thoroughly before installing a new one.
What Tools Are Needed For Installation?
For installing a kitchen sink drain, you’ll need a wrench, plumber’s putty, and a screwdriver. Having a bucket handy is also helpful to catch any water. Gather all necessary tools before starting to ensure a smooth process.
How Do I Prevent Leaks In The Drain?
To prevent leaks, ensure the drain is tightly fitted. Use plumber’s putty around the edges for a secure seal. Check connections and tighten any loose nuts. Regularly inspect for leaks and reseal if necessary.
Can I Install A Drain Without Professional Help?
Yes, installing a sink drain can be done without professional help. Follow step-by-step instructions carefully. Gather all necessary tools and materials beforehand. If unsure, consult online tutorials or seek advice from an experienced friend.
Conclusion
Installing a kitchen sink drain can seem challenging. With clear steps, it’s manageable. Gather your tools first. Follow each step carefully. Check for leaks. Tighten connections securely. A properly installed drain prevents water damage. It keeps your kitchen clean. Regular maintenance helps avoid clogs.
Clean the drain often. Use safe cleaning methods. Enjoy your fully functional kitchen sink. Feel the accomplishment of a job well done. Happy plumbing!


