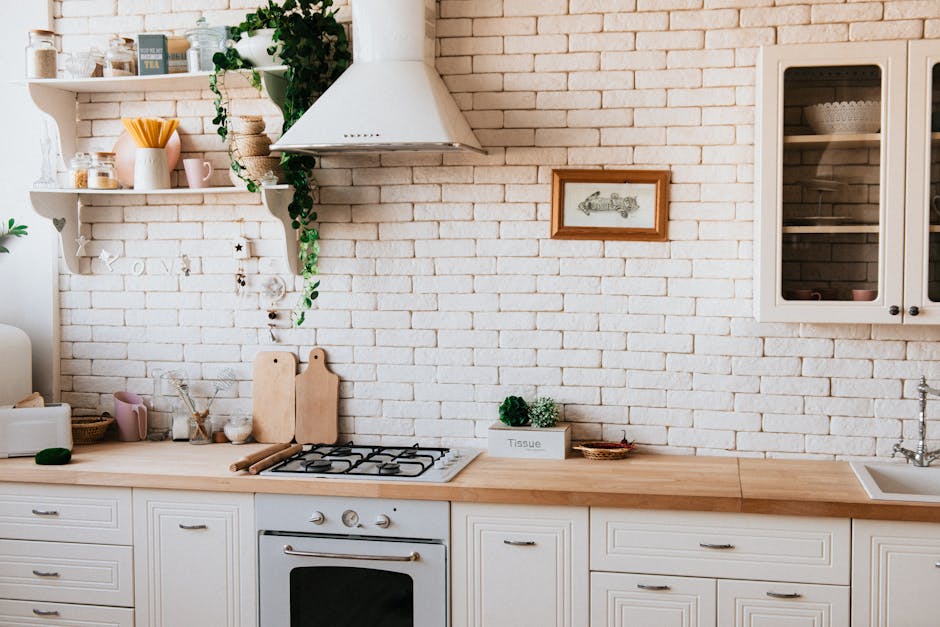
Are you looking to elevate the look of your kitchen without breaking the bank? Adding crown molding to your kitchen cabinets might be the perfect solution.
Not only does crown molding add elegance and sophistication, but it also brings a touch of timeless charm that can transform your kitchen from ordinary to extraordinary. Imagine walking into your kitchen and feeling a sense of pride every time you see the polished finish of your cabinets.
In this guide, you will discover simple steps to hang crown molding on kitchen cabinets, even if you’re not a seasoned DIY expert. We’ll demystify the process for you, breaking it down into manageable tasks that are easy to follow. Plus, you’ll learn tips and tricks to ensure your project looks professionally done. By the end of this article, you’ll be equipped with the knowledge and confidence to give your kitchen the upgrade it deserves. Are you ready to transform your space and impress your guests? Let’s get started!
Tools And Materials Needed
Gather essential tools for hanging crown molding. A tape measureensures precise measurements. Use a pencilfor marking lines. A miter sawcuts angles perfectly. Keep a nail gunready for secure attachment. A ladderhelps reach high spots.
Prepare the right materials. Choose the perfect crown moldingstyle. Make sure you have enough wood fillerfor gaps. Use sandpaperto smooth surfaces. Keep painthandy for finishing touches. Don’t forget the caulkto seal edges.
Measuring And Planning
Begin by measuring the cabinet’s dimensions accurately. Plan the layout to ensure a seamless fit for the crown molding. Mark precise points on the cabinet where the molding will be attached.
Determining The Length
Start by measuring your kitchen cabinets. Use a tape measurefor accuracy. Write down the measurements. This helps you know the length of molding needed. Make sure to include all sides. This ensures you do not miss any part. Measure twice to avoid mistakes.
Identifying Angles And Corners
Corners are tricky. They have special angles. Use a protractor to measure them. Most corners are 90 degrees. Some might be different. Note these angles down. This helps when cutting the molding. Always check twice before cutting. Cut angles carefully. This makes the molding fit well.
Cutting The Crown Molding
Cutting the crown molding involves precise measurements and angles. Ensure the molding fits snugly above the cabinets. Use a miter saw for clean cuts and secure the pieces with finishing nails.
Using A Miter Saw
Place the molding on the saw table. Hold it tight. Adjust the angle to cut. The saw should be at 45 degrees. Always wear safety glasses. The cut should be smooth and clean. Check the edges for rough spots. Sand them if needed.
Handling Different Angles
Some cabinets have corners. These need special cuts. Measure the angles carefully. Use a protractor for accuracy. Adjust the saw for each angle. Cut slowly to avoid mistakes. Test fit the pieces before final attachment. Make sure they fit snugly.

Credit: www.youtube.com
Preparing The Cabinets
Begin by cleaning and sanding the cabinet tops to ensure a smooth surface. Measure and cut the crown molding to fit precisely around the cabinets.
Clearing The Area
Ensure the work area is clear of all items. Remove any objects on or near the cabinets. This helps prevent accidents and keeps tools handy. Keep the floor tidy to avoid tripping. Make sure you have enough light to see clearly.
Securing The Cabinets
Check if cabinets are firmly attached to the wall. Tighten screws if they feel loose. Use a level to make sure they are straight. This is important for the molding to fit right. If needed, ask an adult for help with heavy lifting.
Installing The Crown Molding
Enhancing kitchen cabinets with crown molding adds elegance and style. First, measure and cut the molding to fit. Then, attach it securely using nails or adhesive for a polished look.
Positioning The Molding
Hold the crown molding against the cabinet top. Ensure it’s straight and fits well. Use a level to check its position. Adjust if needed for perfect placement. Don’t rush this step. Proper positioning is crucial for a neat finish.
Nailing In Place
Secure the molding using nails. Start by nailing one end. Then, work along the length. Use a nail gun for easy and quick work. Ensure nails go into the cabinet, not just the molding. This keeps it sturdy and in place.
Checking For Alignment
Check the alignment once nailed. Look from different angles. Ensure it matches other cabinet lines. Adjust if any areas look off. It’s important for a seamless look. Double-check your work to avoid any misalignment.

Credit: www.familyhandyman.com
Finishing Touches
Enhance your kitchen’s elegance by hanging crown molding on cabinets. Measure carefully, cut molding to fit, and secure with nails. Use caulk to fill gaps, ensuring a seamless look.
Filling Gaps And Seams
Use a small amount of wood fillerto fill any gaps. Apply it carefully with a putty knife. Let it dry for a few hours. Sand it smoothly with fine-grit sandpaper. This makes the surface even. Check for any missed spots. Fill them again if needed. A smooth finish makes the crown molding look neat.
Painting Or Staining
Choose a color that matches your kitchen cabinets. Use a quality brush for even coats. Apply primerfirst if needed. Paint or stain in thin layers. Let each layer dry completely. This avoids drips and uneven spots. A final coat adds shine and protection. Your kitchen will look beautiful with the right finish.
Troubleshooting Common Issues
Hanging crown molding on kitchen cabinets often poses challenges. Ensure precise measurements to prevent gaps and uneven surfaces. Use sturdy brackets for secure installation, maintaining the mold’s alignment with cabinet edges.
Dealing With Uneven Walls
Uneven wallsmake crown molding tricky. First, measure the wall’s high and low spots. Use a levelto check for bumps. Sand the uneven areas until smooth. A backer boardcan help. Attach the board to the wall. This creates a flat surface for the molding. Use a good adhesive for sticking the molding. Now, the molding fits better and looks neat.
Fixing Misaligned Joints
Misaligned joints can ruin the look. Cut the ends at the right angle. Use a miter sawfor precise cuts. Test fit the pieces before gluing. If gaps appear, fill them with wood filler. Sand the filler smooth for a clean finish. Paint over the filled areas. This hides the fixes and makes joints appear perfect.
Maintenance Tips
Ensure proper measurements for a snug fit. Secure the molding with nails, and use caulk for a seamless finish. Paint or stain to match your cabinets for a cohesive look.
Cleaning The Molding
Use a soft cloth for cleaning the crown molding. Dust it gently to avoid scratches. A mild soap solution helps remove sticky spots. Make sure the cloth is damp, not wet. Too much water can damage the wood. Clean regularly to keep the molding looking new. Avoid using harsh chemicals or rough sponges.
Inspecting For Damage
Check the molding for cracks or chips often. Look at the joints for any gaps. These signs mean the molding might need repairs. Paint touch-ups can fix small scratches. For big damage, you might need expert help. Regular inspection helps catch problems early. Fixing small issues quickly prevents bigger problems later.

Credit: www.thisoldhouse.com
Frequently Asked Questions
What Is Crown Molding On Cabinets?
Crown molding is decorative trim installed atop kitchen cabinets. It adds elegance and finishes the look. It can hide gaps between cabinets and ceilings. It’s an excellent way to enhance your kitchen’s aesthetic appeal.
How Do I Measure For Crown Molding?
Measure the length of the cabinet top where molding will be installed. Use a tape measure for accuracy. Consider any corners or angles that need precise cutting. Accurate measurements ensure a perfect fit and seamless installation.
What Tools Are Needed To Hang Crown Molding?
You’ll need a miter saw, nails, nail gun, and adhesive. A measuring tape and level are essential for accuracy. Safety gear like goggles is recommended. Proper tools ensure a smooth, secure installation.
Can I Install Crown Molding Alone?
Yes, you can install crown molding alone with preparation. Ensure you have the right tools and measurements. Follow safety guidelines and instructions carefully. Assistance may be helpful for larger projects.
Conclusion
Hanging crown molding on kitchen cabinets adds a touch of elegance. It transforms your kitchen space with minimal effort. Start with the right tools and materials. Measure carefully to ensure a perfect fit. Secure the molding with nails or adhesive.
A steady hand helps for clean cuts and finishes. Painting or staining can match the cabinet style. Now, your kitchen looks polished and complete. Enjoy the new look and feel proud of your work. With patience, you can achieve professional results.
Your kitchen cabinets now stand out beautifully.


