Want to make delicious, creamy ice cream right in your own kitchen? If you have a KitchenAid mixer, you’re already halfway there.
Imagine enjoying your favorite flavors anytime, made fresh with your own hands. This guide will show you exactly how to turn simple ingredients into perfect ice cream using your KitchenAid. By the end, you’ll feel confident creating endless tasty treats that everyone will love.
Ready to impress yourself and your family? Let’s dive in!

Credit: www.youtube.com
Choosing The Right Attachment
Choosing the right KitchenAid ice cream attachmenthelps make smooth, creamy ice cream. There are different typesdesigned for various KitchenAid mixers.
- Standard Ice Cream Maker: Uses a freezer bowl to churn ice cream. Freezer bowl must be frozen before use.
- Gelato Attachment: Creates denser, creamier gelato. Works with a special bowl and paddle.
- Sorbet Maker: Perfect for fruit-based, dairy-free sorbets. Freezer bowl required.
Consider these featureswhen choosing:
- Compatibility with your KitchenAid mixer model.
- Ease of cleaning after use.
- Freezer bowl size and freezing time.
- Durability of the paddle and bowl.
- Ability to make different frozen desserts.

Credit: www.kitchenaid.ca
Preparing The Ice Cream Base
To prepare a perfect ice cream base, gather the basic ingredientsfirst. You will need milk, cream, sugar, and vanilla extract. These form the foundation of most ice cream recipes.
For a smooth mixture, start by mixing sugar with milkuntil fully dissolved. This prevents any grainy texture. Use room temperature ingredientsto help everything blend easily.
Whisk the cream separately until it is light and fluffy. Gently fold the cream into the milk mixture. This keeps the texture light and airy.
- Use a whisk or hand mixerto blend ingredients well.
- Chill the base in the fridge for at least 1 hourbefore churning.
- Do not overmix to avoid breaking the cream’s texture.
Freezing The Bowl Properly
The bowl must freeze for at least 15 hours. Keep it in the coldest part of the freezer. A properly frozen bowl makes better ice cream. Shake the bowl gently to check if it’s frozen. You should not hear liquid sloshing inside. Always plan ahead to ensure the bowl is ready.
Store the bowl in a plastic bag to keep it clean. This prevents ice crystals from forming on the bowl. Place it in a position where it won’t get bumped. Avoid opening the freezer often. This helps maintain the bowl’s cold temperature. When not in use, keep it in the freezer to have it ready for next time.
Setting Up The Mixer
Start by securing the ice cream maker bowl into the Kitchenaid mixer. Make sure it fits tightly to avoid movement during mixing. Attach the dasher to the shaft inside the bowl; this helps churn the ice cream mixture smoothly. Place the bowl and dasher assembly onto the mixer’s base and lock it in position.
Set the mixer speed to slow or stir. This speed gently mixes the ice cream without splashing. Avoid higher speeds to keep the texture creamy. The mixer will churn the mixture evenly and freeze it as it spins.
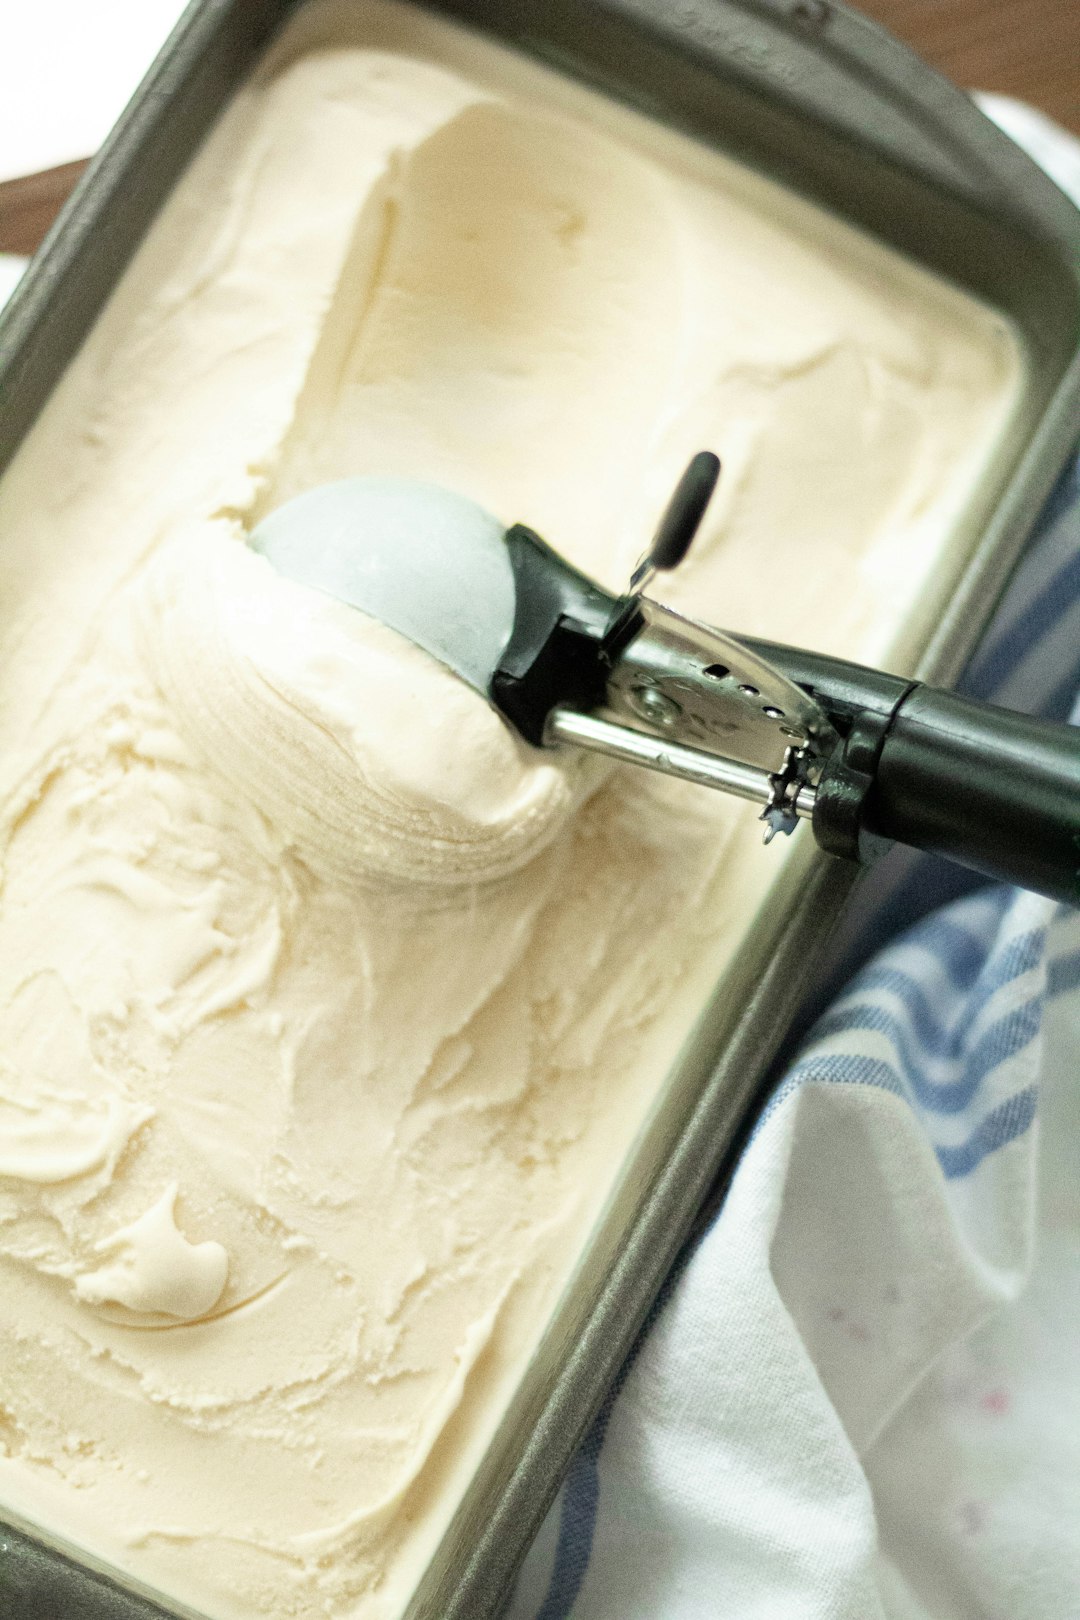
Churning The Ice Cream
Pour the ice cream base gently into the Kitchenaid bowl. Make sure the bowl is cold for better results. Avoid overfilling; leave some space for churning.
Set the machine to the ice cream maker attachment. Turn it on and let it mix the base slowly.
| Mixing Time | Texture |
|---|---|
| 20-30 minutes | Soft and creamy |
| Over 30 minutes | Thicker, more frozen |
Check the texture often. Stop mixing when the ice cream looks firm but still soft. This gives the best scoopable consistency.

Credit: suebeehomemaker.com
Adding Mix-ins
Add mix-insnear the end of churning. This keeps them evenly spreadand stops them from sinking or breaking. Mix-ins like nuts or chocolate chips need less time to blend, preserving their texture and crunch.
Soft mix-ins such as fruit or cookie dough should be added in the last few minutes. This way, they stay fresh and flavorful.
| Popular Mix-in Ideas | Description |
|---|---|
| Chocolate chips | Add crunch and sweetness |
| Chopped nuts | Give a nice crunch and flavor |
| Fresh fruit | Add freshness and natural sweetness |
| Cookie pieces | Give texture and extra taste |
| Caramel or fudge swirls | Add a rich, sweet ribbon |
Storing And Serving
Soft serve ice cream is creamy and easy to scoop right away. It has more air, so it feels lighter. Hard ice cream is denser and needs some time to thaw before serving. It stays solid and cold longer.
| Storage Container | Best Use | Shelf Life |
|---|---|---|
| Plastic Airtight Container | Soft serve and hard ice cream | Up to 2 weeks in freezer |
| Glass Jar with Lid | Hard ice cream for long storage | Up to 1 month in freezer |
| Aluminum Foil Wrap | Quick storage, short term | Up to 3 days in freezer |
Always cover ice cream tightly to avoid freezer burn. Store at a steady freezing temperature. Soft ice cream is best eaten soon after making. Hard ice cream can last longer but changes texture if kept too long.
Troubleshooting Common Issues
The ice cream may not freeze well if the bowl is not cold enough. Make sure to freeze the Kitchenaid bowl for at least 15 hours before use. Also, check if the mixture is too warm before pouring it in. A cold mixture freezes better and faster.
If the ice cream stays soft or watery, the freezer temperature might be too high. Try lowering the freezer temperature to help the ice cream set properly.
- Ensure the mixer is properly assembled with all parts locked in place.
- Check that the paddle is attached correctly and spins freely.
- Listen for unusual sounds; they can indicate motor or gear issues.
- Clean the motor area regularly to avoid overheating.
- Use the correct speed setting to avoid straining the motor.
Frequently Asked Questions
How Do I Use A Kitchenaid For Homemade Ice Cream?
Attach the ice cream maker bowl to your KitchenAid mixer. Chill the bowl overnight. Pour your ice cream mixture inside and churn on low speed until firm.
What Ingredients Are Needed For Kitchenaid Ice Cream?
Basic ingredients include heavy cream, milk, sugar, and flavorings. You can add fruits, chocolate, or nuts for variety. Use fresh, quality ingredients for best taste.
How Long Does Kitchenaid Ice Cream Take To Freeze?
Churning usually takes 20 to 30 minutes. The mixture thickens and firms up during this time. For best results, freeze the bowl before starting.
Can I Make Sorbet With A Kitchenaid Ice Cream Maker?
Yes, KitchenAid works well for sorbets. Use fruit juice, sugar, and water as your base. Churn similarly until the sorbet reaches a smooth texture.
Conclusion
Making ice cream with your KitchenAid is simple and fun. You only need a few ingredients and the right attachment. Mixing and freezing happen right in your kitchen. You can try different flavors every time. This method saves money and tastes better than store-bought.
Enjoy creamy, fresh ice cream anytime you want. Give it a try and share with friends. Homemade ice cream brings joy to any day.


