If you’ve ever struggled with removing a Kitchen Aid attachment, you know how frustrating it can be. You want to switch attachments quickly and safely, but sometimes it feels like they’re stuck or tricky to detach.
Don’t worry—this guide will walk you through simple, clear steps to get your Kitchen Aid attachments off without any hassle. By the end, you’ll feel confident handling your mixer like a pro, saving time and avoiding damage. Ready to make your kitchen tasks easier?
Let’s dive in!

Credit: thekrazycouponlady.com
Identify Your Attachment Type
Kitchen Aid has several attachment types. Knowing yours helps in removal. Attachments fit differently on the mixer. Some twist off, others pull straight out.
Common Kitchen Aid attachments include:
- Flat Beater
- Dough Hook
- Wire Whip
- Food Grinder
- Pasta Maker
- Juicer
Attachment connection stylesvary:
| Style | Description | How to Remove |
|---|---|---|
| Hub Attachment | Secured with a thumbscrew on the front | Loosen thumbscrew, then pull attachment out |
| Power Hub | Slots into the front and locks by twisting | Twist counterclockwise to unlock, then pull out |
| Lift Arm Attachments | Insert into the mixer’s lift arm hub | Pull down and out gently to remove |

Credit: thekrazycouponlady.com
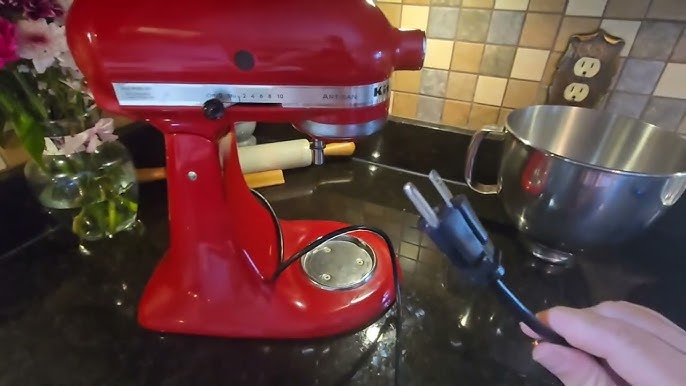
Prepare Your Mixer
Always unplug the mixerbefore touching any attachments. This keeps you safe from electric shocks. Check that the mixer is completely clean and dry. Dirt or moisture can cause damage or make the attachment hard to remove.
Wipe down the mixer with a dry cloth. Avoid using water near the motor or plug. Make sure the mixer is stable on a flat surface. This prevents slipping when you remove the attachment.
Unlock The Attachment
First, find the release mechanismon your Kitchen Aid attachment. It is usually a small lever or button near where the attachment connects to the mixer. This part helps to keep the attachment securely fastened.
Next, either turnor pullthe release mechanism gently. Some attachments need a twist, while others require a pull or push motion. Avoid using too much force to prevent damage.
Once released, you can easily remove the attachmentfrom the mixer. Hold the mixer steady with one hand while you remove the attachment with the other.

Credit: therestaurantwarehouse.com
Remove The Attachment Safely
Hold the mixer firmly. Grip the attachment base gently. Twist the attachment slowly to unlock it. Avoid using force to prevent damage.
Keep the mixer unplugged during removal. This ensures safety and avoids accidents. Check for any food stuck inside before detaching.
Do not pull the attachment straight out. This may harm the mixer’s locking mechanism. Instead, twist and pull carefully.
- Use dry hands to avoid slipping.
- Do not use tools to pry the attachment.
- Store attachments separately to prevent scratches.
Troubleshooting Stuck Attachments
Hold the attachment firmly with both hands. Gently wiggle it side to side. Avoid using force. This might damage the attachment or mixer. If the attachment is still stuck, try rotating it slightly. Patience is key. Small movements can help loosen it.
Apply a small amount of food-safe lubricant around the stuck area. Let it sit for a few minutes. This can help loosen any debris. Use a cloth to wipe away excess lubricant. Try wiggling the attachment again. Repeat as necessary. Make sure the lubricant is safe for kitchen use.
Cleaning And Storing Attachments
Attachments should be cleaned right after use. This stops food from hardening. Use warm, soapy water and a soft cloth or brush. Avoid harsh scrubbers that can scratch the surface. Some parts may be dishwasher safe—check the manual before placing them inside.
Dry attachments fully before storing to stop rust or mold. Keep them in a dry, cool place. Avoid stacking heavy items on top to prevent damage. Store small parts in a container to avoid losing them.
| Safe Storage Tips |
|---|
| Store attachments in a dry, cool cabinet |
| Use a container for small pieces |
| Keep parts separated to avoid scratches |
| Dry completely before putting away |
Frequently Asked Questions
How Do I Safely Remove A Kitchen Aid Attachment?
To remove a Kitchen Aid attachment, first turn off and unplug the mixer. Press the attachment lever, then gently pull the attachment straight off. Avoid twisting to prevent damage. Always handle with care to maintain the attachment’s longevity.
Can I Remove Attachments Without Tools?
Yes, Kitchen Aid attachments are designed for tool-free removal. Simply press the lever or release button, then pull the attachment off. This makes switching attachments quick and easy during cooking or baking.
Why Is My Kitchen Aid Attachment Stuck?
Attachments can get stuck due to food residue or improper alignment. Clean the connection points and try pressing the release lever firmly. Avoid using excessive force to prevent damage to the mixer or attachment.
How Often Should I Remove Kitchen Aid Attachments?
Remove attachments after each use for cleaning and maintenance. Regular removal prevents buildup and keeps the mixer functioning smoothly. Proper care extends the life of both the mixer and attachments.
Conclusion
Removing your Kitchen Aid attachment is simple with the right steps. Always unplug the mixer before starting. Press the release lever or button carefully. Gently twist or pull the attachment to remove it. Clean and store the parts safely after use.
Taking these steps helps keep your mixer in good shape. Try it yourself and see how easy it can be. No need to worry about damage or mistakes. Just follow the instructions and enjoy your cooking!


