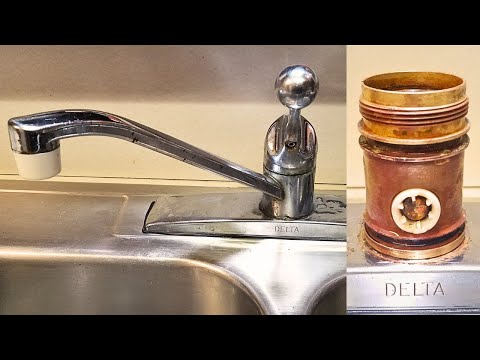
Is your kitchen faucet leaking or just looking outdated? Replacing a single-handle kitchen faucet might seem tricky, but you can do it yourself with the right steps.
Imagine saving money on repairs and giving your kitchen a fresh, modern look in just an afternoon. In this guide, you’ll find simple, clear instructions that make the process easy to follow—even if you’re not a plumbing expert. Ready to take control and upgrade your kitchen?
Keep reading, and you’ll have your new faucet installed before you know it.

Credit: diy.stackexchange.com
Tools And Materials Needed
To replace a kitchen faucet with a single handle, gather the right tools first. Essential tools include an adjustable wrench, basin wrench, screwdriver, and plumber’s tape. These help in loosening nuts and sealing connections.
Recommended materials are a new single-handle faucet, supply lines, and plumber’s putty or silicone. Ensure the new faucet fits your sink holes.
| Essential Tools | Recommended Materials |
|---|---|
| Adjustable wrench | New single-handle faucet |
| Basin wrench | Supply lines |
| Screwdriver | Plumber’s putty or silicone |
| Plumber’s tape (Teflon tape) | Cleaning cloth |

Credit: www.youtube.com
Preparing The Workspace
Clear the area around the sink to have enough room for work. Gather all necessary tools and materials before starting the replacement. Turn off the water supply to avoid leaks during the process.
Shutting Off Water Supply
Locate the water valves under the sink and turn them clockwise. This stops water flow to the faucet. Open the faucet to release any water left inside the pipes. Make sure no water runs before starting the replacement.
Clearing The Sink Area
Remove all items around and inside the sink. This gives clear space to work safely. Use a cloth to dry the area to avoid slipping. Keep tools and parts nearby for easy access.
Removing The Old Faucet
Turn off the water supply and disconnect the water lines under the sink. Loosen and remove the mounting nuts holding the old faucet in place. Lift the faucet out carefully to prepare for the new installation.
Disconnecting Water Lines
Turn off the water supply under the sink. Use a wrench to loosen the water line connections. Twist the lines gently to disconnect them. Place a bucket to catch any drips. Double-check that the water is off.
Unscrewing Mounting Nuts
Find the mounting nuts under the sink. Use a basin wrench to turn them counterclockwise. If they are tight, apply some lubricant. Carefully remove the nuts and set them aside. Ensure the faucet is loose before the next step.
Lifting Out The Faucet
Lift the old faucet straight up. Ensure all connections are clear. Check for any remaining nuts or bolts. Clean the area where the faucet was. Make sure it’s ready for the new faucet. Keep the area dry and tidy.
Credit: www.homedepot.com
Installing The New Faucet
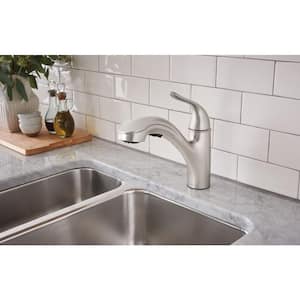
Place the new faucet into the hole on the sink. Make sure it sits firmly and straight. Check the alignment before tightening.
Under the sink, secure the faucet using the mounting hardware. This usually includes a washer and a nut. Tighten the nut with your hand first, then use a wrench to make it snug. Avoid over-tightening to prevent damage.
Connect the water supply lines to the faucet’s inlet. Match the hot and cold linescorrectly. Use a wrench to tighten the connections gently. Do not force them, or you may cause leaks.
Testing And Adjustments
Turn on the main water supply slowly to avoid pressure shocks. Check below the sink for any drips or wet spots. Watch closely around the faucet base and connections.
Leaks can cause damage and waste water. Tighten any loose nuts or connectors gently. Use plumber’s tape to seal threads if needed.
- Move the handle up and down to test water flow.
- Turn the handle left and right to check temperature control.
- Adjust the handle if it feels stiff or too loose.
- Make sure the handle stops smoothly at both ends.
Maintenance Tips
Cleaning the faucethelps keep it working well. Use a soft cloth with mild soap. Avoid harsh cleaners that can damage the finish. Wipe away water spots and dirt daily. For tough buildup, soak a cloth in vinegar and wrap it around the faucet for 15 minutes. Then rinse and dry.
Preventing leakssaves water and money. Tighten loose parts gently. Check seals and washers often. Replace worn parts quickly to stop drips. Turn off the faucet fully to avoid constant dripping.
Regular inspectionscatch problems early. Look under the sink for wet spots or mold. Test the faucet handle to ensure smooth movement. Check water pressure and listen for strange noises. Fix small issues before they get worse.
Frequently Asked Questions
How Do I Remove A Single-handle Kitchen Faucet?
Turn off water supply, disconnect water lines, and loosen mounting nuts. Lift the faucet carefully from the sink.
What Tools Are Needed To Replace A Single-handle Faucet?
You’ll need an adjustable wrench, basin wrench, screwdriver, plumber’s tape, and a bucket for water.
How Long Does It Take To Replace A Kitchen Faucet?
Typically, replacing a single-handle faucet takes about 30 to 60 minutes with basic tools.
Can I Replace A Single-handle Faucet Myself?
Yes, with basic plumbing knowledge and tools, you can replace it without a professional.
Conclusion
Replacing a single-handle kitchen faucet is a simple task. It saves money and improves your kitchen’s look. Follow the steps carefully and take your time. Turn off the water supply before starting. Use basic tools and check for leaks afterward.
A new faucet can make your kitchen feel fresh and clean. Try this project yourself and enjoy the results. Small changes can make a big difference. You have the power to fix things at home.





