Have you ever looked at your kitchen cabinets and thought they could use a little refresh? Staining your cabinets can breathe new life into your kitchen without the hefty price tag of a complete remodel.
Imagine walking into a kitchen that feels brand new, with cabinets that shine and reflect your personal style. It’s easier than you might think, and you can do it yourself with a bit of guidance. We’ll walk you through the simple steps to stain your kitchen cabinets, ensuring a beautiful finish that lasts.
You’ll discover tips and tricks that make the process smoother and more effective, helping you avoid common pitfalls. So, are you ready to transform your kitchen into a space you love even more? Let’s dive in and start your cabinet transformation journey!
Choosing The Right Stain
There are many stains. Water-based stains are easy to clean. Oil-based stains are durable. Gel stains are thick and do not drip. Each type has its special use.
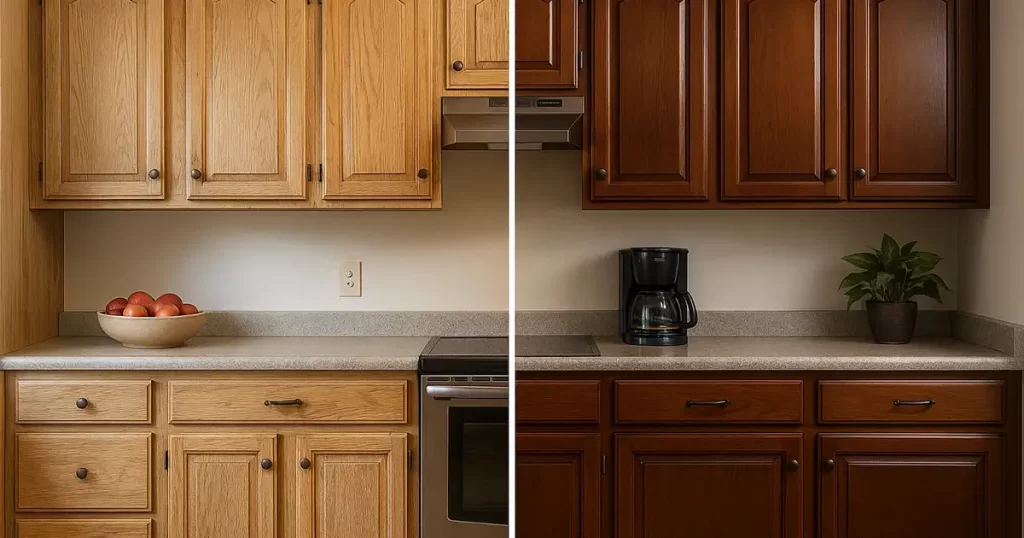
Choose a color that fits your kitchen. Light colors make rooms look bigger. Dark colors add warmth and depth. Test colors on a small piece first.
- Matte finish:No shine. Looks natural.
- Satin finish:Soft shine. Easy to clean.
- Glossy finish:Bright shine. Very smooth.

Credit: www.angi.com
Preparation Steps
Begin by removing cabinet doors and hardware. Sand surfaces to create a smooth base. Apply wood conditioner for even stain absorption.
Cleaning The Cabinets
Start by removing all items from the cabinets. Use a soft cloth and soapy water to clean surfaces. This removes dirt and grease. Make sure every corner is clean. Rinse the cabinets with clean water. Dry them with a towel. Clean cabinets ensure the stain sticks well.
Sanding Techniques
Use sandpaper to smooth the cabinet surfaces. Choose fine-grit sandpaper for best results. Sand in the direction of the wood grain. This avoids scratches. Be gentle but thorough. Wipe away dust with a damp cloth. Smooth surfaces help the stain look even.
Repairing Damages
Check for cracks or holes in the cabinets. Use wood filler to fix these areas. Apply the filler with a putty knife. Let it dry completely. Sand the repaired spots gently. Ensure they are smooth. Repaired cabinets look new and neat.
Gathering Necessary Tools
Collecting the right supplies is important. You need sandpaper, stain, and brushes. Don’t forget clean cloths for wiping. Keep a screwdriver nearby to remove cabinet doors. A sponge will be useful too. Make sure everything is ready before starting. This saves time later.
Protecting yourself is key. Wear gloves to keep your hands safe. Safety goggles will protect your eyes. A mask helps avoid breathing in dust. Safety first, always. These items help you stay safe. Keep them close while you work.
Creating a good workspace is easy. Find a well-lit area to see better. Use drop cloths to keep the floor clean. Make sure there is enough ventilation. Open windows if you can. Keep your tools close for easy access. This makes working more fun.

Credit: www.instagram.com
Applying The Stain
Applying the Stain Begin by sanding the cabinet surface smoothly. Clean off dust with a damp cloth. Use a brush or rag to apply stain evenly. Let it sit for a few minutes, then wipe off excess. Allow the stain to dry completely before applying a protective finish.
Brushing Vs. Spraying
Brushinggives you more control. It is perfect for small areas. Use even strokes. Keep the brush clean for smooth finish. Sprayingcovers large areas quickly. It provides a uniform look. Practice spraying on a scrap first. Choose the method that suits your style.
Layering Techniques
Start with a thin layer. Let it dry. Add more layers for depth. Each layer adds richness. Use a brush for first layer. Spray for second layer. Mix techniques for a unique look.
Drying Time Considerations
Stain needs time to dry. Check the label for drying time. Temperature affects drying speed. Humidity can slow drying. Ensure proper ventilation. Touch the stain to test dryness. Wait before applying next layer.
Adding A Protective Coat
Adding a protective coat to stained kitchen cabinets ensures durability and enhances their appearance. Seal the surface with a clear finish to protect against moisture and wear. This step helps maintain the cabinet’s beauty and prolongs its life.
Types Of Sealants
Sealants keep cabinets safe and shiny. Many types are available. Polyurethane is popular. It gives strong protection. Varnish adds beauty to wood. Lacquer dries fast but needs care. Wax is simple but not very strong. Choose the right sealant for your cabinets. Check labels for best use.
Application Tips
Apply sealant evenly for a smooth finish. Use a clean brush or cloth. Start from one end and work to the other. Avoid drips and bubbles. Thin layers work best. Let the first coat dry well. Add more coats if needed for extra protection.
Curing Process
Curing makes the sealant hard and strong. It takes time to cure properly. Keep cabinets away from dust and dirt. Don’t touch or use them while curing. Follow sealant instructions for curing time. Usually, it takes a few days. Be patient for the best results.

Credit: www.facebook.com
Maintaining Stained Cabinets
Staining kitchen cabinets requires careful preparation and selection of the right stain. Sand the surface to remove old finishes. Apply the stain evenly using a brush or cloth, ensuring smooth coverage. Allow it to dry completely before applying a protective sealant to enhance durability and appearance.
Cleaning Tips
Use a soft cloth to wipe the cabinets. Avoid harsh chemicals that can damage the finish. Warm water and mild soap work best. Dry the cabinets with a clean towel. This prevents water spots and keeps them shiny.
Handling Wear And Tear
Inspect cabinets for scratches or chips. Fix small damages with wood filler. Match the color to the stain. Apply gently with a small brush. This keeps the cabinets looking new and fresh.
Re-staining Guidance
Lightly sand the surface with fine sandpaper. This helps the stain stick better. Apply the stain evenly with a brush. Follow the wood grain for a smooth finish. Let it dry completely before using the cabinets.
Common Mistakes
Uneven application makes cabinets look messy. Use a brush for even strokes. Apply stain in one direction. Avoid back-and-forth movements. Let the stain dry before adding more. Too much stain can cause blotches. Sand cabinets lightly before staining. This helps the stain spread evenly.
Drips leave marks on the cabinets. Wipe them quickly with a cloth. Use a smaller brush for corners. Check for drips often. Thin layers prevent drips. Thick layers cause them. Keep a cloth handy for fast action. Practice on scrap wood first.
Color mismatches are noticeable. Test stain on a small area first. Make sure all cabinets match. Mix stain well before using. Different wood types absorb stain differently. Check the final color in good light. Use a consistent method for all surfaces.
Frequently Asked Questions
What Is The Best Stain For Kitchen Cabinets?
The best stain depends on your desired finish and wood type. Oil-based stains offer durability, while water-based stains dry faster. Choose a stain that complements your kitchen’s aesthetic and is compatible with the cabinet material for optimal results. Always test on a small area first.
How Long Does It Take To Stain Cabinets?
Staining kitchen cabinets typically takes several days. This includes preparation, applying the stain, and drying time. Each coat of stain usually dries within 24 hours. For a smooth finish, additional coats and sanding may be needed. Plan for at least a weekend to complete the project.
Can I Stain Over Painted Cabinets?
Yes, you can stain over painted cabinets, but preparation is key. First, remove the paint with a chemical stripper or sandpaper. Ensure the surface is smooth and clean. Apply a wood conditioner if needed, followed by your chosen stain. Always test on a hidden area first.
Do I Need To Sand Cabinets Before Staining?
Sanding is essential before staining kitchen cabinets. It removes old finishes and opens the wood grain. Use fine-grit sandpaper for the best results. Sanding ensures the stain adheres evenly and enhances the wood’s natural beauty. Clean the surface thoroughly after sanding to remove all dust.
Conclusion
Staining kitchen cabinets can refresh your space. It’s a simple process. Clean the cabinets first. Then, sand them to remove old finish. Apply the stain evenly. Let it dry completely. Seal with a protective coat for durability. Always choose quality materials.
This ensures long-lasting results. Staining lets you customize your kitchen look. It’s affordable and effective. Follow these steps for beautiful cabinets. Enjoy your refreshed kitchen space. Staining cabinets is a great DIY project. It adds value to your home. Plus, it’s rewarding.
You’ll appreciate the effort. Your kitchen will look fantastic.