Is the trickle of water from your kitchen sink driving you up the wall? A low water pressure can turn even the simplest tasks into a frustrating ordeal.
Imagine trying to rinse vegetables or fill a pot when all you get is a measly stream. It’s enough to make anyone’s patience run thin. But don’t worry—you’re not alone, and fixing this issue might be easier than you think.
This guide will walk you through practical steps to restore your water flow to its former glory. We’ll dive into common causes and simple solutions that you can tackle without calling in the pros, saving you both time and money. Ready to say goodbye to those water woes? Let’s get started!
Identify The Problem
Identify the Problem Examine the water flow from the faucet. Check for clogged aerators or leaks in the pipes. Look under the sink for any visible issues.
Check Water Supply Valves
Ensure the water supply valves are fully open. Sometimes, valves get partially closed. This reduces water flow. Turn the valves clockwise to open them. Test the water pressure after adjusting.
Inspect Aerator For Clogs
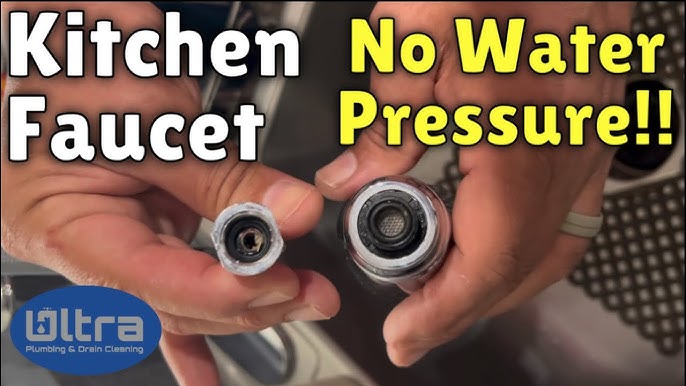
The aerator is at the end of the faucet. It can collect debris and minerals. Unscrew the aerator and rinse it. Use a brush for stubborn clogs. Reattach it and check the pressure.
Evaluate Water Pressure Regulator
Some homes have a water pressure regulator. It controls the flow of water. Locate the regulator near the main water line. Adjust the settings to increase pressure. If unsure, consult a plumber for help.
Clean The Aerator
Remove the aerator from the faucet tip to clear debris and sediment. Rinse it thoroughly under running water. Reassemble the aerator and attach it back to the faucet for improved water flow.
Turn off the water supply under the sink. Use pliers to unscrew the aerator from the faucet. Be gentle to avoid breaking it. Keep all pieces in one place. This will help when reassembling later. Place the aerator in a bowl. Pour vinegar over it until fully covered. Let it soak for an hour. Vinegar helps dissolve any buildup. Rinse the aerator with water. This removes any leftover debris. Screw the aerator back onto the faucet. Make sure it is tight and secure. Turn the water supply back on. Check for leaks around the aerator. Turn on the faucet to test water pressure. It should flow better now. `Examine The Faucet Cartridge
Check the faucet cartridge for blockages or wear. A faulty cartridge may cause low water pressure. Replace it to improve flow.
Disassemble The Faucet
Turn off the water supply. Carefully remove the faucet handle. Use a screwdriver if needed. Locate the cartridge inside. Handle with care to avoid damage.
Inspect For Damage
Check the cartridge for cracks or clogs. Look for worn-out seals. Damaged parts can cause low water pressure. Clean debris from the cartridge. Use a soft brush or cloth.
Replace If Necessary
If damage is found, replace the cartridge. Buy the correct size and type. Follow instructions for installation. Ensure a snug fit to prevent leaks. Test the faucet after replacing. Check water pressure improvement.

Credit: www.instagram.com
Check The Water Supply Lines
Begin by checking the water supply linesunder the sink. These lines might be twisted or clogged. Ensure they are straight and clear. Sometimes, debris can block the flow. Remove any visible dirt or blockage. This can improve the water pressure.
Inspect For Leaks
Look for any leaks in the pipes. Leaks can reduce water pressure. Check around the connections. Feel for moisture or drips. Fix any leaks you find. Use a wrench to tighten loose fittings. Seal any cracks with plumber’s tape.
Clear Any Blockages
Food particles can cause blockages. Remove the aerator from the faucet. Clean it with vinegar and a brush. This can clear clogs in the faucet. Ensure the aerator is free from debris. Reattach it securely after cleaning.
Ensure Proper Connection
Verify that all parts are connected correctly. Loose connections can affect pressure. Tighten any loose nuts and bolts. Make sure the faucet is attached well. Double-check the connections at the wall. Proper connection ensures better water flow.
Test Water Pressure Regulator
Test the water pressure regulator to improve kitchen sink flow. Adjust the regulator to increase water pressure. This simple fix can make a big difference in your daily tasks.
Locate The Regulator
The water pressure regulator is often near the main water line. Check under the kitchen sink or close to the water meter. It looks like a round, metal piece. Make sure you find the right part.Adjust The Settings
Use a wrench to turn the regulator’s screw. Turn clockwise to increase pressure. Turn counterclockwise to reduce it. Adjust slowly and carefully. Small turns can make big changes.Monitor Pressure Changes
Open the kitchen faucet to check the water pressure. Notice if the flow improves. If not, adjust the regulator again. Listen for any changes in water noise. This helps ensure proper settings. `
Credit: www.youtube.com
Examine External Plumbing Issues
Fixing low water pressure in a kitchen sink often involves examining external plumbing issues. Check for clogged aerators, ensuring they are clean. Inspecting the shut-off valves under the sink can also help restore proper water flow.
Inspect For Pipe Corrosion
Corrosion can make pipes weak. Rust might block water flow. Look for brown or green spots. Check under the sink. Touch pipes gently. Feel for rough parts. Rough parts mean damage. Call a plumber if needed.Check For Obstructions
Something might be blocking the pipe. Debris can get stuck. Food bits, soap, and dirt can block flow. Remove the aerator. Clean it with water. Check inside for blockages. Use a flashlight if it’s dark.Consider Professional Help
Sometimes, problems are hard to fix alone. Plumbers know how to fix things. They have special tools. Experts can find hidden issues. They make sure everything works well. Hire help if unsure. `
Credit: www.estesair.com
Frequently Asked Questions
Why Is My Kitchen Sink Water Pressure Low?
Low water pressure in your kitchen sink can be due to clogged aerators, pipes, or a faulty faucet. Check for any leaks, mineral buildup, or blockages. Cleaning the aerator or replacing worn-out parts can help restore proper water flow and pressure.
How Can I Increase Kitchen Sink Water Pressure?
To increase water pressure, start by cleaning the faucet aerator. Check for pipe blockages and leaks. If these steps don’t work, consider replacing the faucet. Ensuring the main water valve is fully open can also help improve water pressure in your kitchen sink.
Does A Clogged Aerator Affect Water Pressure?
Yes, a clogged aerator can significantly reduce water pressure. Mineral deposits or debris can block water flow. Clean the aerator by soaking it in vinegar or replace it if necessary. Regular maintenance can prevent future clogs and ensure consistent water pressure.
Can Pipe Corrosion Cause Low Water Pressure?
Pipe corrosion can lead to reduced water pressure. Corroded pipes restrict water flow and may cause leaks. Inspect pipes for signs of rust or damage. If corrosion is severe, consider replacing the affected pipes to restore proper water pressure in your kitchen sink.
Conclusion
Fixing low water pressure in your kitchen sink is easier than it seems. Start by checking for clogs in the faucet or pipes. Sometimes, cleaning the aerator can solve the issue. If those steps don’t work, inspect the water valves.
Make sure they are fully open. Leaks could also be a problem, so watch out for any drips. Regular maintenance can prevent these issues from returning. With some simple checks, you can enjoy steady water flow. Remember, a little effort can make your kitchen tasks much easier.
Keep your sink in top shape for a hassle-free cooking experience.





