Are you ready to tackle a home project that could save you time and money? Hooking up a kitchen sink drain might sound daunting, but with the right guidance, it can be a straightforward task that you can handle yourself.
Imagine the satisfaction of completing this project without needing to call a plumber. By doing it yourself, you’re not just fixing your kitchen sink; you’re boosting your confidence and skills. In this guide, you’ll discover step-by-step instructions, practical tips, and some insider secrets to help you master this essential DIY task.
You’ll learn the tools you need, the common mistakes to avoid, and the tricks that make the job easier. By the end of this article, you’ll not only have a fully functional sink drain but also the pride of having done it yourself. So, let’s dive in and get your kitchen back in action!
Tools And Materials Needed
Setting up a kitchen sink drain requires some basic tools. You need a wrench, pliers, and a screwdriver. A pipe cutter may be useful too. It’s important to have plumbers tape on hand. This helps prevent leaks.
Materials are equally important. Get a sink drain kit. Ensure it includes all necessary parts. A P-trap is essential. It prevents bad smells. Rubber washers are needed for tight seals. Make sure they fit well. Also, have PVC pipes ready.
Be prepared with a bucket. It catches any water drips. Keep towels nearby. They help clean up spills. Having these tools and materials will make the job easier.
Preparing The Sink Area
Clear the area under the sink. Remove any items stored there. This gives you space to work comfortably. Ensure the water supply is turned off. Look for the valves under the sink. Turn them clockwise to close. Check for leaks by feeling around the pipes. Use a flashlight if needed. Make sure all tools are ready. You will need a wrench, a bucket, and plumber’s tape. Keep them within reach.
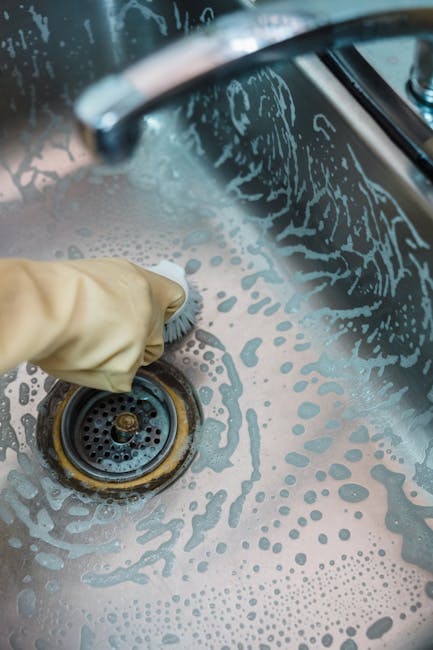
Check the drain opening. It should be clean and free from old sealant. Use a scraper if necessary. Ensure the drain pipe fits snugly. If not, you may need an adapter. Gather all parts of the drain assembly. This includes the sink strainer and rubber gaskets. Arrange them in order of installation. Label them if needed. This prevents confusion later.
Connecting The Drain Tailpiece
First, find the drain tailpieceunder the sink. This is the piece that connects the sink to the drain pipe. Make sure it is clean and free from debris. Take the rubber washerand place it on the tailpiece. This helps to seal the connection.
Next, attach the tailpiece to the sink. Use the lock nutto secure it. Tighten the nut until it is snug. Do not over-tighten, or you might damage the tailpiece. Check that the tailpiece is straight and aligned properly.
Finally, connect the trapto the tailpiece. Make sure the trap is clean and clear. Use the trap nutto secure it. Tighten the nut firmly but not too tight. Check for leaks by running water down the sink.
Installing The P-trap
The P-Trap is a vital part of the kitchen sink. It helps keep bad smells away. Start by gathering all the parts. You will need the trap, washers, and nuts. Make sure they are clean and free from damage. Connect the trap to the sink tailpiece. Use a washer to seal the connection tightly.
Next, attach the other end to the drain pipe. Ensure it aligns properly with no gaps. Hand-tighten the nuts first to position everything. Then, use a wrench for a snug fit. Avoid over-tightening as it can cause leaks. Check for any drips by running water through the sink. If you see leaks, adjust the connections slightly.
Securing The Drain Pipes
First, ensure all pipes are clean and dry. Place the rubber gasket onto the sink’s drain. This helps prevent leaks. Next, attach the metal flange on top of the gasket. Use a wrench to tighten it securely.
Connect the P-trap to the drain pipe. Ensure the curved part of the P-trap faces down. This traps water and blocks sewer gases. Use slip nuts to secure connections. Tighten the nuts with your hands first. Then, use a wrench for a snug fit.
Check all connections for leaks. Turn on the water and let it run. Watch for any drips or wet spots. If you see leaks, tighten the connections again. Ensure everything is secure and leak-free.
Testing For Leaks
Check under the sink for any dripsor wet spots. Use a flashlight to see clearly. Run water through the drain for a few minutes. Look closely at all connections. Make sure the pipes are dryand tight. If you see any leaks, tighten the connections. Use a wrench to twist the fittings snugly. Still leaking? You might need to replace a washer. Washers can wear out over time. Turn off the water before fixing the leak. Double-check everything after repairs. Ensure no water is dripping. Be patient and thorough.
Frequently Asked Questions
What Tools Do I Need To Install A Sink Drain?
To install a kitchen sink drain, you’ll need a pipe wrench, plumber’s tape, and a bucket for catching water. Additional tools include a hacksaw, if you need to cut pipes, and slip-joint pliers for tightening connections. Having these tools ready will make the installation process smoother and more efficient.
How Do I Prevent Sink Drain Leaks?
Prevent sink drain leaks by ensuring all connections are tight and sealed. Use plumber’s tape on threaded connections for added security. Check that washers are properly aligned to avoid gaps. Regularly inspect the drain setup for signs of wear and replace faulty parts promptly to maintain a leak-free system.
Can I Install A Drain Without A Plumber?
Yes, you can install a kitchen sink drain without hiring a plumber. Follow the manufacturer’s instructions carefully and use the right tools. Ensure all connections are secure and check for leaks after installation. If you’re unsure, watch tutorial videos online for guidance to help you through the process.
What Type Of Drain Is Best For My Sink?
Choose a drain type based on your sink’s material and design. Stainless steel drains are durable and resist corrosion, making them ideal for most kitchens. Consider basket strainers for easy cleaning and maintenance. Match the drain’s finish with your sink to enhance the aesthetic appeal of your kitchen.
Conclusion
Your kitchen sink drain is now connected and ready for use. You’ve handled the tools and followed the steps. No need to worry about leaks. Enjoy your smooth-running sink. Keep an eye out for any changes. Regular checks prevent future issues.
A well-functioning drain makes kitchen tasks easier. Remember, practice makes perfect. The more you do, the better you get. Share your experience with friends. They might need a hand too. Keep learning and exploring home projects. Your efforts make a difference.
You’re now a step closer to being a handy homeowner. Well done!


