Are you ready to bring your kitchen ideas to life on paper? Drawing a kitchen step by step might seem tricky, but with the right guidance, you can create a clear and beautiful layout that matches your style.
Whether you’re planning a renovation or just love sketching, this guide will walk you through every part of the process. By the end, you’ll have a drawing that feels just right for your space. Keep reading, and let’s make your dream kitchen visible—one simple step at a time.

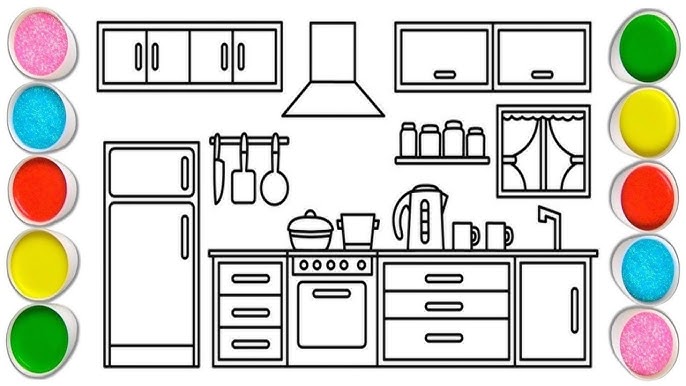
Credit: www.youtube.com
Materials Needed
Gather a few basic materialsbefore you start drawing a kitchen. A pencilworks best for sketching. Use an eraserto fix mistakes. A rulerhelps draw straight lines. Colored pencilsor markersadd life to your drawing.
Paper choice matters. Use smooth drawing paperfor clear lines. Plain white paper is fine for beginners. A sharpenerkeeps your pencils ready for detail work. Keep all tools handy for easy access.
- Pencil (preferably HB or 2B)
- Eraser
- Ruler
- Colored pencils or markers
- Smooth drawing paper
- Pencil sharpener

Credit: www.youtube.com
Basic Kitchen Layout
Start by drawing the outline of the kitchen floor. Use a pencil to sketch a simple rectangle or square. This shape shows the total space.
Draw the walls inside the floor plan. Mark where the walls will be thick or thin. Add lines for each wall, keeping straight edges.
Mark the locations of windows on the walls. Windows bring light and air. Show them as rectangles or squares. Place them where you want sunlight.
Use symbols or simple shapes for doors and openings. This helps see how people will move inside the kitchen.
- Draw clear, straight lines for walls
- Position windows on outer walls
- Make sure doors fit into the layout
- Keep the floor plan neat and easy to read
Sketching Cabinets And Counters
Begin by outlining the shapes of cabinets and counters with simple lines. Focus on proportions and angles to create a clear kitchen layout. Add details like handles and edges to bring your sketch to life.
Positioning Upper Cabinets
Start by drawing a horizontal line for the top. This line marks where the ceiling meets the cabinets. Below it, draw another line for the bottom of the upper cabinets. Make sure these lines are parallel. Space them evenly for balance. Add vertical lines to create cabinet sides. These lines should be evenly spaced too. Draw rectangles within these lines for doors. Consider adding handles or knobs. These details make the cabinets look real. Shade lightly to show depth.
Designing Lower Cabinets And Drawers
Begin with a long horizontal line for the countertop. Below this, draw another line for the cabinet base. These lines should be parallel and spaced apart. Add vertical lines for the cabinet edges. Make sure they’re evenly spaced. Draw rectangles for the cabinet doors. Add smaller rectangles for drawers. Include handles and knobs for detail. Shade parts of the cabinets for a 3D effect. Check all lines for neatness and balance.
Including Appliances
Start by drawing a large rectangle where the refrigerator will go. Place it near a wall or corner for a natural look. Make sure to leave space for the door to open wide. Draw smaller rectangles inside for handles and details.
Sketch the oven and stove close to the refrigerator but with some counter space between. Draw a square or rectangle for the oven base. Add circles or small ovals on top for stove burners. Include knobs on the front for control.
For the sink, draw a rectangle or oval shape inside the countertop area. Add a smaller oval inside to show the basin. Draw a simple faucet above the sink with two handles or one lever. Place it near a window or open space for realism.
Detailing Fixtures And Accessories
Lightingis a key part of kitchen design. Place ceiling lights to brighten the whole room. Use under-cabinet lights for work areas. Include pendant lights over the island for style and function.
Electrical outletsshould be easy to reach. Plan for outlets near counters for small appliances. Keep outlets away from water sources for safety. Think about adding USB ports for charging devices.
- Choose simple decorative elementslike plants or bowls of fruit.
- Use wall art or clocks to add personality.
- Keep decorations small so the kitchen feels open.
- Match decorations with the kitchen’s color scheme.
Shading And Texturing
Shadowshelp make the kitchen look real and deep. Use soft, light strokes to show where light hits and dark strokes for shadows. Think about where the light source is. Shadows under shelves, sinks, and counters add a 3D feel.
Textureshows what materials the kitchen has. For wood, draw light lines to mimic grain. For metal, use smooth shading with a few shiny spots. Tiles can have small squares or dots for patterns. Different textures make your drawing more interesting and clear.
| Material | How to Draw Texture |
|---|---|
| Wood | Light, thin lines to show grain |
| Metal | Smooth shading with bright spots |
| Tiles | Small squares or dots in patterns |
| Stone | Uneven dots and lines for roughness |
Final Touches
Use a fine pencil or pen to trace over the main lines. Make sure the lines are clean and smooth. Erase any extra marks or guidelines carefully. This will make your drawing look neat and clear.
For coloring, choose soft colorsthat match kitchen items. Light shades work well for walls and cabinets. Darker colors can show shadows and depth. Use color pencils or markersfor easy control.
- Start with light colors first.
- Color small areas with a steady hand.
- Blend colors gently to avoid harsh lines.
- Use white or light colors to highlight bright spots.

Credit: www.youtube.com
Frequently Asked Questions
What Materials Do I Need To Draw A Kitchen?
You need pencils, erasers, rulers, and drawing paper. Optional tools include colored pencils or markers for detailing. A reference image helps guide your drawing. Basic drawing tools are essential to create clean lines and accurate proportions.
How Do I Start Drawing A Kitchen Layout?
Begin with a simple floor plan sketch. Outline walls, counters, and appliance positions. Use light pencil strokes to adjust easily. Focus on proportions before adding details. This step ensures your kitchen drawing is well-structured.
What Are The Key Elements To Include In A Kitchen Drawing?
Include cabinets, countertops, appliances, sink, and lighting fixtures. Add windows and doors for realism. Details like handles and textures enhance the drawing. These elements create a complete and functional kitchen illustration.
How Can I Add Depth To My Kitchen Drawing?
Use shading and perspective techniques to create depth. Draw vanishing points and use lines converging towards them. Shade areas to show light and shadow. This adds realism and dimension to your kitchen sketch.
Conclusion
Drawing a kitchen can be simple and fun. Follow each step with care and patience. Use basic shapes first, then add details slowly. Practice helps improve your skill every time. Keep your lines clean and clear. Enjoy the process and learn from mistakes.
Soon, your kitchen drawing will look great. Try different styles to find what you like. Drawing builds creativity and confidence. So, pick up your pencil and start today!


