Picture this: you’re unwinding after a long day, but the persistent drip of your Delta kitchen faucet keeps stealing your peace. It’s more than just a minor annoyance; it’s a tiny culprit sneaking up on your water bill and wasting precious resources.
You might feel overwhelmed by the idea of fixing it, but here’s some good news—you can tackle this problem with a few simple steps, saving both money and sanity. In this guide, you’ll discover how to fix a dripping Delta kitchen faucet, transforming your kitchen from a leaky nightmare to a serene haven.
Ready to reclaim your peace and cut down on water waste? Dive in to learn how.

Credit: www.youtube.com
Tools And Materials Needed
To fix a dripping Delta kitchen faucet, gather these essential tools and materials. A wrench and a screwdriver are key tools for this task. You will need replacement partslike washers or O-rings. Also, have plumber’s tape handy for sealing threads. A cloth will be useful for cleaning spills and drying parts.
A bucketis useful to catch any drips while working. A flashlight can help you see in dark spaces under the sink. Ensure you have a Delta faucet manual for guidance. These tools and materials will help fix the drip with ease.

Credit: www.youtube.com
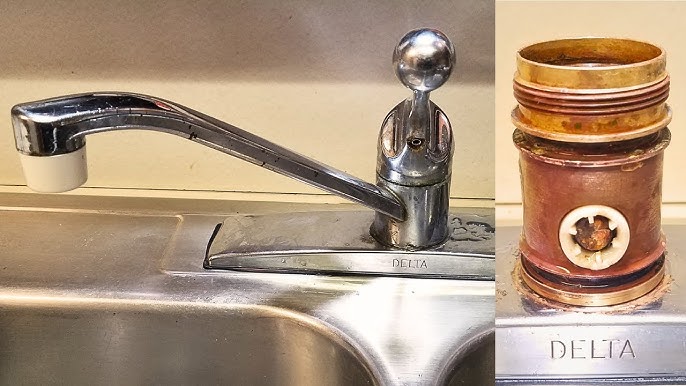
Identifying The Source Of The Drip
Check the handle and the spout for leaks. Handle is a common culprit. Spout may drip if seals are worn. Inspect the connections under the sink. Loose pipes can cause drips. Examine the valve inside the faucet. It controls water flow. Damaged valves lead to leaks. Cartridge may need replacement. It regulates water pressure. Gaskets can wear out. They seal the faucet tightly.
Use a flashlight to see better. Look for water stains. They show where leaks happen. Listen for dripping sounds. They help locate the source. Touch the faucet parts. Wet spots indicate leaks. Check the water supply lines. Tighten them if loose. Inspect every part carefully. Even small cracks can cause drips.
Turning Off The Water Supply
First, find the water supply valves under the sink. These valves control the water flow to the faucet. Turn the valves clockwise to stop the water. If your valves are tight, use a cloth to grip them better. Check the faucet for any remaining water. This ensures the supply is fully off. Remember, turning off the water is crucial. It prevents spills and mess.
After turning off the valves, test the faucet. Turn the faucet handles to see if any water drips. If no water comes out, the supply is off. This step is important before fixing the faucet. Double-check the valves if water still flows. Sometimes, valves need extra tightening.
Removing The Faucet Handle
First, turn off the water supply. This stops the water flow. Next, cover the sink drain. This keeps small parts from falling.
Find the screw under the handle. It may be hidden by a small cap. Use a flathead screwdriver to pop off the cap.
Loosen the screw with a Phillips screwdriver. Hold the handle steady while doing this. Once loose, gently pull the handle off.
Some models have a nut under the handle. Use an adjustable wrench to remove it if present. Now, the handle should be free. Keep all parts in a safe place.
If the handle is stuck, try a handle puller tool. This can help with tight handles. Be careful not to damage the faucet.
Inspecting The Cartridge
Check for signs of wear and tear. Look closely at the cartridge. Cracks or breaks mean it needs replacing. Examine the rubber seals. Worn or cracked seals can cause leaks. Corrosion is another sign. Rusty parts need fixing.
Observe any water stains around the faucet. Drips or leaks often leave marks. Loose parts can also indicate wear. Tighten any parts that wiggle. Strange noises may mean trouble. If it squeaks, something is wrong.
- Turn off the water supply.
- Remove the cartridge carefully.
- Rinse under warm water. Remove dirt and debris.
- Use a soft brush for cleaning.
- Check for clogs or deposits.
- Reinstall when clean and dry.
Replacing The Cartridge
Replacing the cartridge in a Delta kitchen faucet can stop annoying drips. First, turn off the water supply. Then, remove the handle and old cartridge. Install the new cartridge, reassemble the faucet, and restore water flow.
Choosing The Correct Replacement
Find the model number on your Delta faucet. This number is on the faucet’s base or handle. Use this number to get the right cartridge. Look for genuine Delta parts for better results. Avoid using cheap alternatives that may not last long. Check the package for the correct size and type. Make sure it matches your faucet model.
Installing The New Cartridge
Turn off the water supply first. Remove the faucet handle carefully. Unscrew the old cartridge using a wrench. Clean the area before placing the new cartridge. Align the new cartridge properly. Tighten it with the wrench to prevent leaks. Test the faucet by turning the water back on. Ensure no dripping happens after installation.
Reassembling The Faucet
First, gather all the parts of the faucet. Make sure they’re clean. Inspect each piece for damage. Damaged parts need replacing. Begin by placing the cartridge back into the faucet. Ensure it fits snugly. Next, secure the handle onto the cartridge. Use a screwdriver to tighten screws. Don’t over-tighten them. Over-tightening can cause damage.
Check that the spout is aligned correctly. If not, adjust it gently. Now, reattach the nuts and washers. These should be tight, but not too tight. Finally, turn the water supply back on. Watch for any leaks. If you see any, turn off the water. Double-check that each part is secure. A properly assembled faucet should not drip.
Testing The Faucet
Check the faucet for leaks by turning it on and off. Listen for unusual sounds. Watch for drips or water pooling around the base.
Checking For Leaks
Turn the faucet on and look for dripsor puddlesbeneath. Feel around the base and under the sink. Use a flashlight for better visibility. Check each part of the faucet carefully. Leaks often hide in corners. If you find water, note where it comes from. This helps in fixing the problem easily. Sometimes, the leak is tiny and hard to see. Be patient and look closely.
Ensuring Smooth Operation
Turn the faucet handle back and forth. Listen for squeaksor grindingsounds. These signs mean parts might be worn out. Ensure the water flows smoothly without interruptions. Check both hot and cold settings. If the handle sticks, it might need cleaning or oil. A smooth handle means everything is working fine. Always ensure the faucet turns off easily. This prevents future drips.
Preventative Maintenance Tips
Regular maintenance keeps your faucet in good shape. Clean the faucet weekly. Use mild soap and water. Avoid harsh chemicals. These can damage the surface. Check for leaks often. Tighten any loose parts. This stops dripping and saves water. Replace worn-out washers and seals. This is crucial for preventing leaks. Inspect the aerator monthly. Remove any debris or build-up. Use vinegar for cleaning stubborn deposits. The faucet will flow better. Lubricate the moving parts. Use plumber’s grease. This reduces friction and wear. These simple steps extend the life of your faucet.

Credit: www.youtube.com
Frequently Asked Questions
How Do I Identify A Dripping Faucet Issue?
Start by checking for water leaks under the sink or around the faucet spout. Inspect the handle for excess moisture when turned off. Listen for persistent dripping sounds. These signs indicate a potential problem with your Delta kitchen faucet that may require fixing.
What Tools Are Needed To Fix A Delta Faucet?
You will need an adjustable wrench, screwdriver, and replacement parts. These tools help disassemble the faucet and replace worn components. Having Teflon tape and a bucket for catching excess water can be helpful. Gather these before starting your repair process.
Can I Fix A Dripping Faucet Myself?
Yes, you can fix a dripping Delta faucet yourself. Follow the manufacturer’s instructions for disassembly and reassembly. Ensure you have the right tools and replacement parts on hand. If uncertain, consider watching tutorial videos or contacting Delta customer support for guidance.
How Often Should I Check My Kitchen Faucet?
Check your kitchen faucet for leaks every six months. Regular inspections help identify issues early, preventing costly repairs. Examine the faucet, hoses, and connections for any signs of wear or damage. Routine maintenance can extend the life of your Delta kitchen faucet.
Conclusion
Fixing a dripping Delta kitchen faucet is straightforward. Start with basic tools. Follow the step-by-step guide to resolve the leak. Ensure all parts are clean and secure. Replace any worn-out washers or seals. Regular maintenance prevents future drips. It saves water and money.
Check your faucet regularly for early signs of wear. A well-maintained faucet lasts longer. Enjoy a drip-free kitchen with these simple steps. Happy fixing!


