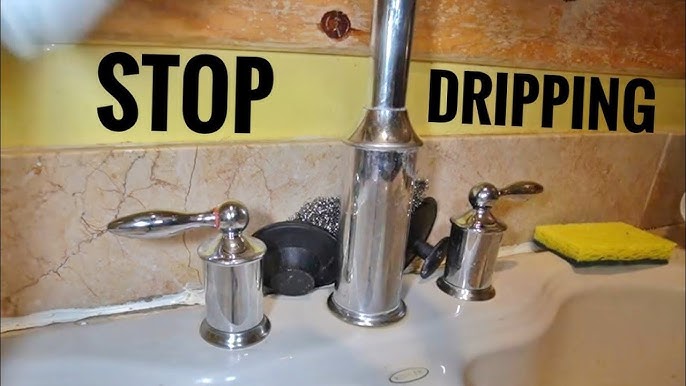
Is the constant dripping of your Moen kitchen faucet driving you up the wall? You’re not alone.
That relentless drip not only grates on your nerves but can also lead to higher water bills and potential water damage if left unchecked. The good news is that you don’t need to be a plumbing expert to tackle this common household issue.
In this guide, you’ll discover straightforward, step-by-step instructions to fix that pesky drip and restore peace to your kitchen. Imagine the relief of finally enjoying a quiet kitchen and saving money on your utility bills. Stay with us, and you’ll soon master the art of faucet repair, transforming a frustrating problem into a satisfying DIY accomplishment. Don’t let this challenge intimidate you—empower yourself with the knowledge to fix it once and for all.
Identifying The Problem
First, examine the faucet to find the source of the drip. Check for loose handles or worn-out seals. Identifying the exact problem helps in choosing the right solution efficiently.
Signs Of A Dripping Faucet
Water drips even when the faucet is off. You hear a constant dripping sound. The sink has water stains or rust. Wet spots form under the faucet. Water bill seems higher than usual. The faucet handle feels loose or wobbly. You notice mold or mildew near the faucet.
Causes Of Leaks In Moen Faucets
The rubber washers might be worn out. O-rings could be damaged. The cartridge may not be seated properly. Mineral deposits can build up. Corrosion might affect metal parts. Loose parts can cause leaks. Improper installation leads to problems.

Credit: www.youtube.com
Gathering Necessary Tools
Gather essential tools like a wrench, screwdriver, and replacement parts to fix a dripping Moen kitchen faucet. Ensure you have a clean cloth and a bucket to catch water. Proper preparation makes the repair process smooth and efficient.
Basic Tools Required
- Screwdriver: Needed for removing faucet handle.
- Adjustable Wrench: Tightens loose parts.
- Allen Wrench: Removes set screws.
- Plumber’s Tape: Seals threads and prevents leaks.
- Replacement Parts: Like cartridges or O-rings.
Safety Equipment To Consider
- Safety Glasses: Protects eyes from splashes.
- Gloves: Keeps hands clean and safe.
- Drop Cloth: Keeps area dry and neat.
Shutting Off Water Supply
Shut off the water supply to begin fixing a dripping Moen kitchen faucet. Locate the valves under the sink. Turn them clockwise to stop water flow.
Locating The Water Valves
Find the valves under the sink. They are small and round. Look for two valves. One for hot water. One for cold water. Turn them clockwise to close. Make sure to turn tightly. This stops the water flow.
Properly Turning Off Water
Check if the water is off. Turn on the faucet. No water should come out. If water comes out, tighten the valves more. Ensure both valves are fully shut. Double-check by listening for any dripping. If it drips, adjust the valves again. Closing them properly prevents leaks.

Credit: www.reddit.com
Disassembling The Faucet
Disassembling the faucet is the first step in fixing a dripping Moen kitchen faucet. Turn off the water supply and remove the handle carefully. Unscrew the retaining nut and extract the cartridge for inspection or replacement.
Removing The Handle
First, turn off the water supply. This prevents any mess. Check for a screw on the handle. It might be hidden. Use a screwdriver to remove it. Lift the handle gently. If it’s stuck, wiggle it a little. Be careful not to damage anything.
Accessing The Cartridge
After the handle is off, see the cartridge. It’s important for stopping leaks. Remove any retaining clips with pliers. Gently pull the cartridge out. Keep track of how it fits. This helps when you put it back. If it’s hard, use a special tool. Moen provides these tools sometimes. Make sure not to force it too much.
Inspecting And Cleaning Parts
Begin by turning off the water supply to your faucet. Disassemble the faucet to access internal parts. Check for worn-out washers or seals. Clean parts thoroughly to remove debris or mineral buildup. Replace any damaged components. Reassemble the faucet and restore the water supply.
Examining The Cartridge
Turn off the water supply. Remove the faucet handle. Use a screwdriver to take off the handle. Take out the cartridgecarefully. Look for any cracks or damage. If it’s broken, it needs replacement. Sometimes, dirt or grime can cause issues. Check for any small debris. A clean cartridge works better.
Cleaning Debris And Build-up
Use a soft cloth to wipe the cartridge. Soak the parts in vinegar. This helps remove mineral deposits. Scrub gently with a brush. Avoid using hard tools. Rinse with clean water. Let all parts dry completely. Reassemble the faucet. Turn the water supply back on. Check if the drip is gone.

Credit: www.facebook.com
Replacing Faulty Components
Replacing faulty components can solve the issue of a dripping Moen kitchen faucet. Identify worn-out parts like washers or O-rings and swap them with new ones. Make sure to tighten them securely for a leak-free faucet.
Installing A New Cartridge
A dripping faucet can waste water. First, turn off the water supply. Next, remove the faucet handle. This reveals the old cartridge inside. Pull out the old cartridge gently. Be careful not to damage other parts. Insert the new cartridge in its place. Ensure it fits snugly. Secure the handle back on. Turn the water supply on. Check for drips.
Checking O-rings And Seals
O-rings and seals stop water leaks. Inspect the O-rings closely. They can crack or wear out. Replace them if needed. Check the seals around the faucet. Make sure they are tight. Loose seals can cause drips. Use a screwdriver to tighten any loose seals. Test the faucet again. Ensure it no longer drips.
Reassembling The Faucet
Reassembling the Faucet Ensure all parts are clean before putting them back. Carefully align the components to avoid leaks. Tighten screws and fittings securely for a proper seal.
Securing The Handle
First, place the handle on the stem. Make sure it fits snugly. Tighten the screw to secure the handle. Use a screwdriver for this task. Ensure the handle moves easily. Test it by turning on the water.
Ensuring A Proper Fit
Check all parts are in place. Look for gaps or loose pieces. Tighten any loose parts with a wrench. Turn the faucet on and off. Ensure there is no dripping. Adjust if needed. A tight fit stops leaks.
Testing For Leaks
Inspect the faucet for leaks after fixing a dripping Moen kitchen faucet. Turn the water on and off. Check under the sink for any signs of dripping.
Turning Water Back On
Turn the water valve slowly. This prevents sudden pressure. Watch for leaks as water flows. Check under the sink for puddles. Listen for dripping sounds. Tighten any loose connections. Use a dry cloth to wipe surfaces. Ensure everything is dry. This helps spot new leaks easily.
Checking For Drips
Keep the faucet off. Look closely at the spout. Use a flashlight if needed. A steady drip means a problem. Watch for water trails on the sink. These show a leak. Place a dry paper towel under the faucet. Wait a few minutes. Check if the towel is wet. A wet towel confirms a drip.
Preventive Maintenance Tips
Fixing a dripping Moen kitchen faucet can save water and money. Check for worn-out O-rings or seals, and replace them to stop leaks. Regularly clean the aerator to ensure smooth water flow and prevent future drips.
Regular Cleaning Suggestions
Clean the faucet with a soft cloth and mild soap. Avoid strong chemicals that can damage the faucet. Rinse well to remove all soap residue. Dry with a clean cloth to prevent water spots. Regular cleaning stops dirt build-up and keeps the faucet shiny. A clean faucet works better and lasts longer.
Routine Inspection Guidelines
Check the faucet for leaks or drips regularly. Look at the handles, spout, and base. Make sure all parts are tight and secure. Listen for strange noises when the water is on. If you find problems, fix them quickly. This helps avoid bigger issues later. Regular checks keep your faucet in good shape.
Frequently Asked Questions
How Do I Stop A Moen Faucet From Dripping?
To stop a Moen faucet from dripping, first, turn off the water supply. Remove the handle and access the cartridge. Check for any worn or damaged parts, and replace if necessary. Reassemble the faucet and turn the water back on.
This should resolve the dripping issue.
What Tools Do I Need To Fix My Faucet?
To fix a dripping Moen kitchen faucet, you’ll need an adjustable wrench, a screwdriver, and pliers. You might also require a replacement cartridge, depending on the faucet’s condition. Ensure you have a towel or bucket to catch any residual water when disassembling.
Why Is My Moen Faucet Dripping?
A dripping Moen faucet is often due to a worn-out cartridge or seal. Over time, these components degrade, causing water to leak. Replacing the faulty parts typically resolves the issue. Regular maintenance can prevent such problems from occurring frequently.
How Can I Identify My Moen Faucet Model?
To identify your Moen faucet model, look for a serial number on the faucet body. Alternatively, check the original packaging or purchase receipt. Moen’s official website provides a tool to help identify your faucet model using these details.
Conclusion
Fixing a dripping Moen faucet is simple with the right steps. Start by identifying the problem. Check the O-rings and cartridge. Replace worn parts promptly. This stops the annoying drip. Regular maintenance prevents future issues. Keep your tools handy. Follow each step carefully.
A fixed faucet saves water and money. Plus, it feels rewarding. Your kitchen stays quiet and efficient. No more drip sounds. Enjoy your peaceful space. Share your success with friends. Encourage them to fix leaks too. Everyone can learn this skill.
It’s practical and useful. Happy fixing!





