
Are you tired of your old kitchen tile backsplash and ready for a fresh new look? Removing it might seem like a big job, but with the right steps, you can handle it yourself and save money.
Imagine how satisfying it will feel to strip away the outdated tiles and open up your kitchen for a makeover. In this guide, you’ll discover simple, clear instructions to remove your kitchen tile backsplash safely and efficiently. Keep reading, and you’ll be amazed at how easy it can be to transform your space starting with this one project.

Credit: www.youtube.com
Tools And Materials Needed
Essential tools include a putty knife, utility knife, and hammer. A chiselhelps remove stubborn tiles. A scrapercleans leftover glue or mortar. A bucketand ragkeep the area clean.
Safety gear is very important. Use glovesto protect your hands. Wear safety gogglesto shield your eyes from flying debris. A dust maskprevents inhaling dust. Long sleeves help protect your skin.
Optional supplies make the job easier. A heat gunsoftens the adhesive for easier tile removal. A scraper bladecan replace dull tools. Painter’s tapeprotects nearby walls during work.
Preparing The Workspace
Clear the kitchen countertop and remove items near the backsplash. This gives you space to work safely and freely. Move any furniture or appliances that might get in the way.
Cover surfaces like counters and floors with plastic sheets or drop cloths. This protects them from dust and tile debris. Use painter’s tape to hold coverings in place.
| Task | Reason |
|---|---|
| Turn off power | Prevent electrical shocks while working near outlets |
| Turn off water | Avoid leaks if plumbing is behind tiles |
Removing Grout
Removing grout helps loosen tiles for easier backsplash removal. Use a grout saw or oscillating tool carefully to avoid tile damage. Work slowly to clear grout lines before lifting the tiles.
Manual Grout Removal
Use a grout scraper for this task. Hold it firmly with both hands. Gently scrapethe grout between the tiles. Be careful not to scratch the tiles. Move slowly and check your progress often. Stop if the scraper feels stuck. You can use a damp clothto wipe away dust. Repeat until all grout is gone.
Using Power Tools
A rotary tool can make this job easier. Attach a grout removal bit. Turn on the tool and hold it steady. Carefully guide it along the grout lines. Keep your hands steady to avoid mistakes. Wear safety glasses to protect your eyes. Take short breaks to prevent overheating. Clean the area with a brush after you’re done.

Credit: www.edwardmartin.com
Detaching The Tiles
Begin by choosing an edge or corner tile to loosen first. This spot is easier to pry and causes less damage. Use a putty knife or flat tool to gently lift the grout around the tile. This weakens the bond and makes tile removal simpler.
For tiles firmly stuck, tapping a chisel behind the tile helps break the adhesive. Wear safety goggles and gloves to protect from flying debris. Work slowly and carefully to avoid cracking nearby tiles or damaging the wall.
- Use a utility knife to cut grout lines near the tile edges.
- Insert a putty knife under the tile corner to pry it up.
- Tap a chisel gently behind the tile for stuck pieces.
- Remove loose tiles carefully by hand or with pliers.
- Clean old adhesive from the wall before installing new tiles.
Cleaning The Wall Surface
Clean the wall surface by removing all dust, grease, and old adhesive after taking down the backsplash. A smooth, dry surface helps new tiles stick better and last longer. Use a mild cleaner and a scrub brush for best results.
Removing Adhesive Residue
Start by scraping off loose glue with a plastic scraper. Avoid metal tools to protect the wall. Use warm soapy water and a sponge to soften the sticky residue. For tough glue, apply a small amount of vinegar or adhesive remover. Let it sit for a few minutes, then wipe away gently. Repeat as needed but be careful not to damage the wall surface.
Repairing Wall Damage
Small holes or scratches can be fixed with spackle or wall filler. Apply the filler with a putty knife and smooth it out. Allow it to dry fully before sanding it down. Use fine sandpaper for a smooth finish. If the wall has larger cracks, fill them with patching compound. After repair, clean the wall with a damp cloth to remove dust.
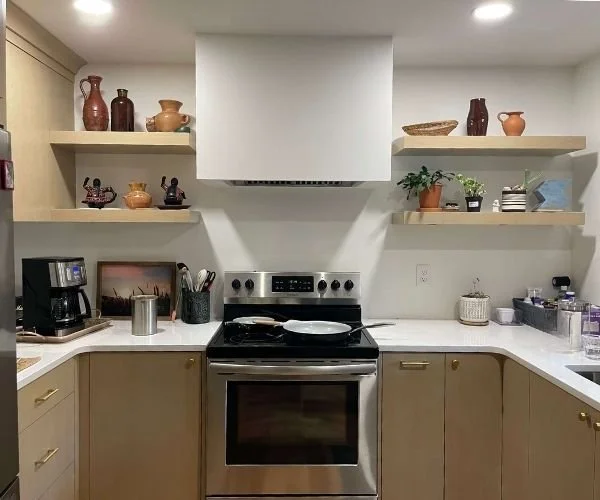
Credit: carlaaston.com
Disposal And Cleanup
Dispose of tile debris carefully to avoid injury. Use a sturdy trash bag or a heavy-duty container. Wear gloves to protect your hands from sharp edges. Sweep up small pieces with a broom and dustpan.
For fine dust, use a vacuum cleaner with a HEPA filter. This helps remove tiny particles from the air and floor. Avoid spreading dust by gently wiping surfaces with a damp cloth.
- Wear a dust mask during cleanup.
- Keep the work area well ventilated.
- Double-check corners for hidden debris.
- Dispose of debris according to local waste rules.
Frequently Asked Questions
How Do I Safely Remove Kitchen Tile Backsplash?
Start by protecting your eyes and hands with safety gear. Use a putty knife and hammer to gently pry tiles. Work slowly to avoid damaging the wall. Apply heat or a chemical adhesive remover if tiles are stubborn.
What Tools Are Needed To Remove Backsplash Tiles?
Essential tools include a putty knife, hammer, utility knife, and safety gear. A heat gun or adhesive remover may help. Also, have a bucket and sponge for cleanup. These tools ensure safe and efficient tile removal.
Can I Remove Backsplash Tiles Without Damaging The Wall?
Yes, by working carefully and using proper tools. Score grout lines first, then gently pry tiles. Avoid excessive force to protect drywall. Using heat or adhesive remover can loosen tiles, reducing wall damage risks.
How Long Does It Take To Remove Kitchen Tile Backsplash?
Tile removal usually takes 2 to 4 hours, depending on size. Larger or stubborn tiles may require more time. Preparation and cleanup add to the overall duration. Planning ahead helps manage this task efficiently.
Conclusion
Removing kitchen tile backsplash takes patience and care. Use the right tools and work slowly. Protect your walls and nearby surfaces from damage. Clean the area well before installing new tiles. This project can refresh your kitchen’s look. Small steps lead to great results.
Keep safety in mind throughout the process. You will feel proud once the job is done. Ready to update your kitchen space? Start with removing the old backsplash carefully.





