Is your Moen kitchen faucet leaking or not working right? Fixing it yourself can save you time and money.
You don’t need to call a plumber or buy expensive tools. With a few simple steps, you can repair your faucet and get it running smoothly again. Keep reading, and you’ll learn easy, clear instructions to tackle the problem quickly.
By the end, you’ll feel confident handling common faucet issues on your own. Let’s get started and bring your kitchen faucet back to life!

Credit: www.youtube.com
Tools Needed
- Adjustable wrenchto loosen and tighten nuts.
- Screwdrivers(both flathead and Phillips) for screws.
- Allen wrenchfor set screws on handle.
- Pliersto grip small parts securely.
- Replacement partsspecific to your Moen faucet model.
- Plumber’s tapeto seal threaded connections.
- Bucket or bowlto catch water drips.
- Towel or ragto clean spills.
Having these tools ready makes the repair process easier.
Shut Off Water Supply
Locate the main water valve under the sink or near the water meter. Turn it clockwise to close and stop water flow. This step prevents leaks and water damageduring repairs.
Open the faucet to release any remaining water in the pipes. This makes the repair easier and safer. Use a towel to catch drips if needed.
Double-check that water is off by turning the faucet handle. No water should come out. If water still flows, turn off the main valve in your home.
Remove Faucet Handle
To remove a faucet handle on a Moen kitchen faucet, first turn off the water supply. Then, use a screwdriver or Allen wrench to loosen the set screw and gently pull the handle off.
Locate Handle Screws
Find the screws on the faucet handle. These screws are usually hidden. Look under the handle or behind a small cap. Use a flashlight if needed. This helps in seeing the screws clearly. Be gentle to avoid scratching the faucet. A small flat-head screwdriver can help. Pry off the cap if there is one.
Unscrew And Lift Handle
Use a screwdriver to turn the screws counterclockwise. Hold the handle while unscrewing. This prevents it from falling. Once loose, gently lift the handle up. Wiggle it if it’s stuck. Check for any hidden screws. Some models have more than one screw. Keep the screws safe for reassembly.
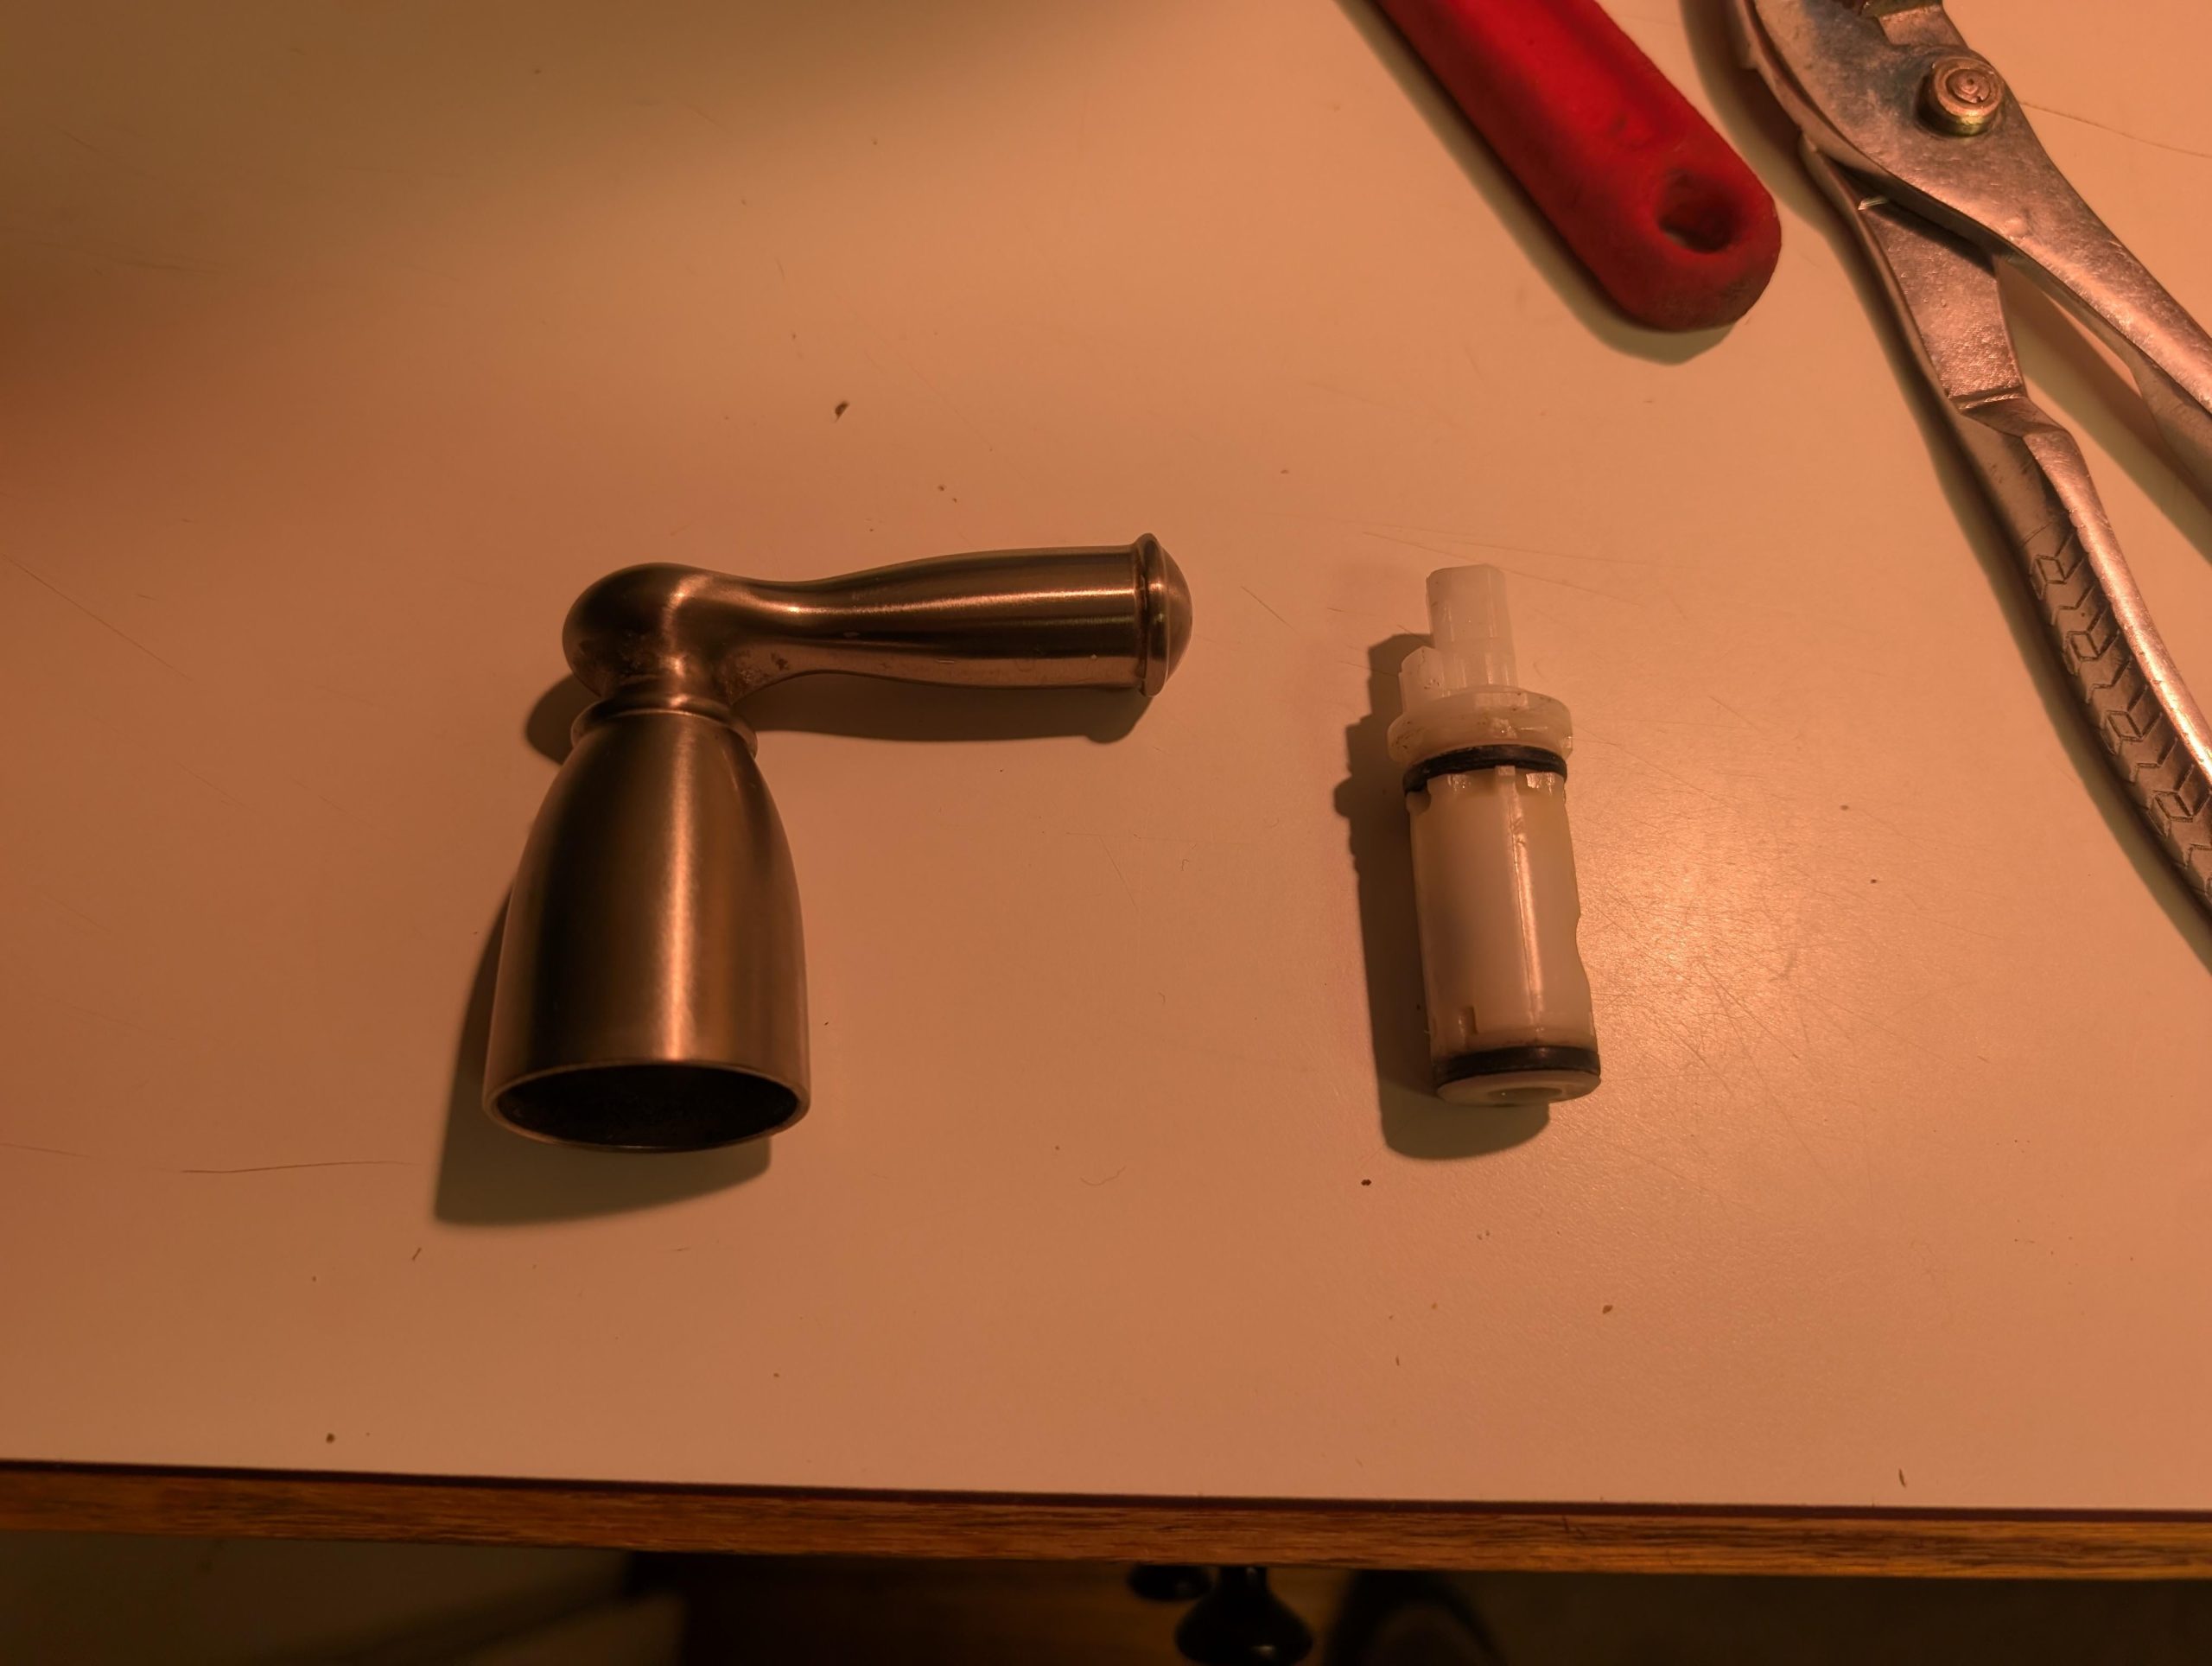
Inspect Cartridge
Start by turning off the water supply under the sink. Use a wrench to loosen and remove the faucet handle. Look for the retaining clipinside the handle assembly. This clip holds the cartridge in place.
- Use needle-nose pliers to carefully pull out the retaining clip.
- Once the clip is out, gently pull the cartridge straight up and out.
- If the cartridge is stuck, wiggle it slightly to loosen.
Inspect the cartridge for damage or mineral buildup. Clean or replace it as needed before reinstalling.
Clean Or Replace Cartridge
Cartridge cleaning can fix leaks and improve faucet flow. If cleaning fails, replacing the cartridge restores proper function quickly. This keeps your Moen kitchen faucet working smoothly.
Clean Cartridge Components
Turn off water supply before starting. Remove the faucet handle carefully. Take out the cartridge and check parts for dirt or buildup. Use vinegar or mild cleaner to soak and clean cartridge parts. Rinse with water and dry completely. Inspect for cracks or damage. Clean inside the faucet body with a soft brush. Make sure all parts move freely after cleaning. Reassemble the cartridge and test for leaks.
Install New Cartridge
Purchase the correct Moen cartridge for your faucet model. Turn off water supply and remove old cartridge. Align new cartridge properly inside the faucet body. Push cartridge in firmly but gently. Replace retaining clip or nut to hold it in place. Reattach faucet handle and tighten screws. Turn water supply back on slowly. Check for leaks and smooth handle operation.
Check O-rings And Seals
Start by turning off the water supply under the sink. Use a wrench to loosen and remove the faucet handle. Carefully pull out the cartridge to access the O-rings. Use a small flathead screwdriver or pick tool to remove the old O-ringsand seals.
Clean the area around the cartridge with a cloth. This removes dirt and old grease. Apply a small amount of plumber’s grease to the new O-rings. Slide the new O-ringsonto the cartridge in the right place. Make sure they fit snugly and evenly to prevent leaks.
Reinstall the cartridge and tighten the faucet handle back. Turn the water supply on and check for leaks. Replacing O-rings and seals can often stop drips and improve faucet function quickly.
Reassemble Faucet
Place the handle backonto the faucet stem carefully. Make sure it fits snugly in place. Align it so the screw holes match up. Then, use a screwdriver to tighten the screws. Do not overtighten to avoid damage. Screws should be firm enough to hold the handle without wobbling. Check that the handle moves smoothly after tightening. If it feels loose, tighten the screws a bit more. This step ensures the faucet works properly and looks neat. Repeat for all handles if there are more than one.

Credit: www.badgerinstitute.org
Test Faucet Operation
Turn on the water supply valves under the sink slowly. This lets water flow back into the faucet.
Watch the faucet closely as water starts to run. Make sure water flows smoothly from the spout.
Check all faucet parts and connections for leaks. Look under the sink and around the faucet base.
Leaks may show as water drops or wet spots. Tighten any loose connections carefully to stop leaks.
If leaks continue, the faucet parts may need replacement or repair.
Troubleshooting Tips
Check for leaksaround the faucet base and handles. Tighten any loose parts carefully. Clean the aeratorby unscrewing it and removing debris. This fixes low water flow.
Replace worn washers or O-ringsinside the faucet. These parts often cause dripping or leaks. Turn off the water supply before removal.
- Use a wrench to remove the handle carefully.
- Inspect the cartridge for damage or buildup.
- Clean or replace the cartridge if needed.
Check water pressureand supply lines. Blockages or kinks can reduce flow. Straighten hoses or clear any blockages.
Test the faucet after each step to see if the problem is fixed. This saves time and effort.

Credit: www.homehardware.ca
Frequently Asked Questions
How Do I Fix A Leaking Moen Kitchen Faucet?
To fix a leaking Moen kitchen faucet, first turn off the water supply. Then, replace the cartridge inside the faucet. Clean or replace worn-out O-rings and seals to stop drips. Reassemble the faucet and test for leaks to ensure the repair was successful.
What Tools Are Needed To Repair A Moen Faucet?
You will need an adjustable wrench, Phillips screwdriver, and Allen wrench. Also, have replacement cartridges, O-rings, and plumber’s grease ready. A small pick or needle-nose pliers can help remove old seals. These basic tools cover most Moen faucet repairs efficiently.
Why Is My Moen Faucet Handle Hard To Turn?
A stiff Moen faucet handle usually means worn or dirty cartridge parts. Mineral buildup can cause resistance. Remove the handle and clean the cartridge thoroughly. Lubricate moving parts with plumber’s grease before reassembling to restore smooth operation.
Can I Repair A Moen Faucet Cartridge Myself?
Yes, most Moen faucet cartridge repairs are DIY-friendly. Follow manufacturer instructions carefully. Turn off water supply before starting. Use proper tools to avoid damage. Replacing cartridges or seals often fixes leaks and handle issues without professional help.
Conclusion
Repairing a Moen kitchen faucet is easier than you think. With basic tools and clear steps, you can fix leaks and drips fast. Take your time and follow each instruction carefully. Small repairs save money and prevent bigger problems later.
Remember to turn off the water before starting. Soon, your faucet will work like new again. Keep this guide handy for future fixes. Simple, quick, and effective—your kitchen faucet will stay reliable.


