Is your kitchen sink shut off valve leaking or not working properly? Knowing how to replace it yourself can save you time, money, and the hassle of waiting for a plumber.
In this guide, you’ll discover simple, step-by-step instructions that anyone can follow—even if you’re not a DIY expert. By the end, you’ll feel confident fixing your valve quickly and keeping your kitchen running smoothly. Ready to take control of your plumbing?
Let’s get started!

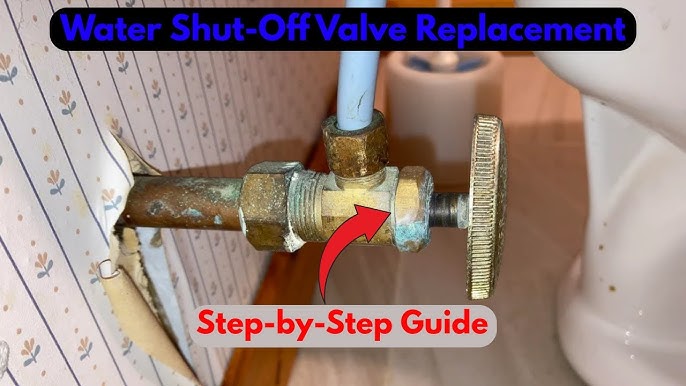
Credit: www.youtube.com
Tools And Materials Needed
Essential tools include an adjustable wrench, a basin wrench, and plumber’s tape. A bucket helps catch water when you disconnect the valve. Keep a cloth nearby to wipe spills.
Choose a valve that fits your pipe size and type. Most kitchen sinks use a 1/2 inch compression valve. Look for a valve made of brass for durability. Quarter-turn valves are easy to use and reliable.
Additional supplies may include pipe joint compound and replacement washers. Having spare parts on hand can save time. Always check for leaks after installation.
Preparing The Work Area
Turn off the main water supplyto stop water flow. This prevents leaks and water damage. Usually, the main valve is near the water meter or where the pipe enters your home.
Clear the cabinet spaceunder the sink. Remove all items to give yourself room to work. This also helps avoid accidents and keeps tools handy.
Safety precautionsare important. Wear gloves to protect your hands. Use safety glasses to shield your eyes from debris. Keep a towel or bucket nearby to catch any leftover water.
Removing The Old Shut Off Valve
Turn off the main water supply. This stops the water flow. Next, place a bucket under the pipe. This catches any leftover water. Open the faucet to release trapped water. Wait until no more water drips.
Use a wrench to loosen the nuts. These nuts hold the valve in place. Turn them to the left. If they are tight, use a bit of force. Be careful not to damage the pipes.
Once the nuts are loose, gently remove the valve. Pull it away from the pipe. Check the pipe for any damage. Ensure the area is dry and clean. This helps when installing the new valve.
Installing The New Shut Off Valve
Before attaching the new shut off valve, apply thread sealantor plumber’s tapeto the valve threads. This helps create a tight, leak-free seal. Wrap the tape clockwise around the threads 2-3 times.
Carefully screw the valve onto the water supply pipe by hand. Make sure it fits snuglyand is aligned straight. Avoid cross-threading, which can cause leaks or damage.
Use a wrench to tighten the valve connection. Turn it firmly but avoid over-tightening. This can damage the valve or pipe. Tighten until the valve feels secure and does not move.
Testing The New Valve
Slowly turn the main water valve back on. Watch the new shut off valve closely. Make sure water flows smoothly without any noise or blockage. Open the faucet to let air escape from the pipes.
Check all connections around the valve for leaks. Look for water drops or wet spots. Tighten fittings slightly if you see leaks. Use a dry cloth to wipe around the valve and fittings to spot moisture easily.
Adjust the valve handle to ensure it turns easily. It should fully open and close without force. If the valve feels stuck, try loosening connections slightly or realign the valve. Confirm the water flow stops completely when the valve is off.

Credit: ruheindia.com
Maintenance Tips
Regular inspectionshelp catch problems early. Check the valve for rust, cracks, or leaks. Turn the valve off and on to ensure it moves smoothly. Look for water dripping or pooling under the sink. Catching issues early saves money and hassle.
Handling minor leakscan stop bigger damage. Tighten loose connections with a wrench. Use plumber’s tape on threads to seal small leaks. Clean around the valve to spot fresh water quickly. Replace washers or seals if leaks persist.
When to replace againdepends on wear and damage. Replace the valve if it won’t turn or leaks after repairs. Old valves may corrode inside, blocking water flow. Choose a new valve that fits your sink’s pipes. Regular checks help decide the right time.

Credit: www.youtube.com
Frequently Asked Questions
How Do I Turn Off Water Before Replacing A Shut Off Valve?
Locate the main water supply valve and turn it off completely. This stops water flow to the kitchen sink. Open the faucet to drain remaining water before starting the replacement process. This prevents leaks and water damage during valve removal.
What Tools Are Needed To Replace A Kitchen Sink Shut Off Valve?
You will need an adjustable wrench, pipe cutter, plumber’s tape, a replacement shut off valve, and a bucket. These tools help safely remove the old valve and install the new one without leaks or damage.
How Long Does It Take To Replace A Shut Off Valve?
Replacing a kitchen sink shut off valve typically takes 30 to 60 minutes. Time depends on your experience and valve type. Preparing tools and shutting off water beforehand speeds up the process.
Can I Replace A Shut Off Valve Without Professional Help?
Yes, if you have basic plumbing skills and the right tools. Follow safety steps like shutting off water and draining pipes. However, call a plumber if unsure to avoid costly mistakes.
Conclusion
Replacing a kitchen sink shut off valve is simple with clear steps. Turn off the main water supply first. Use the right tools to avoid damage. Take your time and follow safety tips carefully. Double-check for leaks after installation. A working valve helps control water flow easily.
This small fix saves money and prevents bigger problems. Keep your kitchen plumbing in good shape with regular checks. You can handle this task, even as a beginner. Stay patient and work carefully for the best results.


