Is your kitchen sink faucet loose or wobbling every time you turn it on? A shaky faucet isn’t just annoying—it can lead to leaks and water damage if left unchecked.
But don’t worry, tightening your kitchen sink faucet is easier than you think. In this guide, you’ll discover simple, step-by-step tips to fix that loose faucet quickly and confidently. Keep reading to take control of your kitchen and avoid costly repairs down the road.
Your faucet—and your peace of mind—will thank you!
Identify The Leak Source
Check the faucet handlesfor any looseness or movement. Tighten the screws if the handles feel wobbly. Loose handles can cause leaks or drips.
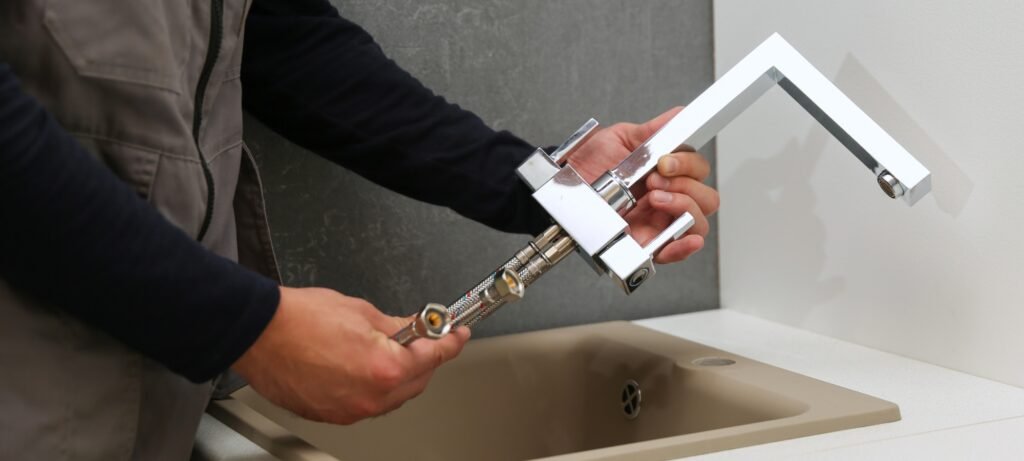
Look closely at the spout and baseof the faucet. Water may leak from the base where the spout connects to the sink. Tighten any visible nuts or fittings under the sink to stop leaks.
Use a cloth to dry the area and watch for fresh water drops. This helps find the exact leak source. Fixing the leak early can save water and prevent damage.

Credit: www.reddit.com
Gather Necessary Tools
Gathering the right toolsis key to tightening your kitchen sink faucet. A few common tools often needed include:
- Adjustable wrenchfor loosening or tightening nuts.
- Screwdriver(flathead or Phillips) to remove screws.
- Plumber’s tapeto wrap around threads and prevent leaks.
- Allen wrenchfor hex screws on some faucets.
- Flashlightto see under the sink clearly.
Safety is important. Turn off the water supply before starting. Wear gloves to protect your hands from sharp edges. Keep the area dry to avoid slipping. Use tools carefully to avoid damage to the faucet or yourself.
Turn Off Water Supply
First, find the shutoff valvesunder the sink. These are usually two handles. One for hot water, and one for cold water. Turn both handles to the right. This will stop the water flow. Make sure they are tight. This helps avoid leaks.
Open the faucet to release leftover waterin the pipes. Let it run until the water stops. This ensures no water spills when fixing the faucet. Keep a towel handy to catch any drips.
Remove Faucet Components
Start by turning off the water supply under the sink. Use a screwdriver or Allen wrench to remove the handle caps. Then, gently pull the handlesoff the faucet. Keep the screws in a safe place to avoid losing them.
Once the handles are off, use a wrench to loosen the retaining nutsholding the faucet parts. Carefully remove the parts to access the internal components. Check for any worn-out washers or seals. These parts often cause leaks or looseness.
Tighten Loose Parts
Loose kitchen sink faucets cause water leaks and waste. Tightening them stops leaks and saves water.
Secure the mounting nuts under the sink. These nuts hold the faucet to the sink. Use a wrench to turn them clockwise until firm. Avoid over-tightening to prevent damage.
Adjust the packing nuts if the faucet handle feels loose. These nuts sit near the base of the faucet handle. Use an adjustable wrench to tighten them slightly. Test the handle to see if it moves less.
- Turn off the water supply before starting.
- Use the correct size wrench for nuts.
- Check for leaks after tightening.
- Do not force nuts too hard.

Credit: www.reddit.com
Replace Worn Out Parts
Worn out parts cause leaks and loose faucet handles. Changing washers and O-ringsoften fixes these issues quickly. These small rubber pieces wear down over time. Remove the faucet handle to access them. Replace old washers and O-rings with new ones of the same size.
Cartridges control water flow inside the faucet. Upgrading cartridgeshelps if leaks persist after changing washers. Cartridges can wear or get clogged. Purchase a compatible cartridge for your faucet model. Remove the old cartridge carefully and install the new one following instructions.
Reassemble Faucet
Place the handles back onto the faucet stems carefully. Align each handle so it fits snugly onto the base. Tighten the screws or nuts that hold the handles in place. Make sure the screws are secure but do not overtighten to avoid damage.
Check the alignment of the handles by moving them gently. Handles should turn smoothly without wobbling. If handles feel loose or uneven, adjust their position. Tighten the screws again if needed.

Credit: carolinagirlcooks.com
Test For Leaks
Turn on the main water supply to the kitchen sink faucet slowly. Check if water flows smoothly without any strange noises. Watch carefully around the faucet base and handles for any drops or moisture. A tight faucet should not leak or drip during use.
Observe how the faucet operates by turning it on and off multiple times. Notice if water pressure feels steady and strong. Pay attention to any unusual sounds like hissing or dripping. These signs can show if the faucet needs further tightening or repair.
Prevent Future Loosening
Regular checks help keep the faucet tight and working well. Look under the sink for any loose parts or leaks. Tighten connections with a wrench carefully. Clean faucet parts to stop dirt build-up that can loosen fittings.
Thread sealants make a big difference. Apply them on the faucet’s threaded parts before tightening. This stops water leaks and holds connections firmly. Use plumber’s tape or pipe dope for best results.
- Check faucet tightness every few months.
- Clean faucet parts gently with a soft cloth.
- Apply thread sealant on threads before tightening.
- Avoid over-tightening to prevent damage.
- Replace worn washers or seals quickly.
Frequently Asked Questions
How Do I Tighten A Loose Kitchen Sink Faucet?
To tighten a loose faucet, first turn off the water supply. Locate the mounting nuts under the sink. Use a basin wrench to tighten these nuts securely, ensuring the faucet is stable without overtightening.
What Tools Are Needed To Tighten A Kitchen Faucet?
You need a basin wrench, adjustable wrench, and possibly a screwdriver. These tools help reach and tighten nuts under the sink easily. Having a flashlight can also help see in dark areas.
How Can I Prevent My Kitchen Faucet From Loosening?
Regularly check and tighten mounting nuts under the sink. Avoid using excessive force on the faucet handle. Inspect for worn parts and replace them promptly to maintain stability and prevent loosening.
Can Tightening A Faucet Fix Leaks Around The Base?
Yes, tightening the faucet can stop leaks caused by loose mounting. If the leak persists, check the O-rings and seals for damage and replace if needed to ensure a tight, leak-free fit.
Conclusion
Tightening a kitchen sink faucet is a simple fix anyone can do. You only need a few basic tools and some patience. Start by turning off the water supply. Then, follow the steps carefully to avoid leaks. Check your work by turning the water back on slowly.
A tight faucet stops drips and saves water. It also keeps your kitchen clean and dry. Small repairs like this prevent bigger problems later. Keep your faucet in good shape and enjoy a smooth-running sink every day.


