Are you tired of looking at your worn-out kitchen cabinets but hesitant about the cost of replacing them? What if we told you that you could transform your kitchen with a fresh, modern look without breaking the bank?
Painting your kitchen cabinets is not just a budget-friendly option; it’s a fun and satisfying project that can breathe new life into your space. Imagine the pride and satisfaction you’ll feel when you see the stunning results of your handiwork every day.
In this guide, we’ll walk you through each step of the process, making it simple and achievable, even if you’re not a DIY expert. Get ready to roll up your sleeves and discover how easy it is to paint your kitchen cabinets like a pro. Keep reading to unlock the secrets to a kitchen makeover that will leave you and your guests amazed.
Choosing The Right Paint
Selecting the right paint is crucial for kitchen cabinets. Durability is key, as cabinets face daily wear. Oil-based paints offer a hard finish but need more drying time. Water-based paints dry faster and have less odor. Choose semi-gloss or high-gloss finishes for easy cleaning. These finishes resist stains and splashes. Consider the color carefully. Neutral tones like white or beige brighten the space. Bold colors can add personality but may require frequent updates. Some paints come with built-in primer. This saves time and effort. Always check the paint label for compatibility with surfaces. Ensure the paint is suitable for wood or laminate. Test a small area before painting the entire cabinet. This avoids surprises and helps confirm your choice.
Gathering Essential Tools
Painting kitchen cabinets needs some important tools. First, you need a good paintbrush. It helps you paint the corners. Next, get a roller for flat surfaces. It makes the job faster. Sandpaper is also needed. It helps in smoothing the cabinet’s surface. Don’t forget a screwdriver. It is used to remove the cabinet doors. Painter’s tape is very important. It helps in protecting areas you don’t want to paint. You will also need a drop cloth. It keeps your floor clean from spills.
Having a small bucket is useful. It holds the paint you use. A primer is another must-have. It helps the paint stick better. Remember to wear old clothes. Painting can get messy. Safety goggles protect your eyes from splashes. Finally, keep a damp cloth nearby. It cleans up small mistakes quickly.
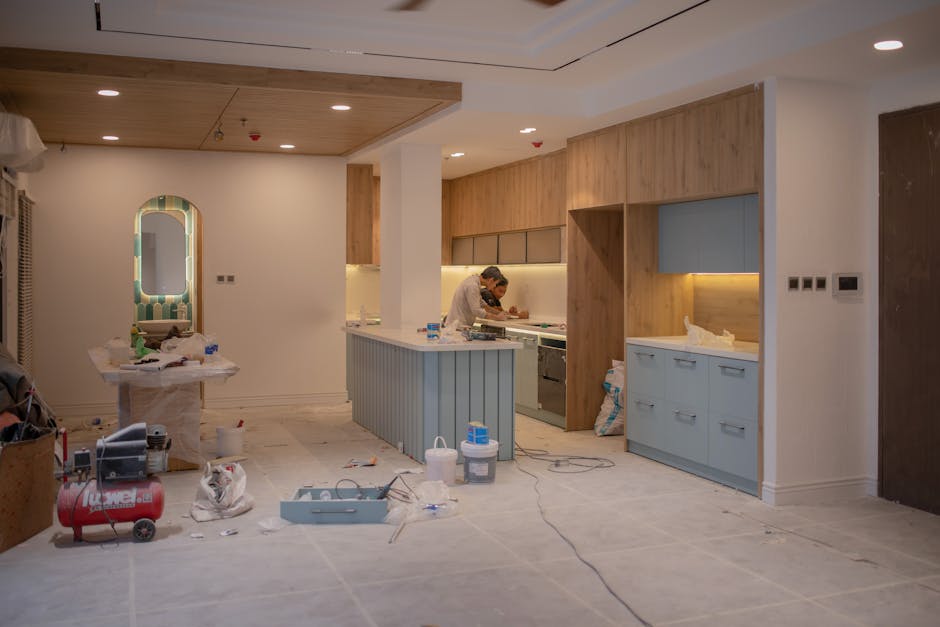
Preparing The Cabinets
Cleaningis the first step. Use a gentle soap and water mix. Wipe the cabinets well. Make sure they are dry.
Next, remove all handlesand knobs. Put them in a safe place. This makes painting easier.
Use sandpaper to smooth the surface. This helps the paint stick. Be gentle and thorough.
Fill any holes or cracks with wood filler. Let it dry completely. Then, sand again for a smooth finish.
Finally, apply a primer. The primer helps paint stick better. Wait for it to dry fully.
Priming For Perfection
Start by cleaning the cabinets well. Remove all grease and dirt. Use a mild soap and water solution. Let the cabinets dry completely. Sand the surface lightly with fine sandpaper. This helps the primer stick better. Wipe off the dust with a clean cloth.
Choose a good primer for your kitchen cabinets. Oil-based primers are strong and effective. Water-based primers dry quickly and are easier to clean. Apply a thin coat of primer with a brush or roller. Make sure to cover all areas evenly. Allow the primer to dry for the recommended time.
Inspect the cabinets for any spots you missed. Apply a second coat if needed. Let it dry completely before painting. A well-primed surface ensures smooth and lasting paint. Now, your cabinets are ready for the final color!
Painting Techniques
Begin by preparing the cabinet surface well. Clean all surfaces with a damp cloth. Remove dirt and grease for better paint adhesion. Sand the cabinet lightly to smooth rough areas. Use a fine-grit sandpaper for delicate surfaces. After sanding, wipe the cabinet again. Remove any dust before painting. This helps the paint stick better.
Choose a good quality primer for the base coat. Apply the primer evenly across all surfaces. Let it dry completely before painting. Use a small brush for corners and edges. A roller can cover large flat areas quickly. Apply the paint in thin layers. This prevents drips and uneven coverage. Let each coat dry fully before adding another.
For best results, use a clear topcoat. This protects the paint and adds shine. Allow the cabinet to dry thoroughly before use. This ensures a smooth, durable finish.
Finishing Touches
Apply a second coat for a smooth finish. Let it dry completely. Sand lightly if there are bumps. Use fine grit sandpaper for this step. Wipe away dust with a damp cloth.
Install cabinet hardware carefully. Ensure screws are tight. Check alignment of handles and knobs. Use a level to keep them straight.
Inspect the painted surface closely. Look for any missed spots. Touch up with a small brush if needed. Clean the area around the cabinets. Remove any paint spills immediately.
Frequently Asked Questions
What Tools Do I Need To Paint Cabinets?
To paint kitchen cabinets, you’ll need a screwdriver, sandpaper, primer, paint, brushes, and a roller. Use a screwdriver to remove cabinet doors. Sandpaper will help smooth surfaces. Primer ensures paint adherence. A good-quality paint and brushes will give a professional finish.
How To Prepare Cabinets Before Painting?
Start by removing all cabinet doors and hardware. Clean surfaces with a degreaser to remove grease. Sand surfaces lightly for smoothness. Apply a primer to ensure paint adheres well. Proper preparation is key to a long-lasting finish.
Can I Paint Cabinets Without Removing Doors?
Yes, but it’s not recommended. Removing doors ensures even coverage and prevents drips. If you must paint without removing, use painter’s tape to protect hinges and surrounding areas. This method requires careful handling and attention to detail for best results.
How Long Does Cabinet Paint Take To Dry?
Cabinet paint typically dries to the touch in 4-6 hours. However, it’s best to allow 24 hours before reattaching hardware and doors. For optimal durability, avoid heavy use for about a week. This ensures the paint fully cures and adheres properly.
Conclusion
Painting kitchen cabinets transforms your space with minimal effort. It saves money and adds a fresh look. Start with clean, dry surfaces. Choose the right paint for lasting results. Good prep work ensures a smooth finish. Use brushes or rollers for even coverage.
Protect floors and countertops while you work. Let each coat dry completely before applying the next. Enjoy a brighter kitchen that feels new. Remember, patience is key. A little care goes a long way in achieving a stunning transformation. Happy painting!