
Are you tired of that leaky, outdated kitchen sink causing you endless frustration? Imagine transforming your kitchen into a space that’s not only functional but also a source of pride.
Changing your kitchen sink might seem like a daunting task, but it’s easier than you think, and you’re about to discover how simple it can be. With the right guidance, you can replace that old fixture and give your kitchen a fresh, new look.
In this step-by-step guide, you’ll learn exactly how to change your kitchen sink, saving money on professional installation and gaining the satisfaction of completing a DIY project. Stick around and find out how you can enhance your kitchen without the hassle.
Tools And Materials Needed
Changing a kitchen sink requires some basic toolsand materials. A wrench is very important. It helps in loosening nuts. A screwdriver is needed too. It helps with screws. Plumber’s putty is a must. It seals the sink edges. Ensure you have a bucket. It collects water spills. Pliers are useful. They grip and twist parts. A tape measure is essential. It helps in taking measurements. Also, have a new sinkready. Ensure it fits your space. A new faucet might be needed too. It completes the look. Lastly, keep towels nearby. They help clean spills.
Preparation Steps
First, find the water valves under the sink. There are usually two valves. One for hot water and one for cold water. Turn them both clockwise to stop the flow. This is important to avoid water spills. After turning the valves, check the faucet. Ensure no water comes out. Double-checking is always good.
Remove all items from under the sink. This includes cleaning supplies, bins, or other stuff. Keep the area clear for easy movement. It helps you see and reach all parts. Use a flashlight if it’s dark. Ensure nothing is in your way. You need a clear workspace. A clean area makes work easier and faster.
Removing The Old Sink
Start by turning off the water supply. Use a wrench to disconnect the pipes. Catch any water in a bucket. Remove the drain and loosen the P-trap. Be careful, pipes can be messy!
Look under the sink. Find the fasteners holding it. Use a screwdriver or wrench to loosen them. Some sinks have clips or brackets. Remove them carefully. Keep all screws safe.
Check if the sink is free. Lift it gently. Ask for help if it’s heavy. Avoid scratching the counter. Clean the area once the sink is out. Prepare for the new sink.

Credit: www.youtube.com
Installing The New Sink
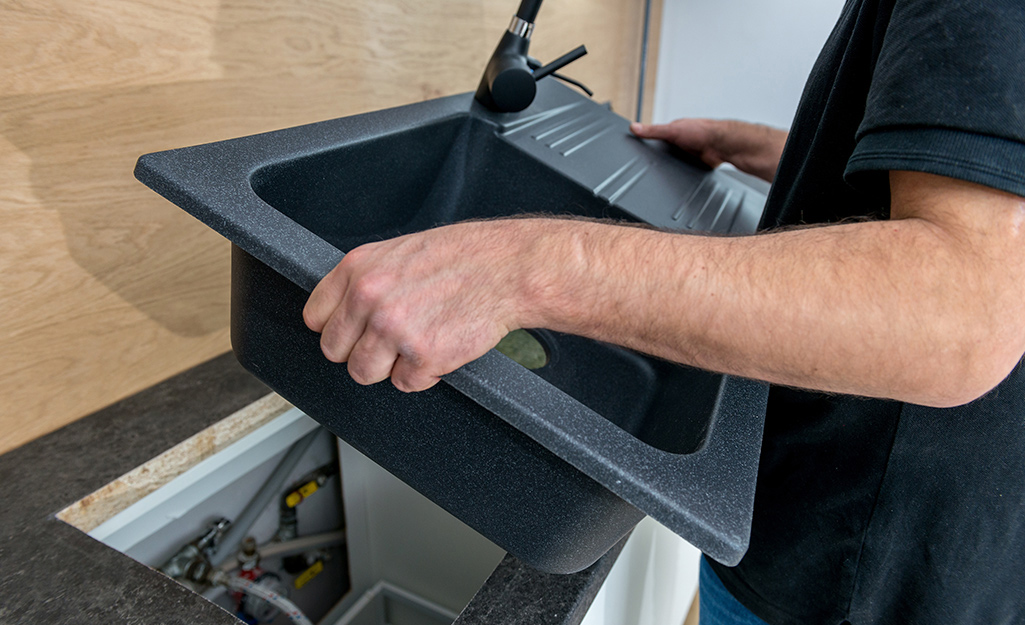
The new sink should fit well in the countertop hole. Ensure it is centered properly. This helps prevent leaks. Check that the sink edges sit flat. If not, adjust it until it is even. Use a level tool to be sure. A flat sink works best.
Fasteners keep the sink in place. First, locate the mounting clips. These are usually under the sink. Tighten them with a screwdriver. This holds the sink tight to the counter. Make sure all clips are secure. Use extra clips if needed for better hold. Now, the sink is ready for use.
Connecting Plumbing
Changing a kitchen sink involves connecting plumbing efficiently. Start by turning off the water supply. Remove old sink carefully and install the new one. Securely connect pipes to prevent leaks, ensuring a snug fit for optimal functionality.
Attach Drain Pipes
Start by connecting the drain pipes under the sink. Make sure the pipes are aligned properly. Use a wrench to tighten the connections. Check for any leaks by running water through the sink. If you see water dripping, tighten the connections more. Apply plumber’s tape to the threads if needed. This helps to prevent leaks. Ensure the trap is in place to catch debris.
Connect Water Lines
First, turn off the water supply to the sink. Attach the water lines to the faucet. Use a wrench to secure them tightly. Turn the water back on slowly. Check for any leaks around the connections. Tighten if you see any water. Make sure the hot and cold lines are connected correctly. Test the faucet to ensure water flows smoothly. Adjust the connections if needed.
Credit: www.homedepot.com
Testing And Final Adjustments
Ensure the sink is securely installed by checking connections and seals. Adjust faucet and drain components for smooth operation. Test water flow and check for leaks to guarantee everything functions properly.
Check For Leaks
Turn on the water gently. Look under the sink for any leaks. Check around the pipes and the sink drain. Tighten any loose connections you find. Use a dry cloth to wipe up water. This helps to spot new leaks. Make sure all parts are secure. Watch carefully for a few minutes.
Adjust Faucet Operation
Turn the faucet on and off. Make sure it runs smoothly. Check both hot and cold settings. Feel the water temperature. Adjust the handle if needed. Make sure it is easy to move. Listen for strange sounds. If something sounds wrong, check the installation. Small adjustments can make a big difference. Everything should feel right and work well.
Maintenance Tips
Check the sink seals regularly. Water can cause damage if seals are broken. Keep an eye out for leaks under the sink. Fix leaks quickly to avoid bigger problems. Clean the sink with a soft sponge. Harsh scrubs can scratch the surface. Use mild soap for cleaning. Rinse well to remove soap residue. Dry the sink after use to prevent water spots. Avoid using the sink as a cutting board. Knives can leave marks on the sink.
Tighten any loose fixtures promptly. Loose faucets can lead to leaks. Inspect the plumbing connections once a month. Properly maintained connections prevent leaks. Replace any worn-out washers. Old washers can cause dripping faucets. Check the drain for clogs. Remove debris to ensure smooth water flow.

Credit: housebythepreserve.com
Frequently Asked Questions
How Do I Remove An Old Kitchen Sink?
To remove an old kitchen sink, first turn off the water supply. Disconnect plumbing connections, then loosen and remove the mounting clips underneath. Carefully lift the sink out of the countertop. Ensure you clean the surrounding area before installing the new sink.
What Tools Are Needed To Change A Kitchen Sink?
To change a kitchen sink, you’ll need a wrench, plumber’s putty, screwdriver, and caulk. A bucket can help catch any water spills. Having these tools ready will streamline the process and ensure a smooth installation.
Can I Change A Kitchen Sink Myself?
Yes, you can change a kitchen sink yourself with some basic plumbing skills. Follow step-by-step instructions and ensure you have the right tools. If unsure, consult a professional to avoid potential water damage.
How Long Does It Take To Replace A Sink?
Replacing a kitchen sink typically takes 2 to 4 hours. The time depends on your experience and the complexity of the setup. Ensure you have all tools and materials ready for a smoother process.
Conclusion
Changing a kitchen sink can be a rewarding task. You gain new skills while improving your kitchen. Start by gathering your tools and materials. Follow each step carefully for a smooth process. Take your time to ensure proper installation. This task boosts your confidence in DIY projects.
You also save money on professional services. Remember, practice makes perfect with home improvements. Enjoy the satisfaction of doing it yourself. The kitchen sink transformation brings a fresh look to your space. Celebrate your achievement and enjoy your upgraded kitchen!





