Are you tired of dealing with a leaky or clogged kitchen sink drain? You’re not alone.
Many homeowners face this frustrating problem, and the good news is, you don’t need to be a plumbing expert to fix it. Imagine the satisfaction of tackling this task yourself, saving time and money, and gaining a handy skill in the process.
In this guide, we’ll walk you through the straightforward steps to connect a kitchen sink drain. By the end, you’ll not only have a smoothly running sink but also the confidence to handle minor plumbing tasks around your home. Ready to dive in and make your kitchen sink work like a charm? Let’s get started!
Essential Tools And Materials
You’ll need a few basic toolsfor this task. Grab a wrench, screwdriver, and plumber’s tape. A bucketwill be useful for catching water. Ensure you have a new drainpipeand any rubber washersrequired.
Having the right tools and materialsmakes the job easier. Check the drainpipe size to get the right fittings. If the pipe is damaged, replace it. A clean clothis handy to wipe away dirt.
Gather everything before starting. This saves time and reduces stress. Make sure all tools are in good condition. They should not be rustyor broken.
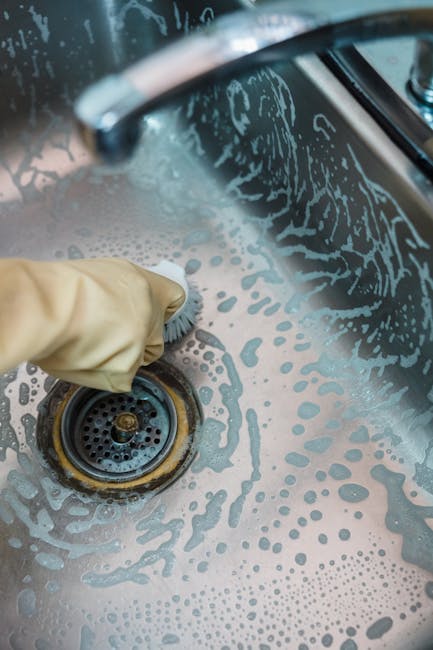
Preparing The Sink Area
Ensure the area under the sink is clean and dry. Clear away any items. Look for old pipes or materials that need replacing. You might find old gaskets or seals that need to go. Check for any leaks or water damage. This helps in fixing the new drain right. Gather all needed tools and parts. A wrench, bucket, and plumber’s putty are essential. Have everything ready to avoid interruptions. Keep a towel nearby for spills. This makes the process smoother and mess-free.
Installing The Drain Flange
Start by placing the drain flangeinto the sink’s drain hole. Make sure it fits snugly. This part helps connect the sink to the pipes.
Next, you need to use plumber’s putty. Roll it into a long snake shape. Place it under the edge of the drain flange. This creates a watertight seal.
Now, press the flange down firmly. This action squeezes out the extra putty. Wipe away any extra putty with a cloth. It should look neat.
Finally, tighten the nut under the sink. Use a wrench to make it secure. Check if it’s tight enough by gently wiggling the flange. If it doesn’t move, you’re done.
Connecting The Drain Pipe
Begin by placing the drain pipe under the sink. Make sure it’s aligned with the sink’s drain hole. Attach the gasket to the pipe’s end. This prevents leaks. Insert the pipe into the sink’s drain hole. Tighten the nut to secure it. Don’t over-tighten. This may cause damage. Check if the pipe is snugly fit. Adjust if necessary.
Connect the other end of the pipe to the wall drain. Use a fitting to join them. Ensure a tight seal. Test for leaks by running water. Look for dripping or puddles. If leaks occur, re-tighten the connections. Verify the alignment of the pipes. Proper alignment is crucial.
Keep the area clean while working. Remove any debris around the sink. This helps maintain a neat workspace. A clean area prevents mistakes. Use a flashlight if visibility is poor. Good lighting improves accuracy.
Securing The P-trap Assembly
Start by gathering all your tools. You will need a wrench, a P-trap kit, and plumber’s tape. Make sure you have a bucket ready too. This will catch any water.
Next, connect the P-trap to the sink drain. Align the pieces carefully. Use your wrench to tighten the nuts. Don’t over-tighten them. They should be snug, not too tight.
Now, wrap plumber’s tape around the threads. This helps prevent leaks. Make sure the tape is smooth. No wrinkles or gaps.
Finally, check your work. Run water through the sink. Look for leaks under the sink. Tighten any loose parts if needed.
Testing For Leaks
Start by running water into the sink. Observe the drain pipes closely. Check for any drips or moisture around joints. Use a flashlight for better visibility.
If you notice any leaks, tighten the connections. Sometimes, a simple twist can stop a leak. Use a wrench if needed, but be gentle.
Place a dry paper towel under the pipes. Wait for a few minutes. Check the towel for wet spots. This helps find hidden leaks.
Don’t forget to inspect the area where the pipe meets the wall. Leaks can hide in tricky spots. Make sure all connections feel secure.
Once everything looks dry, your drain should be ready. Regular checks prevent future problems. Keeping an eye out helps avoid major repairs.
Frequently Asked Questions
How Do I Choose The Right Drain Size?
Selecting the correct drain size is crucial for proper installation. Measure your sink’s drain opening accurately to ensure compatibility with the drain kit. Most kitchen sinks use a standard size, but always double-check. A snug fit prevents leaks and ensures efficient drainage.
What Tools Do I Need To Connect A Sink Drain?
You’ll need a few basic tools: a pipe wrench, plumber’s tape, and a screwdriver. These tools help in securely fastening the connections and ensuring leak-free installation. Having the right tools at hand makes the process smoother and more efficient.
Can I Connect A Sink Drain Myself?
Yes, connecting a sink drain is a manageable DIY task. With the right tools and instructions, most homeowners can complete it successfully. Ensure you follow the manufacturer’s guidelines and check for leaks after installation. If unsure, consulting a professional is advisable.
What Are Common Mistakes To Avoid?
Common mistakes include using incorrect drain sizes or over-tightening connections. These can lead to leaks or damage. Always use the right tools and follow instructions carefully. Double-checking connections before use can prevent issues and ensure a successful installation.
Conclusion
Successfully connecting your kitchen sink drain improves everyday convenience. Ensure all parts fit snugly, preventing leaks. Regular checks help maintain a clean, efficient system. Problems are easier to solve when caught early. Don’t rush; patience leads to better results. Proper installation enhances your kitchen’s function.
Enjoy a well-working sink for years. Basic tools and clear instructions make the task manageable. Seek professional help if needed. Always prioritize safety during installation. A little effort today saves time tomorrow. With the right approach, your kitchen sink drain works seamlessly.


