
Is the constant drip-drip-drip of your kitchen faucet driving you up the wall? You’re not alone.
A dripping single handle kitchen faucet is more than just a minor annoyance; it can inflate your water bill and even damage your sink over time. But here’s the good news: you can fix it yourself without calling in a pricey plumber.
Imagine the satisfaction of turning off the faucet and hearing—nothing at all. Silence is golden, especially when it means saving money and preventing future headaches. You’ll discover simple, step-by-step instructions to tackle that pesky drip once and for all. Ready to reclaim your peace and quiet? Let’s dive in!

Credit: www.tiktok.com
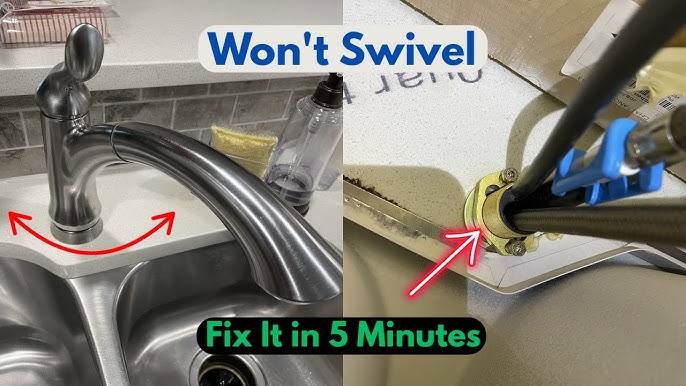
Identify The Source Of The Drip
Identifying the source of the drip is crucial for fixing a single handle kitchen faucet. Check for leaks from the spout, handle, or base.
Check The Handle
Make sure the handle is tight. Loose handles can cause drips. Use a wrench to tighten the handle. If the drip continues, the handle might be broken. Check for any visible cracks or damage. Replace the handle if needed.
Inspect The Spout
Look at the spout closely. Sometimes dirt or debris causes leaks. Clean the spout with a soft cloth. Ensure no blockages are present. If the spout is damaged, it needs replacement. Check for cracks or holes.
Examine The Base
Check the base of the faucet. Ensure it is tightly secured. Use a wrench if it is loose. A loose base can lead to leaks. Look for worn-out washers. Replace them if necessary. Ensure all connections are sealed properly.
Credit: www.youtube.com
Gather Necessary Tools
To fix a dripping kitchen faucet, gather some basic tools. You will need a screwdriver to remove screws. A wrench will help with nuts and bolts. A bucket can catch drips and water spills. Have a cloth to wipe surfaces clean. Use a flashlight to see in dark spots.
Some tasks need special tools. A faucet cartridge puller helps remove old parts. Allen wrenches fit specific screws. A plumber’s tape stops leaks. Slip-joint pliers adjust parts snugly. Keep these tools handy for smooth repairs.
Turn Off The Water Supply
The shut-off valve is under the sink. Twist it clockwise to close. This stops the water flow. Check if the faucet drips. If it does, twist tighter. This ensures the water is completely off.
Turn the faucet handle. Let the leftover water flow out. This prevents spills during repair. Wait until no more water drips. Now, the faucet is ready for fixing.
Disassemble The Faucet
Begin by shutting off the water supply to prevent any leaks. Carefully remove the handle to access the internal components. Unscrew the retaining nut and extract the cartridge, checking for any wear or damage.
Remove The Handle
Turn off the water supply first. Look for a screw on the handle. Use a screwdriver to remove it. Pull the handle off the faucet. Be gentle to avoid damage.
Take Off The Cap Or Cover
Look for a cap under the handle. Use a flat tool to pry it off. Keep the cap safe, you will need it later. Check for any hidden screws inside.
Extract The Cartridge Or Valve
Find the cartridge inside. Use pliers to carefully pull it out. Check the cartridge for damage. Replace it if necessary. Ensure everything is clean before reassembly.
Inspect And Replace Damaged Parts
Inspect and replace damaged parts to fix a dripping single handle kitchen faucet effectively. Check for worn-out washers or seals. Replace them to stop the leak.
Check The Cartridge
Turn off the water supply first. Remove the handle carefully. You will find the cartridge inside. Look for cracks or damage. If damaged, it must be replaced. A damaged cartridge causes leaks. Remember to buy the exact same type.
Examine O-rings And Washers
O-Rings and washers prevent leaks. Take out the old ones. Check them for wear or tear. Replace if you see any damage. Ensure they fit snugly. Proper fitting stops the dripping.
Install New Parts
Place new cartridge, O-rings, and washers. Make sure they fit correctly. Tighten everything securely. Turn on the water supply. Check if the faucet stops dripping. Your kitchen faucet should work well now.
Reassemble The Faucet
Reassemble the faucet after inspecting and cleaning parts thoroughly. Ensure all components fit snugly to avoid future leaks. Tighten screws and secure the handle to restore functionality efficiently.
Reattach The Cartridge
Align the cartridge with the faucet base. Push it gently into place. Ensure it is seated properly. Use the retaining nut to secure it. Tighten the nut with a wrench. Be careful not to over-tighten. This can damage the cartridge.
Secure The Handle
Place the handle back over the cartridge. Align it with the stem. Use a screwdriver to fasten the screw. Check the handle is secure. It should not wobble or move. Ensure the handle moves smoothly. This ensures proper water flow control.
Test For Leaks
Turn on the water supply. Check for any leaks around the faucet. Look at the base and handle area. If leaks occur, tighten connections. Use a wrench gently. Ensure all parts are secure. No leaks mean your faucet is fixed.
Prevent Future Drips
Fix a dripping single handle kitchen faucet by tightening loose parts and replacing worn washers. Regular maintenance prevents future drips and ensures smooth operation.
Regular Maintenance Tips
Check the faucet for leaks every month. Tighten any loose parts. Clean the aerator to remove dirt and mineral deposits. Replace worn-out washers and seals. Use a soft cloth to clean the faucet surface. Avoid using harsh chemicals. Ensure the valve is free from debris. Lubricate moving parts to keep them smooth. Adjust the handle to prevent excess pressure. These steps help maintain the faucet’s longevity.
Importance Of Quality Parts
Choose high-quality parts for repair. They last longer and work better. Avoid cheap parts; they may fail quickly. Brand-name parts often fit better. They are also durable. Check for warranty when buying parts. This ensures you can replace them if faulty. Always keep extra parts handy. They can be useful in emergencies.

Credit: m.youtube.com
Frequently Asked Questions
How Do I Stop A Faucet From Dripping?
To stop a dripping faucet, first, turn off the water supply. Then, disassemble the handle to access the cartridge. Check for worn-out parts and replace any damaged components. Reassemble the faucet and turn the water back on to test for leaks.
What Tools Are Needed To Fix A Faucet?
To fix a dripping faucet, you’ll need a wrench, screwdriver, and pliers. Additionally, have a replacement cartridge or O-rings on hand. Ensure you have a towel or bucket to catch any water spills during the repair process.
Why Is My Kitchen Faucet Dripping?
A kitchen faucet may drip due to worn-out washers, seals, or cartridges. Mineral deposits can cause parts to malfunction. Regular maintenance and timely replacement of damaged components can prevent drips and leaks.
Can A Dripping Faucet Increase Water Bills?
Yes, a dripping faucet can significantly increase your water bills. Even a small drip wastes gallons of water over time. Fixing leaks promptly can save money and conserve water, making it an eco-friendly choice.
Conclusion
Repairing a dripping faucet saves money and prevents water waste. Regular maintenance extends your faucet’s lifespan. Follow the steps to fix it yourself. Tools like a wrench and screwdriver are essential. Shut off the water before starting. Inspect parts carefully for wear and tear.
Replace damaged components promptly. Tighten loose connections. Test your faucet after repairs. You should notice a positive change. A little effort leads to great results. Enjoy a leak-free kitchen and peace of mind. Remember, DIY fixes are rewarding and practical.
Your kitchen faucet can work efficiently again. Stay proactive with your plumbing care.


