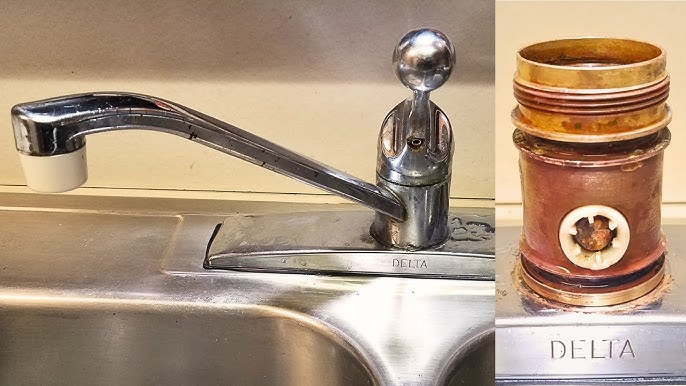
Is your single handle kitchen faucet leaking, dripping, or not working right? You don’t have to call a plumber just yet.
Fixing it yourself can save you time and money. In this guide, you’ll learn simple steps to get your faucet running smoothly again. Imagine turning on your tap and having water flow perfectly, without any hassle. Keep reading, and you’ll discover easy tips that anyone can follow—even if you’ve never fixed a faucet before.
Your kitchen deserves it!

Credit: www.youtube.com
Tools Needed
Gathering the right toolsmakes fixing a kitchen faucet easier. You will need:
- Adjustable wrenchto loosen and tighten nuts.
- Screwdrivers(both flathead and Phillips) for screws.
- Allen wrenchto remove handle set screws.
- Pliersfor gripping and turning parts.
- Replacement partslike O-rings or cartridges.
- Plumber’s tapeto seal threads and prevent leaks.
- Bucketto catch water spills.
- Cleaning clothto wipe surfaces.
Having these tools ready saves time and avoids frustration.

Credit: www.youtube.com
Shut Off Water Supply
Locate the water valves under the sink. These control hot and cold water flow. Turn both valves clockwise to close them. This stops water from reaching the faucet.
Check if the water is off by turning on the faucet. No water should come out. If water still flows, look for the main water shut-off in the house. Turn it off to stop water completely.
Place a bucket or towel under the pipes. This catches any water left in the lines. It helps keep the area dry while fixing the faucet.
Remove Faucet Handle
First, locate the set screwon the faucet handle. It is usually hidden under a small cap or on the side of the handle. Use a flathead screwdriver or an Allen wrench to remove the screw carefully. This screw holds the handle tightly in place.
Once the set screw is removed, lift the handle offthe faucet. Sometimes the handle may be stuck due to mineral buildup. Gently wiggle it up and down while pulling upwards. Avoid using too much force to prevent damage.
If the handle does not come off easily, applying a little bit of lubricantaround the base can help loosen it.
Inspect Cartridge
The cartridgecontrols water flow and temperature. Check it for any visible cracksor worn parts. If damaged, it should be replaced to stop leaks or poor water flow.
Cleaning the cartridge can fix many faucet problems. Use a soft brush and vinegarto remove mineral buildup. Avoid harsh chemicals that may harm the cartridge material.
After cleaning, rinse the cartridge well. Dry it before placing it back into the faucet. This helps the faucet work smoothly again.
Replace Cartridge
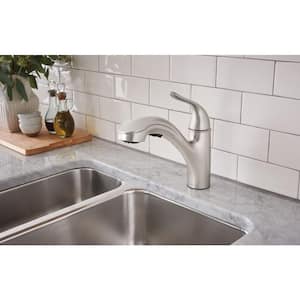
To fix your faucet, begin by replacing the cartridge. First, choose the correct replacementcartridge. Check your faucet’s model number. This helps in finding the right part. Visit a hardware store or search online. Ensure the cartridge matches your faucet.
Finding the right cartridge is very important. Bring your old cartridge to the store. Compare it with new ones. Ask a store assistant for help if needed. This ensures you get the right fit.
Once you have the correct cartridge, begin installation. First, turn off the water supply. Remove the handle by unscrewing it. Take out the old cartridge carefully. Insert the new cartridge in its place. Secure it properly. Reattach the handle and turn on the water. Check for leaks. If all is well, your faucet is fixed!
Credit: www.homedepot.com
Reassemble Faucet
Begin by placing the cartridge back into the faucet body. Make sure it sits properly and aligns with the slots. Next, secure the cartridge with the retaining clip or nut. Tighten it, but avoid over-tightening to prevent damage.
Slide the handle back onto the cartridge stem. Press it firmly to fit snugly. Reattach the handle screw and tighten it with a screwdriver. Place the decorative cap over the screw to hide it.
Turn on the water supply and test the faucet for leaks. Move the handle to check water flow and temperature control. If everything works well, the faucet is successfully reassembled.
Test Faucet Operation
Turn on the water supply valve slowly to avoid sudden pressure. Check that water flows smoothly from the faucet. Watch for any drips or puddles under the sink. Tighten connections if you spot leaks. Make sure the faucet handle moves freely and controls water flow well. Test both hot and cold water to confirm proper temperature control.
- Open the water supply valve carefully.
- Observe water flow and pressure.
- Look beneath the sink for leaks.
- Tighten loose fittings if needed.
- Move the handle to check operation.
- Test hot and cold water separately.
Tips For Maintenance
Regular cleaninghelps keep your faucet working well. Use a soft cloth and mild soap to wipe the surface. Avoid harsh chemicals that can damage the finish.
Check for leaksaround the handle and spout. Tighten loose parts gently with a wrench. Replace worn-out washers or cartridges as needed.
- Turn off the water supply before any repair.
- Remove mineral buildup by soaking parts in vinegar.
- Lubricate the cartridge to keep the handle moving smoothly.
- Inspect O-rings and seals regularly and replace if cracked.
Test the faucet after maintenance. Make sure water flow is steady and no drips occur.
Frequently Asked Questions
How Do I Fix A Leaking Single Handle Kitchen Faucet?
First, turn off the water supply. Then, remove the handle and check the cartridge for damage. Replace any worn parts and reassemble. Tighten all connections securely to stop leaks effectively.
Why Is My Single Handle Faucet Handle Hard To Move?
This usually happens due to mineral buildup or worn-out cartridge parts. Clean the cartridge and lubricate it. If the problem persists, replace the cartridge to restore smooth handle movement.
Can I Replace A Single Handle Faucet Cartridge Myself?
Yes, you can replace it yourself. Turn off water, remove the handle, take out the old cartridge, and install a new one. Follow manufacturer instructions for best results.
What Tools Are Needed To Fix A Kitchen Faucet Handle?
You typically need an Allen wrench, adjustable wrench, screwdriver, and plumber’s grease. These tools help remove and replace faucet parts safely and correctly.
Conclusion
Fixing a single handle kitchen faucet is easier than it seems. Follow each step carefully and take your time. Small problems like leaks or drips can be solved quickly. Save money by doing the repair yourself. Keep tools and parts ready before you start.
If the faucet still has issues, check for worn parts or call a professional. A working faucet makes kitchen tasks smoother and less stressful. Simple fixes help maintain your home’s comfort and value. Try these tips next time your faucet acts up.





