Is that constant drip from your kitchen faucet driving you crazy? That small, steady drip might seem harmless, but it can waste a surprising amount of water and hike up your bill.
The good news is, you don’t need to call a plumber right away. You can fix this common problem yourself, even if you’re not a DIY expert. You’ll discover simple, step-by-step ways to stop that annoying drip and save both water and money.
Ready to take control of your kitchen faucet and enjoy a drip-free sink? Let’s get started!
Identify The Drip Source
Start by checking the faucet handle. Sometimes, the handle is loose or worn out. Tighten it gently or replace the handle parts if needed.
Next, inspect the spout. Look for cracks or mineral build-up that can cause dripping. Clean or replace the spout to fix leaks.
Examine the water supply linesunder the sink. Check for any signs of damage or loose connections. Tighten the fittings or replace damaged lines to stop drips.
Gather Necessary Tools
Gathering the right tools makes fixing a dripping faucet easier. Common tools include:
- Adjustable wrenchto loosen and tighten nuts.
- Screwdrivers(flathead and Phillips) for removing screws.
- Replacement washers or O-ringsto stop leaks.
- Pliersfor gripping small parts.
- Plumber’s tapeto seal pipe threads.
Safety is important. Turn off the water supply before starting.
Wear gloves to protect your hands from sharp edges.
Place a cloth in the drain to catch small parts.
Use tools carefully to avoid damage or injury.
Turn Off Water Supply
First, find the shutoff valvesunder the sink. These valves stop water flow to the faucet. Turn both valves clockwiseto close them. This action stops water from coming out during repairs.
After closing the valves, open the faucet to drain any leftover water. This step prevents water spills while fixing the drip. Water in the pipes can still drip until fully drained.

Credit: extension.msstate.edu
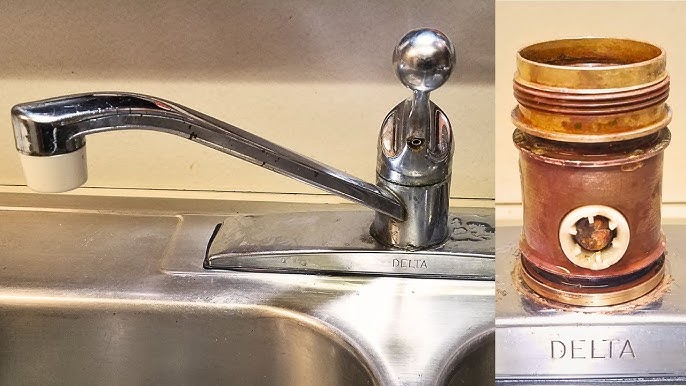
Disassemble The Faucet
Start by turning off the water supply under the sink. Use a screwdriver or an Allen wrench to remove the decorative cap on the faucet handle. Then, unscrew the handle carefully to avoid damage.
Once the handle is removed, you can see the internal parts. Use a wrench to loosen the packing nut and remove the stem or cartridge inside. This gives access to washers, O-rings, and seals that often cause dripping.
Inspect And Replace Parts
O-Rings and seals keep water inside the faucet. If they wear out, water drips. Carefully remove the faucet handle. Check the O-rings and seals. If they look worn or broken, replace them. New O-rings and seals can stop the drip. This simple fix saves water.
Washers help control water flow. Worn washers can cause drips. Remove the faucet handle and locate the washer. If it looks flat or cracked, get a new one. Fit the new washer snugly. Tighten the parts back in place. This easy step can stop the drip.
The cartridge or valve controls water. If damaged, it causes leaks. Remove the faucet handle to see it. Check for cracks or wear. If broken, replace it with a new one. Make sure it fits tightly. This can stop the faucet from dripping.

Credit: www.youtube.com
Reassemble And Test
Carefully put all faucet parts back in their place. Make sure each piece fits tightly.
Turn the water supply back on slowly. Listen for any sounds that seem odd.
- Look closely for drips or wet spots around the faucet base.
- Check under the sink for any leaks from pipes or joints.
- Test the faucet by turning it on and off a few times.
If water still drips, parts may need tightening or replacing. Otherwise, the faucet should work well now.
Prevent Future Drips
Regular checks can keep your faucet working well. Clean faucet parts often to stop dirt buildup. Tighten loose parts to avoid leaks. Replace worn-out washers and seals quickly. Use gentle cleaners to protect faucet surfaces.
Signs that need a professional include persistent dripping after repairs. Strange noises or low water pressure may also mean a deeper issue. Problems with water supply lines or internal parts often need expert help.

Credit: www.youtube.com
Frequently Asked Questions
How Do I Stop My Kitchen Faucet From Dripping?
To stop a dripping faucet, first turn off the water supply. Then, replace worn-out washers or cartridges causing the leak. Tighten any loose parts and clean the valve seat. These steps usually fix common faucet drips effectively and save water.
What Tools Are Needed To Fix A Faucet Drip?
You’ll need an adjustable wrench, screwdrivers, replacement washers or cartridges, plumber’s grease, and a cloth. These tools help you disassemble, clean, and reassemble the faucet parts properly to stop the drip.
Why Does My Kitchen Faucet Keep Dripping After Repair?
A faucet may drip if washers or cartridges are not installed correctly. Damaged valve seats or O-rings could also cause leaks. Ensure all parts fit well and replace any worn components to prevent ongoing dripping.
Can I Fix A Dripping Faucet Without Professional Help?
Yes, many faucet drips are easy to fix with basic tools and instructions. Turn off the water, identify the problem part, and replace it. If unsure, watch tutorial videos or consult a guide before starting.
Conclusion
Fixing a dripping kitchen faucet saves water and money. Start by turning off the water supply. Check the washers and seals for wear or damage. Tighten or replace parts as needed. A steady drip can cause bigger problems over time.
Simple steps often solve the issue quickly. Keep your tools ready for small repairs. Regular checks prevent leaks and keep your faucet working well. Don’t ignore a drip; fix it soon. Your kitchen will stay cleaner and quieter. Small fixes make a big difference.


