Are you ready to give your kitchen a fresh, new look? Installing a countertop is one of the most impactful changes you can make, transforming your space from drab to fab.
You might think it’s a job for the pros, but with the right guidance, you can tackle this project yourself. Imagine the satisfaction of preparing meals on a stunning surface you installed with your own hands. In this guide, we’ll walk you through each step of the process, ensuring you avoid common pitfalls and achieve a flawless finish.
Get ready to enhance your kitchen’s functionality and style, all while boosting your DIY confidence. Let’s dive into the world of countertop installation and discover how you can create a kitchen that truly reflects your taste and personality.
Choosing The Right Material
Graniteis a popular choice. It is strong and durable. Granite comes in many colors. It can be expensive.
Quartzis also durable. It needs less care. It is not as natural as granite. Quartz has many color choices.
Laminateis budget-friendly. It is easy to install. Laminate can mimic stone looks. It is less durable than stone.
Marbleis elegant and smooth. It can stain easily. Marble needs regular care. It is usually more costly.
Woodadds warmth to kitchens. It can scratch easily. Wood needs sealing. It is not good with water.
Concreteoffers a modern look. It is very sturdy. Concrete can crack over time. It needs sealing often.
Measuring The Space
First, grab a measuring tape. You need to measure the lengthof the area. Start from one end and go to the other. Write down the number. Next, measure the width. Do the same as before. Write that number down too. Finally, measure the depth. This is how thick the countertop should be. Write this number down as well. Double-check your numbers. Make sure they are correct. It’s important to get it right. Mistakes can be costly.
Measure twice to be sure. This helps avoid errors. Accurate measurements are key to a good fit. It’s easier to adjust before cutting. You can always make it smaller. Making it bigger is hard. A helper can make the job easier. They can hold the tape or the end. Teamwork makes measuring quicker.
Preparing The Surface
Before installing the countertop, clean the old surface. Remove all items. Use a damp cloth to wipe the area. Ensure no dust remains. Check for any loose parts. Tighten them if needed.
Next, measure the space accurately. Use a measuring tape. Write down the numbers. This ensures the countertop fits perfectly. Mistakes can cause issues later.
Check for levelness. Place a level tool on the surface. Adjust if it’s not straight. Use shims to help. This prevents future problems.
Make sure the area is dry. Moisture can damage new countertops. Use a fan to speed up drying. Check twice to be sure.
Finally, gather all needed tools. You’ll need a drill, screws, and adhesive. Keep them handy. This makes the installation process easier.
Cutting The Countertop
Measure the countertop carefully with a tape measure. Mark the cutting lines using a pencil. This helps you cut straight and accurate. Use a straightedge to draw the lines. Ensure the lines are clear and visible. Wear safety goggles to protect your eyes.
Choose a saw that fits the material type. A circular saw works well for laminate and wood. Clamp the countertop securely to avoid movement. Start cutting slowly along the marked line. Keep the blade steady for a clean cut.
Sand the edges gently after cutting. Check the measurements again. Ensure the cut piece fits perfectly. Adjust if necessary. Safety first, always use protective gear.
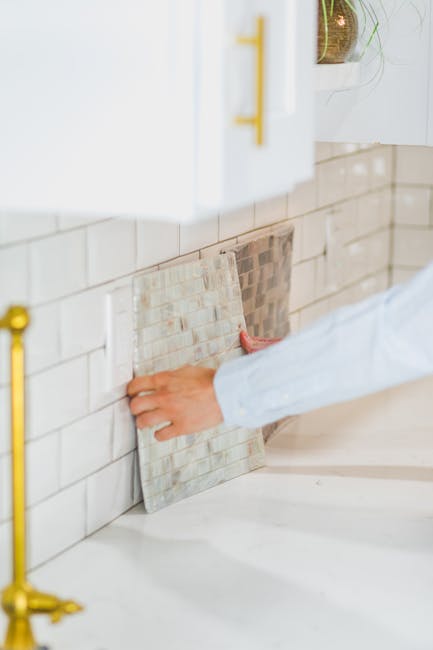
Installing The Countertop
Prepare your space by ensuring the surface is clean and level. Measure and cut the countertop for a precise fit. Secure the countertop using adhesive and screws, making sure all edges are aligned. Finish by sealing gaps for a smooth and durable kitchen surface.
Measure The Area
Measure the space for the countertop. Use a tape measure. Write down the measurements. Double-check them to avoid mistakes.
Prepare The Surface
Clear the area. Remove any objects. Ensure the surface is clean and dry. Check for any uneven spots.
Cut The Countertop
Use a saw to cut the countertop. Follow your measurements. Wear safety goggles to protect your eyes. Sand the edges for smoothness.
Attach The Countertop
Place the countertop on the base. Ensure it fits correctly. Use screws to secure it. Tighten screws firmly but gently.
Seal The Edges
Apply sealant to the edges. Use a caulk gun for even application. Let it dry completely. This prevents water damage.
Sealing And Finishing Touches
Sealing your countertop keeps it safe and shiny. It stops water and stains. First, clean the surface well. Use a soft cloth and mild soap. Let it dry completely. Next, apply a thin layer of sealer. Use a clean brush or roller. Spread it evenly across the countertop. Make sure to cover all edges and corners.
Allow the sealer to dry. Check the product label for drying time. Sometimes, you need two coats. After sealing, polish the surface for extra shine. Use a clean, soft cloth for polishing. Rub gently in circular motions. This makes your countertop look new and bright.
Don’t forget to check your countertop regularly. Reapply sealer when needed. This keeps your countertop beautiful and protected.
Frequently Asked Questions
What Tools Are Needed For Countertop Installation?
You’ll need a tape measure, level, and saw. A drill, screwdriver, and adhesive are also essential. Safety gear like gloves and goggles are recommended. Having a helper is beneficial for lifting and positioning the countertop. Ensure all tools are in good working condition for a smooth installation process.
How Long Does Countertop Installation Take?
Countertop installation usually takes one to two days. It depends on the size and complexity of the project. Pre-fabricated countertops are generally quicker to install. Custom countertops may require more time for fitting and adjustments. Proper preparation can help streamline the process and reduce installation time.
Can I Install A Countertop Myself?
Yes, you can install a countertop yourself. It requires basic carpentry skills and some tools. However, professional installation is recommended for precision and safety. DIY installation can save money, but mistakes may lead to costly repairs. Consider your skill level before deciding to install it yourself.
What Materials Are Best For Kitchen Countertops?
Granite, quartz, and marble are popular countertop materials. They are durable and offer aesthetic appeal. Laminate and solid surface options are budget-friendly and versatile. Consider your kitchen’s style and usage when choosing materials. Each material has unique benefits and maintenance requirements.
Conclusion
Installing a kitchen countertop can be straightforward. Follow the steps carefully. Measure correctly for a perfect fit. Secure the countertop firmly. Use quality materials for durability. Seek help if needed. Enjoy your new kitchen space. A well-installed countertop boosts your kitchen’s look.
It can improve your cooking experience. Take pride in doing it yourself. Remember, practice makes perfect. Your kitchen will be ready for family gatherings. Cooking will feel more enjoyable. Transform your kitchen with patience and effort. A beautiful countertop can make your kitchen shine.