Are you ready to upgrade your kitchen with a handy sprayer but unsure where to start? Installing a kitchen sprayer might sound tricky, but with the right steps, you can do it yourself quickly and easily.
Imagine how much easier washing dishes and rinsing veggies will be with a sprayer right at your fingertips. In this guide, you’ll discover simple, clear instructions to get your kitchen sprayer up and running without hassle. Keep reading, and by the end, you’ll feel confident tackling this project on your own.

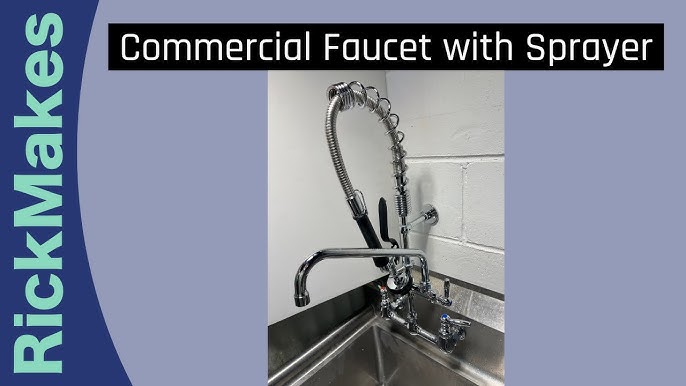
Credit: www.youtube.com
Gather Necessary Tools
Gather the essential toolsbefore starting the kitchen sprayer installation. Having the right tools makes the job easier and faster.
- Adjustable wrench– to tighten and loosen nuts.
- Screwdriver– for screws on the sprayer and faucet.
- Plumber’s tape– to prevent leaks at connections.
- Bucket– to catch any water drips.
- Rag or towel– to wipe spills and clean parts.
Check that all parts of the sprayer kit are included. This helps avoid interruptions during installation.
Turn Off Water Supply
Before starting, turn off the water supplyto avoid leaks. Locate the main valve under the sink or near the water meter. Use a wrench or hand to close the valve completely. Check by opening the faucet; no water should come out. This step is crucial for safetyand to keep your work area dry.
If your home has separate valves for hot and cold water, close both. Some valves turn clockwise to close, others may need a different direction. Be gentle to avoid damage. If no valve is found, turn off the main water supply for the house. Keep a towel or bucket nearby to catch any leftover water in pipes.
Remove Old Sprayer
Turn off the water supply under the sink. Open the faucet to release any water left in the line. Use a wrench to loosen the nut that holds the sprayer hose. Gently pull the hose out from the faucet. Check for any leaks or damage around the area. Remove the sprayer head by twisting it counterclockwise. Clean the area to remove dirt or old sealant. Keep all parts for reference or recycling. Make sure the new sprayer matches the old one before installing. Take your time to avoid breaking any parts.

Credit: www.youtube.com
Install New Sprayer
Turn off the water supply under the sink before starting. Remove the old sprayer by unscrewing it from the hose. Check the new sprayer parts to ensure all pieces are included.
Attach the new sprayer hose to the water supply. Tighten the connection but avoid over-tightening to prevent leaks. Insert the sprayer head into the sink hole.
- Connect the hose to the sprayer head securely.
- Test the sprayer by turning on the water supply slowly.
- Check for leaks around all connections.
- Adjust the sprayer head position if needed.
Use a wrench to tighten any loose parts carefully. Clean the area around the sink to remove any debris. Enjoy a fully functional kitchen sprayer.
Test For Leaks And Functionality
Turn on the water supply slowly to check the sprayer for leaks. Watch the connections closely for any drips or wet spots. Tighten any loose fittings if needed.
Press the sprayer handle to test the water flow. Water should come out smoothly and stop immediately when released. Listen for unusual sounds that may show a problem.
- Check the hose for cracks or holes.
- Ensure the sprayer head sprays evenly.
- Look under the sink for any water pooling.
Fix any leaks by tightening connections or replacing damaged parts. Repeat the test until everything works well and stays dry.

Credit: www.youtube.com
Frequently Asked Questions
How Long Does It Take To Install A Kitchen Sprayer?
Installing a kitchen sprayer usually takes 30 to 60 minutes with basic tools.
What Tools Do I Need To Install A Kitchen Sprayer?
You need a wrench, plumber’s tape, screwdriver, and sometimes a drill for installation.
Can I Install A Kitchen Sprayer Without A Plumber?
Yes, many people install kitchen sprayers themselves by following clear instructions carefully.
Conclusion
Installing a kitchen sprayer is easier than it seems. Follow the steps carefully for the best results. Take your time and avoid rushing the process. Check all connections to prevent leaks and spills. Enjoy the convenience a sprayer adds to your kitchen tasks.
Keep your tools handy for any future adjustments. With practice, installation will feel simple and quick. Your kitchen will look more functional and neat. Try this project to improve your kitchen setup today.