Your kitchen sink drain might not be the most glamorous part of your home, but it’s certainly one of the most essential. When everything is flowing smoothly, you hardly notice it.
However, when clogs or other issues arise, it can quickly become a source of frustration. Fortunately, you don’t need to be a plumbing expert to tackle these problems. With a few simple steps and a bit of know-how, you can ensure your kitchen sink drain stays in top condition.
Imagine the satisfaction you’ll feel knowing you can handle this crucial aspect of home maintenance yourself. Dive into this guide, and you’ll discover the secrets to keeping your kitchen sink drain clean and clear, avoiding costly repairs, and maintaining a harmonious kitchen environment. Are you ready to take control of your kitchen’s flow? Let’s get started!

Credit: medium.com
Tools And Materials
Gather a pipe wrench, pliers, and a bucket for collecting water. Have a plumber’s snake and drain cleaner ready. Ensure you have gloves and a flashlight for better visibility.
Essential Tools
- Plunger: Pushes water and air through the drain.
- Pipe wrench: Used for tightening or loosening pipes.
- Bucket: Catches water or debris when opening pipes.
- Flashlight: Helps you see inside dark spaces.
Required Materials
- Drain cleaner: Breaks down clogs and grease.
- Baking soda: Natural cleaner that helps unclog drains.
- Vinegar: Reacts with baking soda to clear blockages.
- Rubber gloves: Protects your hands from dirt and chemicals.

Credit: www.youtube.com
Safety Precautions
Use rubber gloves to protect your hands from sharp objects while cleaning the kitchen sink drain. Ensure the area is well-ventilated to avoid inhaling any harmful fumes from cleaning chemicals. Always turn off water supply before starting any work under the sink.
Protective Gear
Always wear gloveswhen working on a sink. They keep your hands safe. Use safety gogglesto protect your eyes from splashes. An apron can help keep your clothes clean. Good shoes are important too. They prevent slipping on wet floors.
Handling Chemicals
Use chemicals in a well-ventilated area. Open a window if possible. Read labels carefully before using any product. Mix chemicals only if the label says it’s safe. Never mix bleach with ammonia. It creates a dangerous gas. Rinse the sink with water after using chemicals. This ensures no residue is left. Store chemicals out of children’s reach. Safety is always the top priority.
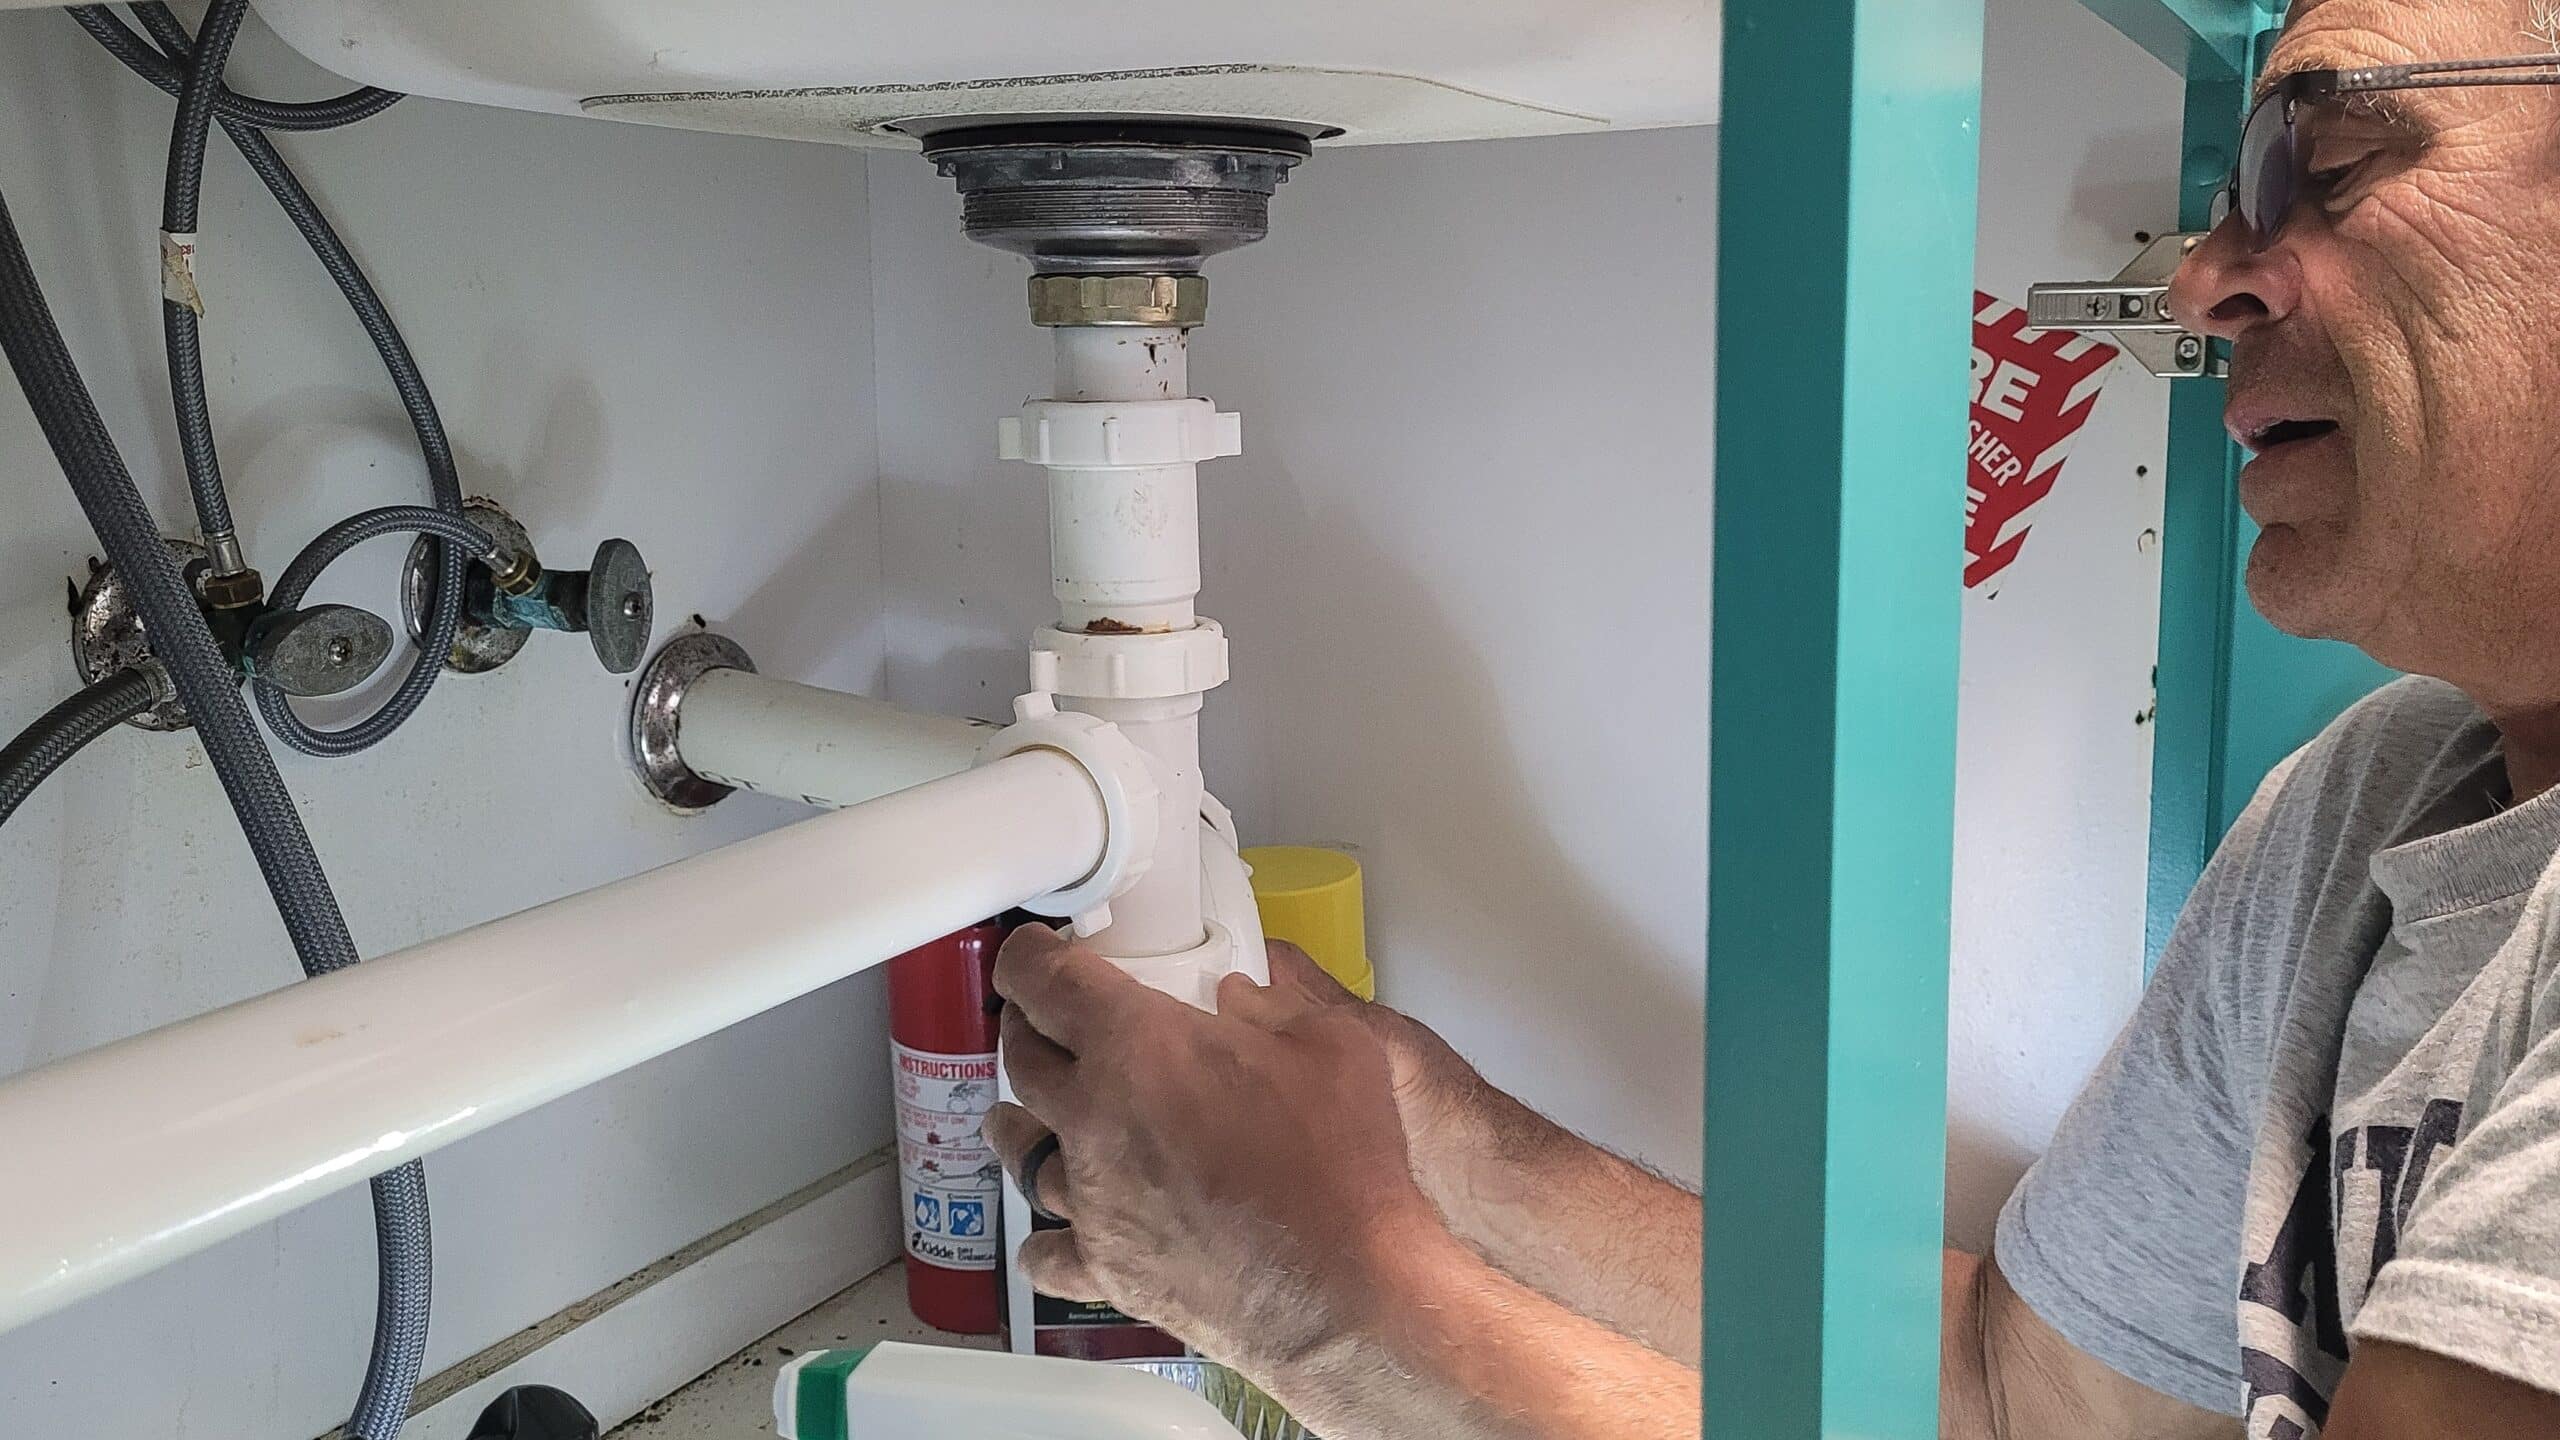
Removing The Old Drain
Removing the old drain involves detaching the plumbing underneath the sink. Loosen the nuts with a wrench and carefully remove the drain pipe. Ensure you have a bucket to catch any water spills during the process.
Disconnecting Pipes
Turn off the water. Use a wrench to loosen the nuts. Carefully disconnect the pipes. Ensure no water is trapped inside. Place a bucket under the pipes. This will catch any spills. Keep a towel handy. You may need it.
Clearing The Area
Remove items under the sink. Create a clear workspace. This helps you move freely. Check for any obstacles. Ensure good lighting. Bright light helps you see better. Have all tools ready. This saves time.
Installing The New Drain
Installing the new drain in your kitchen sink is simple. Begin by removing the old drain carefully. Place the new drain in the sink hole and secure it tightly to prevent leaks.
Positioning The Drain
Place the new drain on the sink hole. Ensure it fits snugly. Align it carefully with the sink edge. Use a small level to check alignment. The drain should be centered correctly. This prevents leaks later.
Securing Connections
Connect the drain to the pipe underneath. Use plumber’s tape for better sealing. Wrap it around the threads tightly. Attach the pipe securely with a wrench. Check each connection for tightness. Tighten connections properly to avoid water leakage.
Testing For Leaks
Check for leaks by filling the sink with water. Look under the sink for any dripping. Tighten connections if needed.
Running Water Check
Turn on the tap at full flow. Look under the sink for any drips. Water should flow smoothly down the drain. Any drip means a leak. Check all around the pipes. Listen for any hissing sounds. These also mean a leak is present. Ensure all connections are tight.
Inspecting Connections
Feel around pipe joints for moisture. Tighten loose nuts with a wrench. Check washers for wear or damage. Replace worn washers to stop leaks. Confirm pipes are properly aligned. Misaligned pipes can cause leaks. Use a flashlight for better visibility. Ensure everything is secure and dry.
Maintaining Your Kitchen Drain
Regularly clean your kitchen sink drain to prevent clogs. Use hot water and baking soda to dissolve grease and debris. Natural cleaning solutions help maintain a free-flowing drain efficiently.
Regular Cleaning Tips
Use a mixture of baking soda and vinegar. Pour half a cup of baking soda into the drain. Follow it with half a cup of vinegar. Wait for 15 minutes. Rinse with hot water. This helps to remove small clogs. Repeat once a month.
Preventing Clogs
- Avoid pouring grease down the sink. It hardens and blocks pipes.
- Use a strainer to catch food particles. Empty it regularly.
- Run hot water after each use. It keeps oil from sticking.
- Grind a few ice cubes in the garbage disposal. It sharpens blades.

Credit: www.facebook.com
Frequently Asked Questions
How Do I Unclog My Kitchen Sink Drain?
To unclog your kitchen sink drain, start by removing visible debris. Use a plunger or a drain snake to dislodge blockages. Pouring a mixture of baking soda and vinegar can help dissolve stubborn clogs. Regular maintenance prevents future issues. Always follow safety guidelines when using chemical cleaners.
What Causes Kitchen Sink Drains To Clog?
Kitchen sink drains often clog due to food waste, grease, and soap residue. Over time, these materials accumulate and obstruct water flow. Regular cleaning and avoiding pouring grease down the drain can prevent clogs. Installing a drain strainer helps catch larger debris before it causes problems.
Can Baking Soda And Vinegar Unclog Drains?
Yes, baking soda and vinegar are effective for unclogging drains. Start by pouring half a cup of baking soda down the drain. Follow with half a cup of vinegar. The fizzy reaction helps dissolve minor clogs. Flush with hot water after 15 minutes for best results.
Repeat if necessary.
How Often Should I Clean My Kitchen Sink Drain?
Clean your kitchen sink drain every month to prevent clogs. Regular maintenance involves removing debris, using baking soda and vinegar, and flushing with hot water. This routine keeps your drain clear and odor-free. Consider professional cleaning annually for thorough maintenance and to ensure optimal functionality.
Conclusion
Tackling a kitchen sink drain doesn’t have to be tough. Simple tools and basic steps make the job easier. Regular maintenance helps keep the drain clear. Avoid pouring grease or large food scraps down the sink. Use a mesh strainer to catch debris.
These small actions prevent clogs. If problems persist, consider professional help. Clean pipes ensure smooth water flow. A clear drain means less stress and hassle. Enjoy a kitchen that’s always ready for cooking and cleaning. Remember, a little care goes a long way in maintaining your kitchen sink drain.


