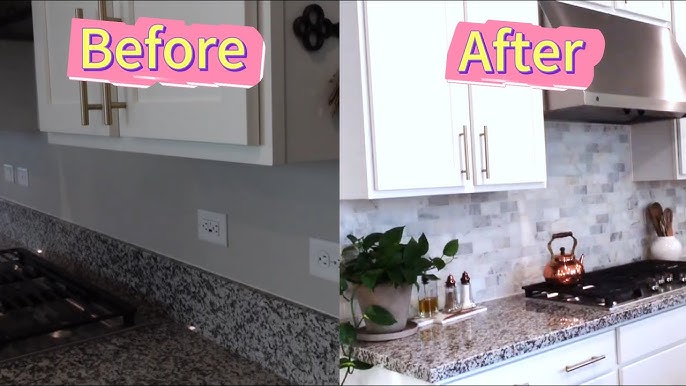
Are you tired of your old kitchen tile backsplash and ready for a fresh new look? Removing it might seem like a huge job, but with the right steps, you can do it yourself without breaking a sweat.
Imagine the satisfaction of transforming your kitchen space on your own, saving money, and avoiding the hassle of calling a pro. In this guide, you’ll discover simple, clear instructions to help you remove your kitchen tile backsplash safely and efficiently.
Keep reading, and you’ll be one step closer to the kitchen makeover you’ve been dreaming about.

Credit: www.edwardmartin.com
Tools And Materials Needed
Removing a kitchen tile backsplash needs the right toolsand materials. Start with essential toolslike a putty knife, a hammer, and a chisel to pry tiles off. A utility knife helps cut grout lines and caulk.
Wear protective gearsuch as safety goggles and gloves. This keeps your eyes and hands safe from sharp edges and debris. A dust mask is also important to avoid breathing dust.
Keep cleanup suppliesnearby. Have a bucket, sponge, and rags ready. A vacuum cleaner helps remove dust and small tile pieces. Use a trash bag to collect broken tiles and debris.

Credit: www.mrhandyman.com
Preparing The Workspace
Clear the countertops and remove any items near the backsplash. This creates space to work freely and avoid damage. Cover the floor with a drop cloth or old sheets to catch debris and dust. Use painter’s tape and plastic sheets to protect cabinets and appliances from scratches and dust.
Turn off the water supply to the sink to avoid leaks or spills during tile removal. Also, switch off power at the circuit breaker for any outlets or lights near the backsplash. This keeps the workspace safe from electric shocks and water damage.
Removing The Tiles
Start by scoring the grout around the tiles using a grout saw or utility knife. This helps break the seal and makes tile removal easier. Be careful not to damage the wall behind the tiles.
Use a flat pry bar or putty knife to gently lift the edges of the tiles. Work slowly to avoid cracking or breaking the tiles too much. Protect your hands with gloves to prevent cuts.
For tiles that refuse to budge, try tapping the pry bar with a hammer lightly. Repeat scoring the grout if needed. Sometimes a heat gun softens the adhesive, making removal simpler.
Dealing With Adhesive Residue
Scraping off old adhesive can be done using a putty knife or scraper. Hold the tool at a low angle to avoid damaging the wall. Work slowly to remove as much glue as possible. For stubborn spots, apply adhesive remover or warm soapy water to soften the residue.
Sanding the walls helps smooth rough areas left by the adhesive. Use medium-grit sandpaper to start, then switch to fine-grit for a clean finish. Sand gently to avoid making holes or scratches. A sanding block or electric sander can speed up the process.
| Tools Needed | Purpose |
|---|---|
| Putty Knife or Scraper | Remove old adhesive |
| Adhesive Remover or Soapy Water | Soften tough residue |
| Sandpaper (Medium and Fine) | Smooth and prepare wall surface |
| Sanding Block or Electric Sander | Make sanding easier and faster |
Repairing And Preparing Walls
Repairing the wall is key after removing tile backsplash. Check for holes, cracks, and glue residue. Use a putty knife to scrape off old adhesive. Fill holes and cracks with spackle or joint compound. Let it dry completely, then sand smooth. This creates a flat surface for the new backsplash.
Priming the wall helps the new tiles stick better. Choose a high-quality primersuited for kitchen walls. Apply one even coat using a roller or brush. Wait for the primer to dry fully before tiling. This step also blocks stains and moisture, protecting your walls.

Credit: www.mrhandyman.com
Safety Tips Throughout The Process
Protect yourself by wearing gloves, goggles,and a dust mask. Tiles and grout can be sharp and cause cuts. Falling debris might injure your eyes. Use tools carefully to avoid slipping or hitting your hands.
Keep the workspace clean. Cover counters and floors with plastic sheets or drop cloths. Sweep or vacuum dust often to stop it from spreading. Dust can irritate your eyes, throat, and lungs.
- Wear protective gear at all times.
- Work slowly and carefully to prevent accidents.
- Use a vacuum or damp cloth to clean dust.
- Keep tools in good condition to avoid mishaps.
Frequently Asked Questions
How Do I Safely Remove Kitchen Tile Backsplash?
Start by protecting surfaces with a drop cloth. Use a utility knife to cut grout edges. Gently pry tiles with a putty knife or chisel. Work slowly to avoid wall damage. Wear safety glasses and gloves for protection.
What Tools Are Needed To Remove Backsplash Tiles?
You need a utility knife, putty knife, chisel, hammer, and safety gear. A grout saw helps remove grout efficiently. Having a drop cloth protects your counters and floor from debris.
Can I Remove Backsplash Without Damaging Walls?
Yes, by carefully cutting grout and gently prying tiles. Use low force and proper tools to minimize wall damage. Take time and patience during the process for best results.
How Long Does Removing A Tile Backsplash Take?
It typically takes 2 to 4 hours for an average kitchen backsplash. Time depends on tile size, wall condition, and your experience level.
Conclusion
Removing a kitchen tile backsplash can be easy with the right steps. Start by gathering necessary tools. Safety first: wear gloves and goggles. Carefully remove tiles using a putty knife. Take your time to avoid damage. Clean the wall surface after tile removal.
Prepare it for your next project or new tiles. Enjoy the fresh look of your kitchen. You’ll love the change. Remember, patience and care lead to great results. Tackle this task confidently. Happy renovating!


