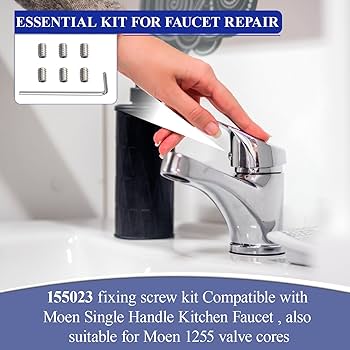
Is your Moen kitchen faucet leaking or not working right? You don’t have to call a plumber or buy a new one just yet.
Fixing your faucet yourself can save you time, money, and frustration. In this guide, you’ll learn simple, step-by-step tips to repair your Moen kitchen faucet quickly and easily. Whether it’s a drip, a loose handle, or low water flow, you’ll find clear instructions that anyone can follow.
Ready to get your faucet working like new? Let’s dive in and make your kitchen hassle-free again!
Identify Common Faucet Issues
Leaking faucetswaste water and raise bills. Common causes include worn-out washers or seals. Tightening parts or replacing washers often stops leaks.
Low water pressurecan come from clogged aerators or pipes. Cleaning aerators or checking supply lines helps improve flow.
Dripping spoutsusually signal valve problems. Replacing the cartridge or valve can fix this annoying drip.
Handle problemslike stiffness or looseness affect faucet use. Adjusting screws or replacing cartridges restores smooth handle action.

Credit: www.badgerinstitute.org
Gather Necessary Tools
Gathering the right toolsis key to fixing your Moen kitchen faucet. Use wrenchesto loosen and tighten nuts without damage. Screwdrivershelp remove screws carefully.
Keep replacement parts like O-rings, cartridges, or washers ready. These parts wear out and cause leaks. Having them on hand makes repair faster.
Plumber’s greaseis useful to lubricate moving parts. It helps seals last longer and prevents leaks.
Cleaning supplies like a soft cloth and mild cleaner remove dirt and buildup. Clean parts work better and last longer.
Turn Off Water Supply
First, find the shutoff valvesunder the sink. They control water flow to the faucet. Turn them clockwiseto close and stop water.
If no valves are under the sink, turn off the main water supplyto the house.
Open the faucet handles to drain remaining waterfrom pipes. This stops water from spilling during repair.

Credit: www.amazon.com
Disassemble The Faucet
Start by locating the set screwon the faucet handle. Use an Allen wrench to loosen and removethe handle carefully.
Next, find the retaining clipthat holds the cartridge in place. Use needle-nose pliers to gently pull out the clip. Keep it safe for reassembly.
After the clip is removed, grab the cartridge firmly. Pull it straight up to extract it from the faucet body. Some water may leak, so have a cloth ready.
Inspect And Replace Parts
Check the cartridgefor any cracks or wear. A damaged cartridge can cause leaks or poor water flow. Remove it carefully and inspect all sides for signs of damage or buildup.
Replace the O-rings and sealsif they look worn or cracked. These small parts help keep water inside the faucet. Using new O-rings and seals can stop leaks and improve faucet function.
Mineral deposits can block water flow. Use vinegar or a mild cleaner to gently clean mineral depositsfrom faucet parts. Soak removable parts in the solution to dissolve buildup.
Reassemble The Faucet
Place the new cartridgecarefully into the faucet body. Make sure it fits snugly and aligns with the slots. Press down firmly but gently.
Take the retaining clipand slide it into place to hold the cartridge securely. This clip keeps the cartridge from moving or falling out during use.
Now, reattach the handle. Position it over the cartridge stem. Tighten the handle screw with a screwdriver until it feels secure but not too tight. Test the handle by moving it back and forth to check for smooth operation.
Test The Faucet
Turn on the main water supply valve under the sink. Slowly open the faucet handles to let water flow. Watch closely for any signs of drips or wet spots around the faucet base and connections. Check both hot and cold water lines for leaks.
Ensure water flow is steady and consistent. Weak flow might mean a clogged aerator or valve issue. Strong flow with no leaks means the faucet is working well. Tighten any loose parts if needed.
Maintenance Tips
Keeping a Moen kitchen faucet in good shape needs regular cleaning. Wipe it with a soft cloth and mild soap. This stops dirt and grime from building up. Avoid using harsh chemicals or abrasive pads. They can damage the faucet’s finish.
Check your faucet often for leaks or loose parts. Look under the sink and around the handles. Fix small problems quickly to stop bigger issues. Tighten screws and replace worn-out washers as needed.
- Clean gentlywith soap and water.
- Skip harsh chemicalsto protect the finish.
- Inspect regularlyfor leaks or drips.
- Tighten loose partsto avoid damage.
- Replace washersif the faucet drips.

Credit: www.youtube.com
Frequently Asked Questions
How Do I Fix A Leaking Moen Kitchen Faucet?
First, turn off the water supply. Then, disassemble the faucet handle. Replace worn-out O-rings or cartridges. Reassemble and test for leaks.
What Tools Are Needed To Repair A Moen Kitchen Faucet?
You’ll need an adjustable wrench, Allen wrench, flathead screwdriver, and replacement parts like cartridges or O-rings.
Why Is My Moen Faucet Handle Hard To Turn?
Mineral buildup or worn cartridge causes stiffness. Clean or replace the cartridge to restore smooth operation.
How Long Does It Take To Repair A Moen Kitchen Faucet?
Most repairs take 30 to 60 minutes, depending on the issue and your experience level.
Conclusion
Repairing a Moen kitchen faucet is simple with clear steps. First, identify the problem. Next, gather the right tools. Then, follow the instructions carefully. Always check for leaks after each step. Regular maintenance can prevent future issues. A fixed faucet saves water and money.
It also keeps your kitchen running smoothly. Enjoy a hassle-free kitchen experience. A little effort goes a long way. Happy fixing!


