Is your kitchen sink sprayer leaking or not working properly? You don’t need to call a plumber or buy a whole new faucet.
Replacing the sprayer on your kitchen sink is easier than you think—and you can do it yourself in just a few simple steps. Imagine saving money and gaining a handy skill that makes your kitchen run smoother. Ready to fix your sprayer and enjoy a fresh, fully functional sink?
Let’s dive in and show you exactly how to replace your kitchen sink sprayer quickly and without hassle.
Tools And Materials Needed
To replace a kitchen sink sprayer, gather these essential tools and materials. A adjustable wrenchhelps loosen nuts and bolts. Use plumber’s tapeto seal connections and stop leaks. A screwdriveris needed to remove screws from the sprayer or hose. Have a bucketready to catch any water drips. A replacement sprayer kitshould match your sink model. Make sure to use clean clothsto wipe spills and keep the area dry. Safety gloves protect your hands during the job.

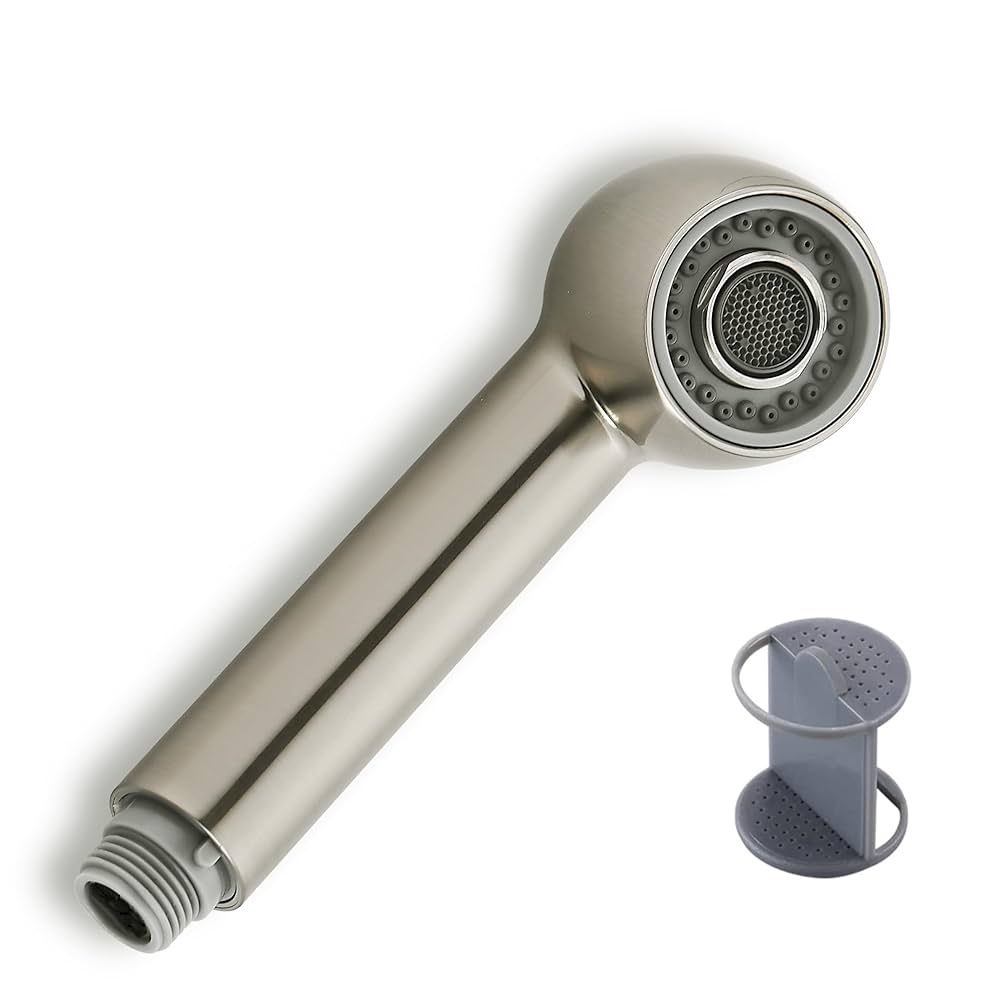
Credit: www.amazon.com
Preparing The Sink Area
Turn off the water supplybefore starting any work. Locate the valves under the sink. Twist them clockwise to close. This stops water flow and prevents leaks.
Clear the sink area to create enough space. Remove dishes, soap, and any objects nearby. A clean space makes work easier and safer.
Removing The Old Sprayer
First, turn off the water supply under the sink. Then, locate the sprayer hose connected to the faucet. Use a wrench or pliers to carefully loosen the nut that holds the sprayer hose in place. Pull the hose out gently once the nut is loose.
To remove the sprayer head, grip it firmly and twist it counterclockwise. It should unscrew easily. If it feels stuck, try using a cloth for better grip. Set the old sprayer head aside after removal.

Credit: www.leoalmanac.org
Installing The New Sprayer
Connect the sprayer hoseto the water supply line under the sink. Make sure the connection is tightto avoid leaks. Thread the hose through the hole on the sink or countertop.
Attach the sprayer headto the hose end. Turn it clockwise until it is secure. Avoid overtightening to prevent damage.
- Check the hose for any kinks or twists.
- Ensure the sprayer head moves freely.
- Test the sprayer by turning on the water supply.
Tighten any loose connections using a wrench but be careful not to strip the fittings. A good seal stops water leaks and keeps the sprayer working well.
Testing The New Sprayer
Turn on the water supply slowly to avoid sudden pressure. Watch closely for any drips or leaks around the sprayer base and hose connections. Tighten connections if you see water escaping.
Test the sprayer by pressing the handle gently. The water should flow smoothly and with good pressure. Spray in different directions to check full coverage.
- Check hose connectionsfor tightness to prevent leaks.
- Ensure sprayreaches all parts of the sink effectively.
- Listenfor unusual sounds that may mean a problem.
- Lookfor steady water flow without sputtering or stopping.

Credit: www.amazon.ca
Tips For Maintenance
Keep the sprayer clean by wiping it with a soft cloth often. Dirt and grime can block water flow. Check the hose for cracks or leaks. Replace it if you find any damage to avoid water spills. Make sure the sprayer handle moves smoothly without sticking. Tighten loose connections under the sink to stop drips. Avoid harsh chemicals that can damage the sprayer parts. Use mild soap and water for cleaning. Test the sprayer after maintenance to ensure it works well. Regular checks can make the sprayer last longer and work better.
Frequently Asked Questions
How Do I Remove A Kitchen Sink Sprayer?
First, turn off the water supply under the sink. Unscrew the sprayer hose connector from the faucet. Remove the sprayer handle by unscrewing it. Gently pull out the sprayer hose through the sink hole.
What Tools Are Needed To Replace A Sprayer?
You will need an adjustable wrench, pliers, and a screwdriver. These tools help disconnect and reconnect the sprayer hose. Having a bucket handy is useful to catch any water spills.
How Long Does It Take To Replace A Kitchen Sprayer?
Replacing a kitchen sprayer usually takes 15 to 30 minutes. The process is simple and requires only basic plumbing skills. Properly turning off water and carefully reconnecting parts saves time.
Can I Replace A Sprayer Without Turning Off Water?
No, always turn off the water supply first. This prevents leaks and water damage during replacement. Safety and avoiding messes are important in plumbing tasks.
Conclusion
Replacing a kitchen sink sprayer is easier than it seems. Follow the steps carefully, and take your time. Use the right tools and parts for a good fit. Check for leaks once done to avoid water damage. Regular maintenance helps your sprayer last longer.
Enjoy a fully working sink sprayer again without extra help. Small repairs like this save money and boost confidence. Give it a try—you might surprise yourself!


