Are you ready to turn your KitchenAid mixer into the ultimate ice cream maker? The KitchenAid Ice Cream Attachment is a game-changer, letting you create creamy, homemade ice cream right in your own kitchen.
But how do you use it to get the perfect texture every time? This guide will walk you through simple, step-by-step instructions so you can enjoy delicious ice cream without any guesswork. Keep reading and discover how easy it is to make your favorite frozen treats at home!

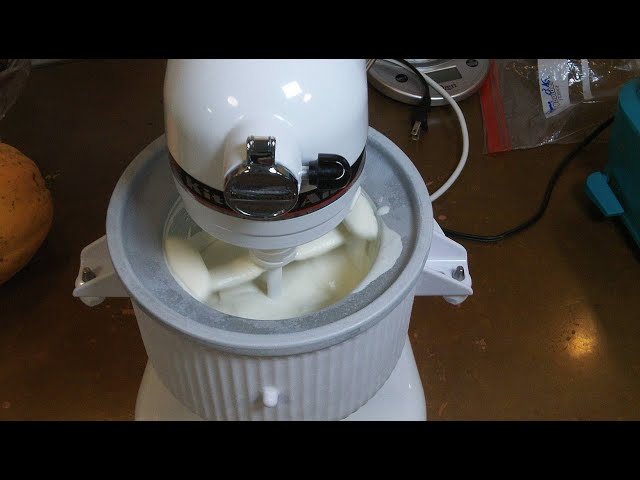
Credit: www.amazon.com
Choosing The Right Kitchenaid Attachment
Choosing the right KitchenAid attachment depends on what you want to make. The Ice Cream Attachmentis perfect for homemade ice cream, gelato, and sorbet. It fits on the KitchenAid stand mixer, turning it into a frozen dessert maker.
Other attachments serve different purposes:
- Food Grinder:For grinding meat and vegetables.
- Pasta Roller:For making fresh pasta sheets.
- Vegetable Spiralizer:For creating vegetable noodles.
Check if your mixer model supports the attachment. Some older models may not fit all attachments. Also, consider how often you will use it and the types of recipes you want to try. This helps you pick the best tool for your kitchen.
Preparing Your Mixer
Make sure your KitchenAid mixeris clean and dry before use. Attach the ice cream bowlto the mixer base securely. Place the dasherinside the bowl to stir the mixture. Lock the bowl into the mixer by turning it until it clicks. Use the flat beaterattachment designed for ice cream. Ensure the mixer is offand unplugged while assembling. Keep the ice cream bowl frozen for at least 15 hoursbefore use. This keeps the mixture cold and helps it freeze properly. Check that all parts fit tightly to avoid leaks. Have your ingredients readyand measured before starting the mixer. Set the mixer speed to stiror slowto mix ice cream smoothly.
Freezing The Bowl
The ice cream bowlmust be frozen solid before use. Place it in the freezerfor at least 15 hours. Make sure the bowl is clean and dry before freezing.
Do not freeze the bowl with any liquid inside. This will protect the freezing liquidinside the bowl from damage. Keep the freezer temperature at or below -10°F (-23°C)for best results.
- Check the bowl’s freezing liquid level regularly.
- Do not shake or drop the bowl.
- Use the bowl only once fully frozen.
After freezing, attach the bowl to the mixer and start making your ice cream. The bowl must be very cold to freeze the mixture quickly.

Credit: www.neweggbusiness.com
Mixing Ingredients
Mix all ingredients well before using the KitchenAid ice cream attachment. Use cold ingredients for the best results. This helps the ice cream freeze evenly. Avoid lumps by stirring the mixture until smooth. Chill the mixture in the fridge for at least 2 hours. Cold mixture freezes faster and creates a better texture.
- Use fresh cream, milk, sugar, and flavorings.
- Mix sugar and liquids first to dissolve sugar.
- Stir gently to avoid adding air bubbles.
- Keep the bowl and attachment parts cold.
- Do not overfill the bowl; leave space for expansion.
Attaching The Ice Cream Maker
Make sure the mixer is unplugged before attaching the ice cream maker. Remove the bowl from the mixer and insert the frozen bowl of the ice cream attachment. Secure it by locking the bowl in place. Attach the dasher to the motor shaft inside the bowl. Align the attachment arm with the mixer head and lower it until it clicks. Ensure the attachment fits snugly to avoid leaks or wobbling. Plug in the mixer and set to the stir speed once ice cream ingredients are added. Do not remove the bowl or dasher while mixing to keep the process smooth.

Credit: www.kitchenaid.com
Operating The Attachment
Ensure the bowl is completely frozen before using. This step is vital. Attach the drive assembly to the mixer. Make sure it’s secure. Insert the dasher into the bowl. It should fit snugly. Next, place the bowl onto the mixer. Lock it in place for safety. Turn the mixer to a stir speed. Pour your mixture into the bowl slowly. Let it churn for 20 to 30 minutes. The mixture should thicken.
Stop the mixer once the desired consistency is reached. Remove the dasher carefully. Scoop the ice cream into a container. Freeze it for a few hours for a firmer texture. Clean the attachment parts with warm soapy water. Dry them thoroughly before storing. Enjoy your homemade ice cream!
Tips For Perfect Ice Cream
Always chill the ice cream bowl in the freezer for at least 15 hours. This keeps the mixture cold and helps it freeze faster.
Use fresh and cold ingredients. Cold cream and milk make the ice cream smooth.
Do not overload the bowl with too much mixture. Leave some space for the ice cream to expand.
- Mix ingredients well before pouring into the bowl.
- Stir the mixture gently after adding to remove air bubbles.
- Turn on the mixer and let it run for 20-30 minutes.
Once done, transfer ice cream to a container and freeze for a firmer texture. Serve within a few days for best taste.
Cleaning And Maintenance
First, unplug the attachment for safety. Remove all parts carefully. Use warm, soapy water to clean each piece. Avoid using abrasive sponges or cleaners. Rinse thoroughly and make sure no soap is left. Dry each part with a clean towel. Ensure the parts are completely dry before storing.
For the metal parts, check for any rust. Use a soft brush to clean any dirt. If needed, use a soft cloth with a bit of vinegar. Wipe off vinegar well to prevent any lingering smell.
Store all parts in a cool, dry place. Avoid direct sunlight to keep them in good shape. Regular cleaning helps the attachment last longer. This makes your ice cream smoother and more delicious.
Frequently Asked Questions
How Do I Attach The Kitchenaid Ice Cream Maker?
First, freeze the bowl for 15+ hours. Lock the bowl onto the mixer. Attach the dasher and secure the drive hub. Turn on the mixer to start churning.
What Ingredients Work Best With This Attachment?
Use heavy cream, milk, sugar, and flavorings. Avoid large chunks or hard add-ins initially. Add mix-ins near the end of churning for best texture.
How Long Does The Ice Cream Take To Churn?
Typically, churning takes 20 to 30 minutes. Time varies with ingredients and freezer temperature. Stop when the mixture thickens to soft-serve consistency.
Can I Make Sorbet With This Attachment?
Yes, the attachment works well for sorbets. Use fruit puree, sugar, and water. Follow the same freezing and churning process as ice cream.
Conclusion
Using the KitchenAid ice cream attachment is simple and fun. Just follow the steps carefully for best results. You can make delicious ice cream at home anytime. It saves money and lets you try new flavors. Clean the parts well after each use.
This tool fits easily on your mixer. Enjoy creamy, homemade ice cream with little effort. Give it a try and enjoy sweet treats soon.


