Are you tired of hearing the constant drip-drip sound from your kitchen faucet? A dripping faucet not only disrupts the peace in your home but also racks up your water bill.
If your kitchen faucet has two handles and you’ve been wondering how to fix it, you’re in the right place. Solving this common household issue doesn’t require a plumber or special skills—just a bit of guidance and patience. Imagine the satisfaction of mastering this repair yourself and enjoying a quieter, more efficient kitchen.
Get ready to dive into a step-by-step guide that will transform your noisy faucet into a silent, money-saving fixture. Stay with us as we unlock the secrets to a drip-free kitchen faucet, empowering you to tackle this task with confidence.
Common Causes Of Dripping Faucets
Faucets drip due to worn-out washers. These washers help seal the faucet. When they wear out, water leaks. Another reason is a damaged O-ring. This small ring can break. A broken O-ring lets water escape. Sometimes, mineral build-up causes drips. Hard water leaves deposits. These deposits block the faucet. Loose parts also cause drips. Check for loose nuts or bolts. Tighten them to stop leaking. Faulty cartridges can be a problem too. Cartridges control water flow. If broken, water drips. Always check parts for damage.

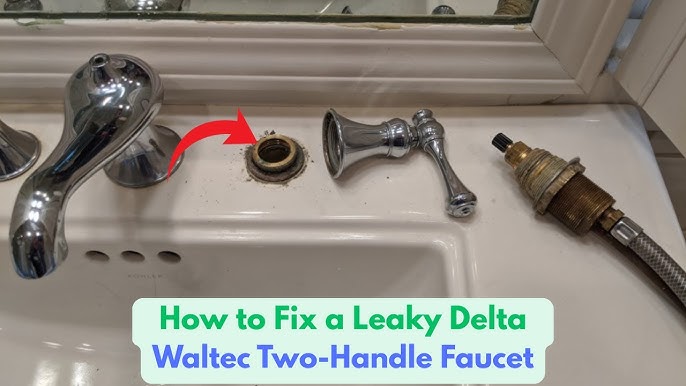
Credit: www.youtube.com
Tools And Materials Needed
- Adjustable wrench for loosening nuts
- Screwdriver to remove screws
- Pliers for gripping parts
- Replacement washers or O-rings
- Plumber’s tape to seal connections
- Bowl to catch dripping water
These tools are essential for fixing your faucet. They help you open, remove, and replace parts. Replacement washers and O-rings are needed if old ones are worn. A bowl is useful to catch water and keep your area dry. Plumber’s tape helps prevent future leaks.
Turning Off The Water Supply
Locate the water supply valves under the sink. Turn the handles clockwise to close them. This stops water flow to the faucet. Check the faucet to ensure it’s off. If water still flows, tighten the valves more. Sometimes valves can be stiff. Use a towel for better grip. Make sure the water stops completely. This prevents mess when fixing the faucet. Take your time to ensure valves are tight.
After turning off, test the faucet again. If no water drips, you’re ready. Now, you can start fixing the faucet. Remember, safety first. Always check twice before proceeding. It’s important to have a dry workspace.

Credit: plumbing-united.com
Removing Faucet Handles
Removing faucet handles helps access the problem area underneath. Turn off the water supply first. Then, use a screwdriver to remove the screws securing the handles, allowing you to inspect and replace worn-out washers or seals, which might be causing the drip.
Identifying Handle Type
Check the faucet for a screw. It may be hidden. Look under the cap or label. Some handles have a set screw. It’s on the side or back. Use a flashlight to see clearly. Write down the handle type. It’s important for later steps.
Unscrewing The Handles
Turn off water supply first. Use a screwdriver to loosen the screw. Hold the handle with your other hand. Pull the handle gently. If stuck, wiggle it. Avoid using too much force. This could break it. Place the handle aside safely.
Inspecting And Replacing The Washer
Inspect the washer beneath the faucet handles. A worn washer often causes drips. Replace it with a new one to stop leaks.
Locating The Washer
The washer is inside the faucet handle. Start by turning off the water. Unscrew the handle using a screwdriver. You might need a wrench for tight screws. Once open, find the washer near the stem. It’s small and round. Check if it’s old or worn out. A bad washer causes leaks. Remember where each part goes. This makes reassembly easier.Installing A New Washer
Buy a new washer of the same size. Place it where the old one was. Make sure it fits well. Tighten it gently using your fingers. Reattach the faucet handle with a screwdriver. Turn the water back on. Check for drips. If no drips, you did it right! Always keep spare washers handy. They are useful for future fixes. `Checking And Replacing The Valve Seat
Replacing the valve seat might stop a dripping kitchen faucet with two handles. First, check the valve seat for damage or wear. If needed, replace it to ensure a tight seal and prevent leaks.
Understanding Valve Seat Function
The valve seathelps control water flow. It is a crucial part of the faucet. A worn valve seat can cause dripping. It blocks water when the handle is off. Water flows when the handle is on. If it leaks, the faucet drips.
Removing And Installing A New Valve Seat
Turn off the water supplyfirst. Use a wrench to remove the old seat. Check the seat for damage or wear. If damaged, replace with a new valve seat. Install the new seat carefully. Tighten it with the wrench. Turn the water supply back on. Check if the faucet still drips. If it does not, the problem is fixed.
Reassembling The Faucet
Reassemble the faucet by carefully aligning the handles and securing them with screws. Ensure all parts fit snugly to prevent leaks. Test the faucet for smooth operation, checking for any remaining drips.
Placing Handles Back
Place the handles back on the faucet. Make sure they fit snugly. Align them properly with the valve stems. Secure them using a screwdriver. Be careful not to overtighten screws. This can damage the handles. Once secured, check their movement. They should turn smoothly. If they feel loose, tighten screws a bit more. Ensure both handles are at the right position. This helps in proper water flow control.
Testing For Leaks
Turn the water supply back on. Check for any leaks around the faucet. Let the water run for a few minutes. Watch closely around the handles. If you see any water, re-tighten the screws. Check the base of the faucet too. Make sure there is no dripping. If all is well, your faucet is fixed. Enjoy a drip-free kitchen sink!
Preventative Maintenance Tips
Fixing a dripping kitchen faucet with two handles requires simple tools and patience. Turn off the water supply, then gently remove the faucet handles. Inspect and replace worn-out washers or seals to stop the leak.
Important
Keep your kitchen faucet working well with regular care. Check for any leaks or drips often. Tighten any loose parts to prevent problems. Clean the faucet with a soft cloth to avoid scratches. Use mild soap to remove any dirt or stains.
Remove any mineral deposits by soaking the faucet in vinegar. This helps keep water flowing smoothly. Avoid using harsh chemicals that can damage the faucet. Check the water pressure to ensure it is not too high. High pressure can cause leaks over time.
Replace worn-out washers or seals to prevent dripping. These small parts can wear out and cause leaks. Have a few spares at home for quick fixes. Following these tips can help your faucet last longer and work better.

Credit: www.youtube.com
Frequently Asked Questions
How Do You Stop A Faucet From Dripping?
To stop a faucet from dripping, first turn off the water supply. Then, disassemble the faucet handles to access the internal components. Replace any worn-out washers or seals. Reassemble the faucet, ensuring all parts are tightened properly. Turn the water supply back on to test for drips.
Why Is My Two-handle Faucet Dripping?
A two-handle faucet may drip due to worn-out washers, seals, or O-rings. Mineral deposits can also cause leaks by damaging internal components. Regular maintenance and timely replacement of these parts can prevent drips. Inspecting and cleaning components periodically will help maintain the faucet’s functionality.
Can I Fix A Dripping Faucet Myself?
Yes, you can fix a dripping faucet yourself with basic tools. Turn off the water supply and disassemble the faucet. Identify and replace worn or damaged parts like washers or seals. Reassemble the faucet and ensure all parts are secure.
Turn the water back on and check for leaks.
What Tools Are Needed To Fix A Dripping Faucet?
To fix a dripping faucet, you need a wrench, screwdriver, and plumber’s tape. Additionally, you might require replacement washers, seals, or O-rings. Having a towel handy will help catch any residual water. These tools will assist you in disassembling and reassembling the faucet effectively.
Conclusion
Fixing a dripping kitchen faucet is easier than it seems. With patience, you can stop the leak. Start by turning off the water supply. Then, remove the handles and check the washers. Replace worn parts with new ones. Tighten everything securely.
Turn the water back on and test. No more dripping! Regular maintenance helps prevent future leaks. Save money and water with this simple fix. Feel proud of your DIY skills. Now, enjoy peace in your kitchen. Happy fixing!


