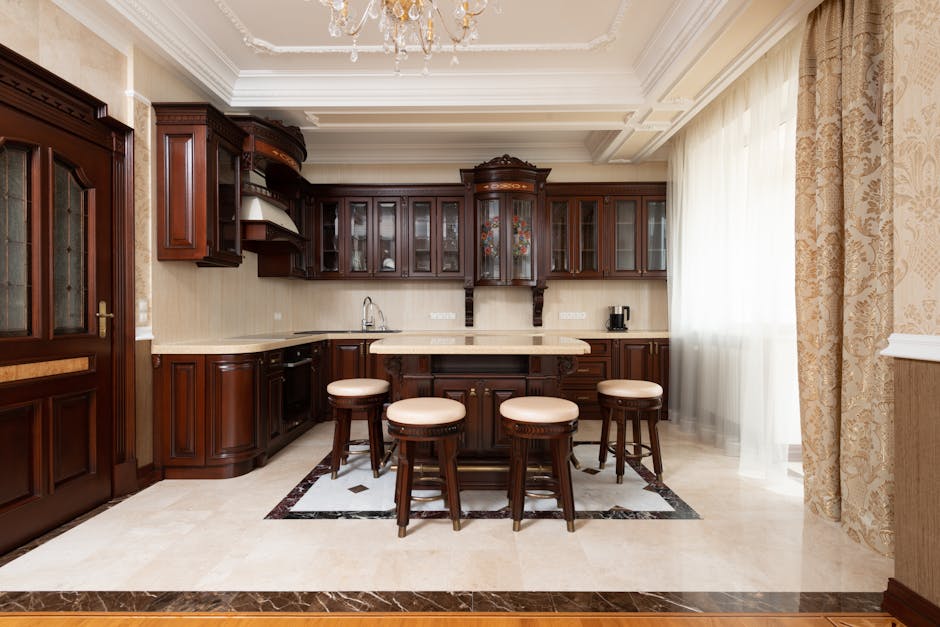
Transforming your kitchen into a masterpiece is easier than you think. One elegant touch that can elevate your space is adding crown molding to your cabinets.
You might wonder how this simple addition can make such a difference. Imagine stepping into a kitchen that looks straight out of a magazine—sleek, sophisticated, and seamlessly put together. That’s the magic of crown molding. Perhaps you’ve admired this detail in home decor shows or magazines and thought it was out of reach for you.
The truth is, attaching crown molding to your kitchen cabinets is a task you can tackle yourself. It’s an opportunity to showcase your DIY skills, impress guests, and bring a touch of luxury to your home. But how exactly do you go about it? What tools and techniques will ensure a flawless finish? This guide is designed just for you, breaking down each step in a straightforward manner. By the end, you’ll feel confident and ready to transform your kitchen cabinets into stunning focal points. Stick with us, and you’ll discover tips and tricks that professionals use, all without breaking the bank. Ready to get started? Let’s dive in!
Tools And Materials Needed
Attaching crown molding needs some basic toolsand materials. A miter sawhelps cut molding at the right angles. Wood glueor nailshold the molding in place. A measuring tapeensures the correct length. Sandpapersmooths rough edges. You might need a drillfor screws.
Choose the right crown moldingsize for your cabinets. Safety gogglesprotect your eyes. Use a levelfor perfect alignment. Have a pencilready to mark spots. Don’t forget a ladderif your cabinets are high.
These tools make the job easier. They help you attach molding firmly. Check you have everything before starting. This saves time and effort.
Measuring For Crown Molding
Measure the length of the cabinet top carefully. Use a tape measure for accuracy. Write down each measurement. Always double-check to avoid mistakes. Measure from one end to the other. Include any corners in your measurement. Add extra length for overhang if needed. Consider the thickness of the molding. Mark where you will cut on the molding. Use a pencil for marking lines. Check the angles of corners carefully. You might need a miter saw for cuts. Follow the marks when cutting the molding. Ensure the molding fits before attaching. Adjust as needed for a perfect fit.
Cutting The Crown Molding
First, measure the cabinet lengthcarefully. Use a tape measure for accuracy. Mark the length on the molding with a pencil. The mark should be clear. Next, use a saw to cut the molding. A miter saw works best. It gives clean edges and precise angles.
Angle the saw at 45 degreesfor corner cuts. This helps the molding fit perfectly. Make sure the cuts are smooth. Sand the edges if needed. This removes any rough spots. Check the fit before attaching. It should align well with the cabinet.
- Measure cabinet length accurately.
- Mark the molding clearly.
- Use a miter saw for cutting.
- Angle the saw at 45 degrees.
- Sand edges for smoothness.
Preparing The Cabinets
Clean the cabinets with a soft cloth. Remove all the dust and grease. This helps the glue stick better. Use a mild cleaner to avoid damage. Make sure the surface is dry after cleaning. This step is very important. A clean surface ensures a good fit for the molding.
Measure the cabinet tops carefully. Accurate measurements are crucial for a smooth installation. Write down each measurement. Double-check to ensure they are correct. This will help avoid mistakes later.
Gather all your tools and materials. You will need a saw, glue, and nails. Keep everything within reach. This makes the job easier and faster. Being organized is key for a successful project.
Attaching The Molding
First, measure the length of your cabinet edges. Use a tape measure. Cut the crown molding to fit these measurements. A miter saw works best for precise cuts. Next, sand the edges. This ensures smooth attachment. Then, apply wood glue to the molding edges. Align the molding on the cabinet top. Hold it firmly in place. Let the glue dry for a few minutes.
Drill small holes through the molding into the cabinet. Use screws to secure the molding. Make sure not to over-tighten. Over-tightening can damage the wood. Finally, fill any gaps with wood filler. Paint or stain the molding to match the cabinets. This gives a finished look.
Check the stability of the molding. Ensure it’s attached properly. Adjust if necessary. This keeps the molding secure and looking neat.
Finishing Touches
Crown molding gives cabinets a stylish look. It hides gaps and adds charm. Use a nail gun to attach the molding. This tool makes the job easier and faster. Ensure the nails are small. Large nails can split the wood. A good tip is to paint the molding before attaching. This prevents accidental paint smudges on the cabinets. After attaching, check the corners. They should fit well together.
Use caulk to seal gaps. Caulk creates a smooth finish. Choose a caulk color that matches your cabinets. This will make the molding look seamless. Remember to wipe excess caulk away. A clean finish makes the cabinets look neat and tidy.
Frequently Asked Questions
What Tools Are Needed To Attach Crown Molding?
To attach crown molding, you’ll need a miter saw, nail gun, measuring tape, and adhesive. The miter saw helps in cutting precise angles. A nail gun secures the molding, while adhesive ensures a strong hold. Measuring tape assists in accurate sizing for perfect fitting.
Can I Install Crown Molding On Any Cabinet?
Yes, crown molding can be installed on most kitchen cabinets. Check the cabinet’s top for a flat surface to attach molding. Ensure the cabinet is sturdy and has enough space above for the molding. It’s a great way to enhance the cabinet’s appearance.
How Do I Cut Crown Molding Corners?
Cut crown molding corners using a miter saw set at 45 degrees. Measure and mark the molding before cutting for accuracy. Adjust the saw blade angle for inside or outside corners. This technique ensures tight-fitting corners and a professional finish on kitchen cabinets.
Do I Need Adhesive For Crown Molding?
Yes, adhesive is recommended for crown molding installation. It provides a strong bond between the molding and cabinet. Use adhesive in combination with nails for extra security. This prevents the molding from shifting over time, ensuring durability and maintaining aesthetic appeal.
Conclusion
Attaching crown molding to kitchen cabinets enhances their look. It adds elegance. Follow steps carefully for a neat finish. Use the right tools. Measure precisely to avoid mistakes. Secure molding firmly for durability. Choose quality materials for lasting beauty. Make sure corners align perfectly.
Your kitchen will transform with this simple update. Feel proud of your handiwork. Enjoy your refreshed kitchen space. Craftsmanship matters in home projects. Impress guests with your skills. A little effort brings great rewards. Happy remodeling!


