
You’re in the middle of preparing dinner, hands covered in flour, when you notice it—your kitchen faucet is dripping. The sound becomes a constant reminder that something’s not quite right.
It’s easy to ignore at first, but soon, you realize it’s more than just an annoyance; it’s a problem that needs fixing. But where do you even start? The thought of calling a plumber might cross your mind, but imagine the satisfaction of tackling this challenge yourself.
Not only could you save money, but you’ll also gain a new skill. In this guide, you’ll learn step-by-step how to fix a kitchen faucet, even if you’ve never handled a wrench before. Stay with us, and soon that dripping will be a thing of the past, and you’ll have a kitchen you can be proud of.

Credit: www.youtube.com
Identifying The Problem
Understanding the issue is key to fixing a kitchen faucet. Check for leaks, low water pressure, or dripping sounds. Identifying these signs helps in determining the right solution.
Leaky Faucet
The first sign of a leaky faucetis dripping water. Check if the faucet handle is loose. Tighten it to stop the leak. Inspect the washer or O-ring. Replace it if worn out. These simple fixes often solve leaks quickly.
Low Water Pressure
Low water pressure can be very annoying. Check the faucet’s aerator. It might be clogged with dirt or minerals. Unscrew the aerator and clean it gently. Make sure to rinse it well before putting it back. This can improve water flow.
Noisy Faucet
A noisy faucet can sound like a loud thud. This is often due to a worn-out washer or valve. Inspect these parts carefully. Replace any damaged components. This usually quiets the faucet. Make sure everything is tight and secure.
Gathering Necessary Tools
Fixing a kitchen faucet requires some basic tools. Make sure you have a screwdriverand an adjustable wrench. A pair of pliersis also very helpful. Keep a buckethandy to catch water. Gather some clean clothsfor drying. These simple tools can solve most faucet problems.
Certain faucets need special tools. A basin wrenchis useful for hard-to-reach places. Some faucets require a hex keyor Allen wrench. Check your faucet model for specific requirements. Having the right tool makes the job easier.
Turning Off Water Supply
Turning off the water supply is crucial before fixing a kitchen faucet. Locate the shut-off valves under the sink to stop water flow. This step prevents leaks and ensures a safe repair process.
Locating Shut-off Valves
Find the shut-off valvesunder your sink. They are usually round knobs. Turn the knobs clockwise to stop the water. This prevents any leaks or spills.
Draining Remaining Water
Open the faucet to let out remaining water. This helps in draining the pipes. Catch the water in a bucket or bowl. This way the area stays dry.
Disassembling The Faucet
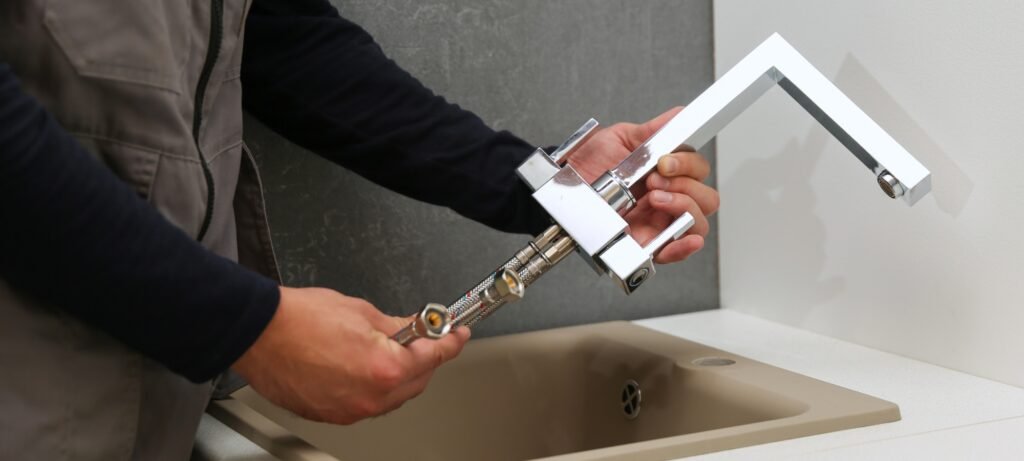
Shut off the water supply before disassembling the faucet. Unscrew the handle and remove the cap and nut. Detach the spout and replace worn-out parts to fix leaks or improve function.
Removing Handle
Use a screwdriver to loosen the screw on the handle. Some faucets have hidden screws. Look under the cap or handle. Pull the handle off gently. Don’t force it too hard. You might break it. Place the handle aside safely.
Accessing Internal Components
Find the retaining nut underneath the handle. Use a wrench to unscrew it. Be gentle to avoid damage. Now, you can see the internal parts. Look for any worn or broken parts. Replace them if needed. Ensure everything is clean. Dirt can cause problems later.
Replacing Damaged Parts
Replacing damaged kitchen faucet parts is straightforward. Identify the faulty component, secure the correct replacement, and follow installation instructions for a seamless fix. Regular maintenance can prevent frequent repairs.
O-rings And Washers
O-Rings and washers can wear out quickly. They help stop leaks. Turn off the water supply first. Then, unscrew the faucet handle. Look for the old O-Rings and washers. Replace them with new ones. Make sure they fit snugly. This keeps the faucet from leaking. Test the faucet after replacement. Ensure there’s no water drip. A tight fit is very important.
Cartridges And Valves
Cartridges and valves control water flow. They can get clogged or damaged. Remove the faucet handle. Locate the old cartridge or valve. Carefully pull it out. Replace with a new one. It should fit perfectly. Secure it in place. Reassemble the faucet. Turn on the water supply. Check if the faucet works well. No leaks mean you did it right.

Credit: www.youtube.com
Reassembling The Faucet
Reassembling the faucet involves aligning parts carefully. Ensure washers and seals are in place to prevent leaks. Tighten nuts securely for a firm fit.
Reattaching Components
Begin by placing the faucet handleback onto the base. Ensure it fits snugly. Next, secure the screwsusing a screwdriver. Tighten them properly. Insert the cartridgeinto the faucet body. Align it with the holes. Push it in gently.
Ensuring A Tight Seal
Place the washeronto the faucet stem. Press it down firmly. Apply a thin layer of plumber’s tapearound the threads. This prevents leaks. Attach the aeratorto the spout. Ensure it screws in tightly. Test the faucet for leaksby turning the water on.
Testing The Repair
Ensure the water flow is smooth after repair. Turn on the faucet to test for leaks or drips. Adjust any loose parts if necessary, checking all connections.
Checking For Leaks
Turn on the kitchen faucet slowly. Look closely for any water leaks. Check under the sink and around the faucet base. Use a dry cloth to wipe around connections. A wet cloth means a leak is present. Tighten the connections if needed. Replace any faulty washers or seals. Repeat the process until all leaks are fixed.
Assessing Water Flow
Turn the faucet on full blast. Ensure the water flowis smooth. No sputtering or uneven flow should occur. If the flow is weak, check the aerator. Remove and clean it if necessary. Reinstall the aerator and test again. Ensure water flows evenly from both hot and cold taps.
Preventive Maintenance Tips
Fixing a kitchen faucet requires basic tools and a little patience. Turn off the water supply first. Check for leaks or drips and tighten loose parts. Replace worn-out washers or O-rings if needed. Regularly clean and inspect to prevent future issues.
Regular Cleaning
Keep the faucet clean to make it last longer. Use a soft cloth to remove dirt and grime. Avoid harsh chemicals as they can damage the finish. Wipe down the faucet after each use. This stops water spots from forming. A clean faucet works better and looks shiny.
Routine Inspections
Check your faucet often for leaks and drips. Tighten any loose parts with a wrench. Look at the seals and washers; they can wear out. Replace them if they look old or broken. Make sure the faucet is stable and not wobbly. A quick inspection keeps your faucet working well.
Credit: carolinagirlcooks.com
Frequently Asked Questions
How Do You Troubleshoot A Leaking Faucet?
To troubleshoot a leaking faucet, first identify the leak source. Check for worn-out washers, O-rings, or seals. Tighten any loose parts and replace damaged components. Turn off the water supply before starting repairs. If the leak persists, consider consulting a professional plumber for assistance.
What Tools Are Needed To Fix A Faucet?
To fix a kitchen faucet, you’ll need basic tools. Gather an adjustable wrench, screwdriver, pliers, and replacement parts. Consider having plumber’s tape and a flashlight handy. These tools will help in disassembling and reassembling the faucet efficiently. Always turn off the water supply before starting repairs.
Can I Fix A Faucet Without A Plumber?
Yes, fixing a faucet without a plumber is possible. Follow a step-by-step guide to identify the problem. Use basic tools like wrenches and screwdrivers. Replace worn-out washers or O-rings as needed. Turn off the water supply before starting repairs. If the issue persists, professional help might be necessary.
Why Is My Kitchen Faucet Dripping?
A dripping kitchen faucet often results from worn-out washers or O-rings. Mineral buildup can also cause leaks. These components may degrade over time, leading to water leakage. Replacing faulty parts usually resolves the issue. Turning off the water supply before repairs is essential for safety and efficiency.
Conclusion
Fixing a kitchen faucet doesn’t have to be hard. With simple tools and steps, you can do it yourself. First, identify the problem. Is it leaking or not turning well? Then, gather your tools. Wrench, screwdriver, and new parts if needed.
Follow the steps in this guide. Patience helps. Don’t rush the process. Test the faucet after fixing it. Check for leaks and smooth operation. Celebrate your success with a clean, functional faucet. Now, you have the skills to tackle faucet issues easily.
Your kitchen is back in working order. Enjoy the satisfaction of a job well done.





