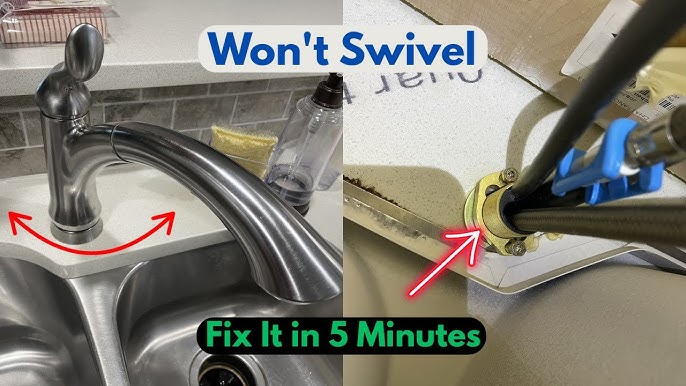
Is your kitchen faucet leaking, dripping, or just not functioning the way it used to? It can be frustrating to deal with a faucet that’s acting up, especially when you’re trying to prepare meals or clean up.
The good news is, you don’t necessarily need to call a plumber or replace it entirely. With a little guidance, you can repair your kitchen faucet yourself and save both time and money. Imagine the satisfaction of fixing it on your own and the peace of mind that comes from knowing exactly what’s behind your faucet’s newfound functionality.
Plus, you’ll gain valuable DIY skills that can empower you to tackle other small home repairs. In this guide, we’ll walk you through simple, step-by-step instructions to help you get your kitchen faucet back in working order. Whether you’re dealing with a minor drip or a more significant issue, you’re just a few easy steps away from a fully operational kitchen faucet. Ready to take control of your kitchen? Let’s get started!
Tools And Materials Needed
Repairing a kitchen faucet requires some essential tools. A wrench is crucial for loosening nuts. A screwdriver helps in removing screws. You may need plumber’s tape to seal connections. Have a bucket ready to catch water spills. Gather all parts before starting the work. Use gloves for safety while handling tools.
Materials are just as important. You might need new washers for a better seal. Replacement O-rings can fix leaks. Ensure you have a clean rag to wipe surfaces. An old toothbrush helps in cleaning grime. Inspect all faucet parts for damage. Replace any broken parts for a lasting fix.

Credit: m.youtube.com
Identifying The Problem
A leaking faucet can waste water. Check the handles and spout. Tighten any loose parts. Replace worn-out washers. This often stops leaks. Use a wrench carefully.
Low water pressure is frustrating. First, clean the aerator. It might be blocked. Remove it and rinse under water. Mineral deposits can cause this issue. Ensure the valves are fully open. This usually improves water flow.
Noisy faucets can be annoying. Air in pipes is a common cause. Turn the faucet on slowly. This reduces noise. Check if parts are loose. Tighten them with a screwdriver. This often quiets the faucet.
Shutting Off The Water Supply
Turn the faucet handleto check if water flows. If water runs, you must shut it off. Locate the valve under the sink. Turn it clockwise to stop water flow. If you cannot find the valve, check the main water supply. Turn the main valve clockwise. Once closed, test the faucet again. Water should not flow. Ensure all valves are tightly shut.

Credit: www.youtube.com
Disassembling The Faucet
Carefully remove the faucet handle using a screwdriver. Check for screws or caps that hide them. Once the handle is off, access the cartridge or valve inside.
Removing The Handle
Turn off the water supply before starting. Use a screwdriver to take off the handle screw. Keep the screw in a safe place. Gently pull the handle to remove it. If it’s stuck, wiggle it slowly. Be careful not to damage the handle. Use a cloth for better grip if needed.
Accessing The Cartridge
After removing the handle, look for the retaining clip. Use pliers to take the clip out. Keep it safe for later use. Pull out the cartridge carefully. Check for any dirt or damage. If it’s dirty, clean it gently. If damaged, replace it with a new one.
Fixing Common Issues
The washer can wear out over time. First, turn off the water supply. This stops water from flowing. Next, use a wrench to remove the faucet handle. You will see the washer inside. Take it out carefully. Replace it with a new washer of the same size. Tighten everything back up. Turn the water on and check for leaks. A new washer helps stop drips.
The cartridge controls water flow and mixing. Sometimes, it gets clogged or damaged. To clean or replace it, first, shut off the water supply. Remove the faucet handle and locate the cartridge. Take it out gently. If it’s dirty, clean it with vinegar. If broken, replace it with a new one. Reassemble the faucet. Turn the water on and test for smooth flow.
Loose parts can cause leaks and noise. Check the faucet handle and spout. If loose, use a screwdriver or wrench to tighten them. Make sure not to over-tighten. This can break parts. Test the faucet by turning it on. Tight parts make the faucet work better. No more leaks or wobbles.

Credit: www.youtube.com
Reassembling The Faucet
Start by placing the valve back into the faucetbody. Ensure it fits snugly. Use a wrench to tighten any loose parts. Next, attach the handle on top of the valve. Secure it using a screw or bolt. Check for any remaining washers or gaskets. Ensure all are in their correct places. Tighten everything but avoid over-tightening. Over-tightening can cause damage.
Once assembled, turn the water supply back on. Check for any leaks around the faucet. If leaks occur, turn the water off again. You may need to tighten parts further. Sometimes, replacing a washer can help. Test the faucet by turning it on. Ensure both hot and cold water flow smoothly. If everything works, you have successfully reassembled your faucet!
Testing The Repair
Ensure the faucet works perfectly after repairs. Turn on the water, checking for leaks or irregular flow. Adjust and tighten components if needed for smooth operation.
Checking For Leaks
Turn on the faucet slowly. Look carefully under and around the sink. Watch for any water drops. Use a tissue to check small leaks. If it gets wet, there might be a leak. Make sure all connections are tight. Tighten nuts with a wrench if needed. This helps stop leaks.
Ensuring Proper Water Flow
Turn on both hot and cold water. Check if water flows smoothly. If water sputters, there might be air in the pipes. Let water run until it flows steady. Test the faucet handle. It should move easily. Listen for any strange noises. These can mean there’s a problem. A steady flow means your repair worked.
Preventive Maintenance Tips
Regularly check for leaks and drips in your kitchen faucet. Tighten loose parts using a wrench to prevent water damage. Clean the aerator to ensure smooth water flow and avoid clogs.
Regular Cleaning
Keep your kitchen faucet clean to avoid damage. Use a soft cloth and mild soap to wipe away dirt. This helps prevent scratches and keeps the faucet shiny.
Check For Leaks
Look for drips or puddles around the faucet base. Tighten any loose parts to stop leaks. This saves water and prevents further damage.
Inspect The Aerator
Remove the aerator and clean it monthly. This ensures good water flow. Rinse it under running water to remove any debris.
Avoid Harsh Chemicals
Do not use strong cleaners on the faucet. They can damage the finish. Choose gentle, non-abrasive cleaners instead.
Use Proper Tools
Always use the right tools for any repairs. This prevents damage to faucet parts. Keep basic tools handy in your kitchen.
Frequently Asked Questions
How Do I Identify Faucet Problems?
To identify faucet problems, start by checking for leaks or drips. Inspect the faucet handles for stiffness or unusual movement. Listen for strange noises when the faucet is in use. These signs often indicate worn-out parts or a need for replacement.
What Tools Are Needed To Repair A Faucet?
To repair a faucet, you’ll need a wrench, screwdriver, and pliers. You may also require replacement parts like washers or O-rings. Having a towel handy helps to clean up spills. Always turn off the water supply before starting repairs.
How To Fix A Leaky Kitchen Faucet?
To fix a leaky faucet, first turn off the water supply. Remove the handle and inspect for worn-out washers or O-rings. Replace any damaged parts, then reassemble the faucet. Turn the water back on and check for leaks.
Why Is My Faucet Water Pressure Low?
Low faucet water pressure may be due to clogged aerators or pipes. Mineral deposits can restrict water flow. Remove and clean the aerator to improve pressure. If the problem persists, check for leaks or contact a plumber.
Conclusion
Repairing a kitchen faucet is simple with the right steps. Start by gathering necessary tools. Turn off the water supply to prevent leaks. Identify the problem area. Tighten loose parts. Replace worn-out washers or seals. Test the faucet for smooth operation.
Regular maintenance prevents future issues. Troubleshooting saves money and time. Remember, a functional faucet enhances daily kitchen tasks. Now, your kitchen is ready for use. Enjoy the satisfaction of a job well done. Keep learning about home repairs to boost your skills.
Happy fixing!





