Is your single handle kitchen faucet leaking or not working right? You don’t have to call a plumber or spend a lot of money to fix it.
With a few simple steps, you can solve common faucet problems yourself and get your kitchen back to normal. Imagine saving time and avoiding frustration by handling this repair on your own. Keep reading, and you’ll learn easy tips that anyone can follow to fix your single handle kitchen faucet quickly and confidently.

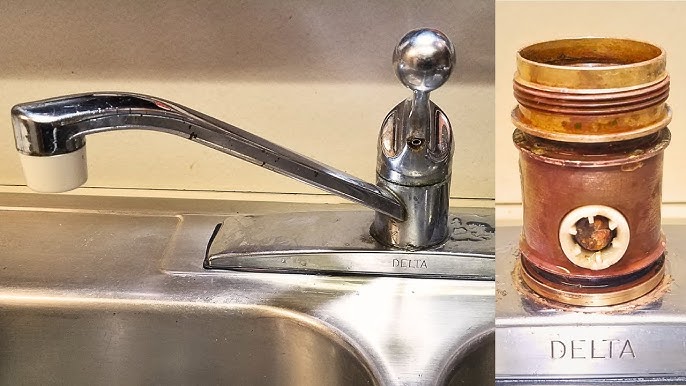
Credit: www.youtube.com
Tools And Materials Needed
Gather these tools and materialsbefore starting the repair. A adjustable wrenchhelps to loosen nuts. You will need a screwdriverto remove screws from the handle. A Allen wrenchis sometimes required for set screws. Keep a replacement cartridgeready if the faucet leaks or drips. Use plumber’s greaseto lubricate parts and prevent damage. Have clean ragshandy to wipe water and dirt. A bucketcan catch any dripping water during the fix.
Identifying Common Faucet Issues
A leaking handlecan waste water and raise bills. It often means the internal cartridgeor O-rings are worn out. Tightening the handle may help, but replacement might be needed.
Low water pressuremakes it hard to wash dishes. It can be caused by a clogged aerator or supply valve issues. Cleaning the aerator usually improves flow.
A dripping spoutshows water even when off. This is a sign of a faulty cartridge or worn seals inside the faucet. Replacing these parts often stops the drip.
Shutting Off Water Supply
Locate the main water valve under your kitchen sink. It often looks like a small round or oval handle.
Turn the valve clockwise to close it. This stops water from flowing to the faucet.
If there is no valve under the sink, turn off the main water supply for the house. This is usually near the water meter or where the pipe enters your home.
Open the faucet to drain any water left in the pipes. This prevents spills while fixing the faucet.
Keep a bucket or towel nearby to catch any water that may drip after shutting off the supply.
Disassembling The Faucet
Start by turning off the water supply under the sink. Use an Allen wrench or screwdriver to remove the small set screw on the handle. Gently pull the handle straight up to take it off. Sometimes, a little wiggle helps if it feels stuck. Keep the screw safe for reassembly.
Once the handle is removed, use a wrench to loosen the retaining nut. This exposes the cartridge or valve inside. Carefully pull out the cartridge; it controls the water flow. Check for any damage or dirt that may cause leaks or poor function.
Inspecting And Replacing Parts
Check the cartridgeby turning off water supply first. Remove the handle and use pliers to pull out the cartridge. Look for cracks, mineral buildup, or worn parts. Clean the cartridge with vinegar if dirty. Replace it if damaged to stop leaks or poor water flow.
O-rings and sealsprevent water leaks around the faucet. Remove the cartridge and find the small rubber rings. These can get hard or crack over time. Replace with new O-rings and seals of the right size. Apply a little plumber’s grease to help them seal better and last longer.
Cleaning The Faucet Components
Remove the handle carefully to avoid damage. Use a screwdriver to loosen screws. Pull out the cartridge gently. Soak the cartridge and other parts in vinegar for 30 minutes. This helps to remove mineral deposits. Use a soft brush to clean tight areas. Avoid harsh tools that can scratch the surface. Rinse all parts with clean water. Dry them with a soft cloth before reassembling. Check for worn-out seals or O-rings. Replace them if needed to prevent leaks. Clean the faucet body with a mild soap solution. Wipe dry to keep it shiny and new. Regular cleaning keeps your faucet working smoothly.
Reassembling The Faucet
After cleaning all parts, place the cartridge back into the faucet body. Make sure it fits snuglyand aligns with the slots. Secure the cartridge with the retaining clip or nut. Tighten it gently to avoid damage.
Next, attach the handle by sliding it over the cartridge stem. Press it firmly and fasten the screw that holds it in place. Do not overtighten to prevent stripping the screw.
Replace the decorative cap to cover the screw. This gives the faucet a cleanlook. Finally, turn on the water supply and check for leaks around the base and handle.

Credit: www.leftonhome.com
Testing For Leaks And Functionality
Turn on the faucet and watch for any water drips or sprays. Check around the base and under the sink. Tighten any loose parts to stop leaks. Move the handle to test hot and cold water flow. Listen for strange sounds like hissing or dripping. A steady stream shows good water pressure. If water pressure is low, clean the aerator. Use a dry cloth to wipe all wet spots. This helps find small leaks quickly. Watch the water temperature change smoothly. No sudden drops or spikes means the faucet works well. Fix any leaks before finishing the job. This keeps your kitchen dry and safe.
When To Call A Professional
Signs of complex problems need expert help. Leaks that keep coming backor water damage around the sink are serious. Strange noises or low water pressure might mean internal parts are broken. Broken handlesor parts that don’t move right also call for a pro. Sometimes, the tools or skills needed are more than simple fixes. A professional plumber can fix these issues safely and quickly.
Here are some situations to call a plumber:
- Persistent leaks after attempts to fix
- Water pressure stays low
- Handle or faucet parts are cracked or broken
- Water temperature does not change properly
- Unusual noises when using the faucet
- Signs of water damage or mold near the sink

Credit: www.homedepot.com
Frequently Asked Questions
How Do I Fix A Leaking Single Handle Kitchen Faucet?
First, turn off the water supply. Remove the handle and inspect the cartridge. Replace any damaged parts. Reassemble and test for leaks.
What Tools Do I Need To Repair A Kitchen Faucet?
You typically need an adjustable wrench, screwdriver, Allen key, pliers, and plumber’s grease for smooth reassembly.
Why Is My Single Handle Faucet Handle Hard To Move?
Mineral deposits or a worn cartridge often cause stiffness. Cleaning or replacing the cartridge usually resolves this issue.
How Long Does It Take To Fix A Single Handle Faucet?
Most repairs take 30 to 60 minutes, depending on your experience and the faucet’s condition.
Conclusion
Fixing a single handle kitchen faucet can be straightforward. Follow the steps carefully. Always ensure you have the right tools on hand. Turn off the water supply before starting. This prevents any accidental leaks. Pay attention to each component while dismantling.
Clean every part to remove debris. Reassemble with precision to avoid leaks. Test the faucet after reassembly to ensure success. Regular maintenance can extend its life. Don’t hesitate to consult a professional if needed. A well-functioning faucet enhances your kitchen experience.
Enjoy the ease and efficiency of a properly working faucet. Happy fixing!


