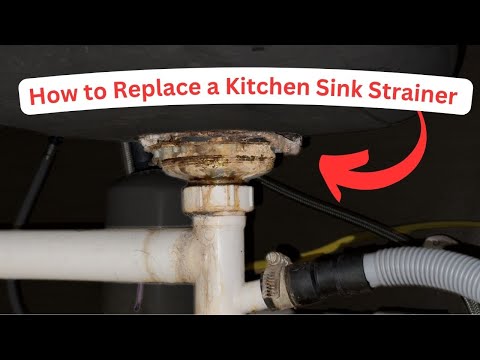
Imagine transforming your kitchen into a space of seamless functionality, where everything works just the way you want it to. Installing a kitchen sink drain might sound like a daunting task, but with the right guidance, you can do it yourself and enjoy the satisfaction of a job well done.
Are you ready to tackle this project head-on and save money in the process? You don’t need to be a plumbing expert to achieve a perfect installation; you just need a little help and a willingness to learn. By following these straightforward steps, you’ll be able to put in a kitchen sink drain with ease and efficiency.
Dive in, and let’s turn what seems like a challenging task into a rewarding experience. Your kitchen deserves it, and so do you!
Tools And Materials Needed
Gather all your toolsand materialsfirst. This saves time later. You need a wrenchand plumber’s putty. Also, have a bucketready for water. A screwdriveris essential for removing screws. Keep rubber glovesto protect your hands.
Get a new drain assembly. Ensure it fits your sink. You will need a sealantto prevent leaks. Have a towelor cloth nearby. It helps clean spills. Make sure your drain stopperis functional. A brushmight be useful for cleaning.
Here’s a simple list:
- Wrench
- Plumber’s putty
- Bucket
- Screwdriver
- Rubber gloves
- Drain assembly
- Sealant
- Towel
- Drain stopper
- Brush
Choosing The Right Sink Drain
Sink drains come in different types. The most common is the pop-up drain. It uses a lever to open and close. Another type is the basket strainer. It catches food and debris. There is also the grid drain. It has small holes to let water through. Each type fits different needs. Think about what you want your sink to do.
Measure the hole of your sink. This helps you pick the right size. Most drains are around 3.5 inchesin diameter. Make sure it fits snugly. A tight fit prevents leaks. Check your sink’s manual if unsure. The right size makes installation easier. It also ensures a smooth water flow.
Preparing The Sink Area
Ensure the sink area is clean and free of debris. Place a towel underneath to catch any spills. Gather all necessary tools like pliers, plumber’s putty, and the drain kit for easy access.
Removing Old Drain
First, gather your tools. You need a wrench and pliers. Twist the old drain with the wrench. Be careful not to damage the sink. If the drain is stuck, use pliers for extra grip. Loosen all the nuts around the drain. Pull the old drain out gently. Dispose of it properly. Check for any leftover debris in the hole. Clean it before moving on.
Cleaning The Sink Surface
Use a damp cloth to wipe the sink. Ensure there is no grime left. Scrub stubborn spots with a soft brush. Avoid using harsh chemicals. They can damage the sink. Rinse the surface with water. Dry it with a towel. Make sure the area is dry before installing a new drain. A clean surface ensures a tight seal.
Assembling The Drain Components
Place the rubber gasketunder the sink’s drain hole. Ensure it sits flat. This keeps water from leaking. The gasket should fit snugly. It stops water from escaping. Make sure it’s aligned perfectly. Check for any gaps. Press it firmly in place.
Position the strainer basketon top of the gasket. It should sit right in the center. The basket keeps food out of the pipes. Push it down gently. Make sure it’s secure. Twist it slightly to lock it. Ensure it does not wobble. A firm fit is essential. Check for stability.
Securing The Drain To The Sink
Ensure a snug fit between the sink and drain for smooth water flow. Use plumber’s putty around the drain rim. Securely tighten the locknut underneath to prevent leaks.
Tightening The Locknut
Place the rubber gasketunder the sink drain. Make sure it fits snugly. Use a locknutto secure the drain. Turn it with your hand first. Then, use pliers to tighten it firmly. Be careful not to over-tighten. This could damage the sink. Check if the drain is stable.
Ensuring A Watertight Seal
Apply a thin layer of plumber’s puttyaround the drain edge. Press it down firmly. This helps to create a watertight seal. Wipe away any excess putty. Ensure there are no gaps or leaks. Check with a bit of water. If it leaks, adjust and try again. The sink should stay dry underneath.

Credit: www.tiktok.com
Connecting The Plumbing
Learn how to connect your kitchen sink drain effectively. Begin by attaching the drain assembly to the sink’s underside. Ensure the pipes align properly, and tighten the slip nuts securely to prevent leaks.
Attaching The Tailpiece
The tailpiece connects the sink to the plumbing. First, fit the tailpiece into the sink drain. Make sure it’s snug and secure. Use a rubber washerto prevent leaks. Tighten the nut by hand, then use pliers for a final turn. Check the connection for leaks.
Connecting To The Trap
The trap stops sewer gas from coming into your home. Connect the trap to the tailpiece. The trap has two parts: the U-bendand the trap arm. Attach the U-bend to the tailpiece. Use a slip nut and washer for a tight fit. Then, connect the trap arm to the wall pipe. Adjust the pieces for a snug fit. Finally, tighten all connections with pliers. Test for any leaks by running water.
Testing For Leaks
Ensure the sink drain is tightly fitted and sealed. Run water through the drain to check for leaks. Tighten or reseal any loose connections to prevent water escape.
Running Water Through The Drain
Turn on the tap slowly. Let water flow for a few minutes. Watch the sink carefully. Check if water drains properly. Listen for strange sounds. Look under the sink. Feel for any wet spots. Use a flashlight for better visibility. Make sure everything stays dry.
Checking For Drips
Place a dry towel under the pipes. Let it sit there for a while. Check the towel after ten minutes. Look for water spots or dampness. Feel the pipes with your hands. Ensure they are dry. Tighten loose connections if needed. Inspect all fittings closely. Make sure there are no leaks.

Credit: www.tiktok.com
Tips For Maintenance
Ensure a snug fit by securing the drain flange with plumber’s putty. Connect the drain pipe tightly to prevent leaks. Regularly check connections to maintain a watertight seal.
Cleaning The Drain Regularly
Keep your kitchen sink drain clean to avoid problems. Use warm water and dish soap for daily cleaning. This helps remove food and grease. A small brush can reach inside the drain. It removes dirt and grime. Baking soda and vinegar are great for deep cleaning. Pour a cup of baking soda, then vinegar. Wait for bubbles and rinse with hot water. This keeps the drain fresh and clear.
Preventing Clogs
Clogs can cause big trouble in sinks. Avoid putting food scraps down the drain. Use a strainer to catch bits. Throw them in the trash instead. Grease can harden and block pipes. Wipe greasy pans before washing them. Pouring hot water weekly can help keep drains clear. A little care can save a lot of hassle.

Credit: www.youtube.com
Frequently Asked Questions
How Do I Remove The Old Kitchen Sink Drain?
To remove the old drain, first, loosen the locknut beneath the sink. Then, detach the drain flange from the sink basin. Carefully remove any old plumber’s putty or sealant. Once removed, clean the area thoroughly to ensure a smooth installation of the new drain.
What Tools Are Needed For Sink Drain Installation?
You’ll need a pipe wrench, pliers, plumber’s putty, and a screwdriver. A bucket can catch excess water. Ensure you have a new sink drain kit. These tools will help you efficiently remove the old drain and install the new one securely.
How Do I Apply Plumber’s Putty Correctly?
Roll a small amount of plumber’s putty into a snake-like shape. Place it under the lip of the drain flange. Press down firmly to create a watertight seal. Remove any excess putty to ensure a neat finish. Allow it to set for a few hours.
Can I Install A Sink Drain Without Professional Help?
Yes, you can install a sink drain without professional help. With the right tools and guidance, it’s a manageable DIY task. Follow step-by-step instructions carefully. Ensure all connections are tight to prevent leaks. If unsure, seek advice or consult a professional for assistance.
Conclusion
Installing a kitchen sink drain may seem daunting. But it’s manageable with patience. Start with the right tools and materials. Follow the steps carefully. Double-check each connection for leaks. Practice makes perfect, so take your time. A well-installed drain prevents future plumbing issues.
It also keeps your kitchen clean and efficient. Remember, safety first. Wear gloves and eye protection. If unsure, don’t hesitate to consult a professional. With these tips, you’ll enjoy a functional kitchen sink. Happy installing!





