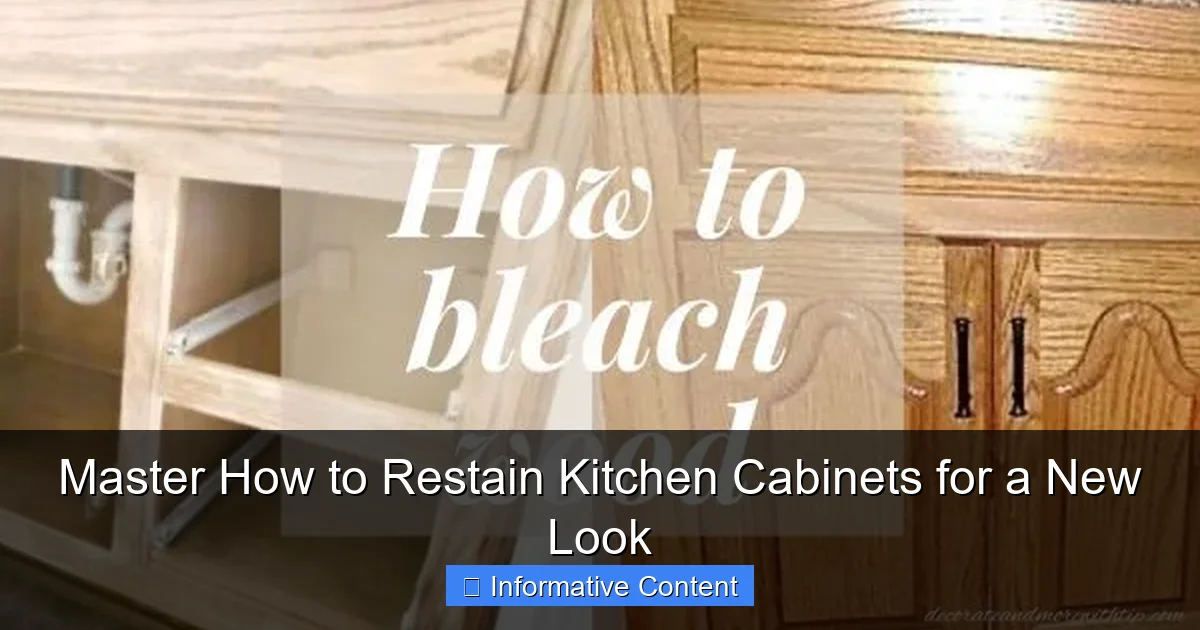
Featured image for how to restain kitchen cabinets
Image source: i.pinimg.com
Restaining kitchen cabinets offers a dramatic and cost-effective way to revitalize your kitchen’s entire aesthetic, transforming outdated looks into a fresh, modern style. This rewarding DIY project involves careful preparation, thorough sanding, precise stain application, and durable sealing to ensure a flawless and long-lasting finish. Master these essential steps to achieve a stunning new look you’ll love.
Master How to Restain Kitchen Cabinets for a New Look
Have you ever walked into your kitchen and felt… underwhelmed? Perhaps your cabinets, once stylish, now whisper tales of a bygone era. Or maybe they’ve simply seen better days, showing scuffs, faded patches, and a general lack of luster. It’s a common dilemma, often leading us to imagine a full kitchen renovation. That thought can quickly send shivers down your wallet’s spine. But what if there’s a powerful, transformative secret that can breathe new life into your kitchen without the monumental cost and disruption of a complete overhaul?
That secret, my friend, is learning how to restain kitchen cabinets. It’s more than just a DIY project; it’s an act of rediscovery. You take something familiar and reveal its hidden potential. I remember feeling overwhelmed at the prospect myself, gazing at my own tired cabinets and wondering if I was really capable. But with patience, the right tools, and a clear understanding of the steps, restaining your cabinets can be an incredibly rewarding journey. It culminates in a kitchen that feels fresh, modern, and uniquely yours.
So, if you’re ready to roll up your sleeves and give your kitchen the facelift it deserves, you’ve come to the right place. We’ll walk through every step, from initial assessment to the final protective coat. I’ll share all the tips and tricks I’ve learned along the way. Get ready to master how to restain kitchen cabinets and fall in love with your kitchen all over again!
Key Takeaways
- Prep is paramount: Thoroughly clean and sand cabinets for best results.
- Strip old finish: Essential for proper stain absorption and consistent color.
- Test stain first: Always sample stain on an inconspicuous area or scrap wood.
- Apply thin coats: Stain evenly along the wood grain, avoiding drips or pooling.
- Seal for durability: Protect your new finish with a high-quality topcoat.
- Patience pays off: Allow ample drying time between each step.
- Ventilate properly: Ensure good airflow and wear appropriate protective gear.
Quick Answers to Common Questions
Do I have to remove the old finish completely before I restain kitchen cabinets?
For the best and most durable results, yes! You’ll want to strip or sand down to the bare wood so your new stain can penetrate properly and give you a beautiful, even finish when you **restain kitchen cabinets**.
What’s the best way to choose a new stain color?
Consider the overall color scheme of your kitchen and natural light. It’s always a good idea to test a few sample colors on an inconspicuous area or a scrap piece of wood that matches your cabinets before you fully **restain kitchen cabinets** to ensure you love the look.
How many coats of stain should I apply?
Generally, one to two thin coats are sufficient when you **restain kitchen cabinets**, depending on how dark you want the finish. Always apply thinly and wipe off any excess immediately to prevent a sticky or blotchy appearance.
Is a topcoat really necessary after staining?
Absolutely! A durable topcoat like polyurethane or lacquer is crucial to protect your newly **restained kitchen cabinets** from daily wear, moisture, and scratches, ensuring their beauty lasts for years to come.
Can I use gel stain to restain kitchen cabinets, and is it easier?
Yes, gel stain is an excellent option for beginners or if you have woods that don’t absorb traditional stain evenly! It sits more on the surface, offering greater control and often a more uniform finish when you **restain kitchen cabinets**.
📑 Table of Contents
- Is Restaining Right for Your Cabinets? Assessing Your Kitchen’s Potential
- Gathering Your Arsenal: Tools and Materials You’ll Need
- The Art of Preparation: Why It’s 90% of the Job
- The Staining Process: Bringing Your Vision to Life
- Sealing the Deal: Protecting Your Hard Work
- Troubleshooting and Tips for a Professional Finish
- Conclusion: Embrace Your Transformed Kitchen
Is Restaining Right for Your Cabinets? Assessing Your Kitchen’s Potential
Before diving into sanding and staining, it’s crucial to assess if restaining is truly the best path for your existing kitchen cabinets. Not all cabinets are created equal. Understanding their current state will save you a lot of heartache later.
Understanding Your Cabinet Material
- Solid Wood: If your cabinets are solid wood (oak, maple, cherry), they are excellent candidates for restaining. Solid wood can be sanded down repeatedly, allowing for deep color changes. Learning how to restain kitchen cabinets made of solid wood is generally the most straightforward.
- Wood Veneer: These cabinets have a thin layer of real wood over a particleboard or MDF core. They can often be restained, but with extreme caution. The veneer is very thin, limiting how much you can sand.
- Laminate or Thermofoil: These materials don’t absorb stain like real wood. Traditional restaining is not suitable for them. Painting is an option, but learning how to restain kitchen cabinets typically applies only to real wood or wood veneer.
Assessing the Condition of Your Cabinets
Beyond the material, check the overall condition:
- Minor Scratches and Fading: Ideal for restaining. A fresh stain can hide minor imperfections and bring back vibrancy.
- Deep Gouges and Dents: Restaining can make deep damage less noticeable. You might need to fill significant dents with wood filler, which can then be sanded and stained. Filled areas may take stain differently. This is important when you learn how to restain kitchen cabinets effectively.
- Structural Damage: If cabinets are falling apart or warped, restaining might be a temporary fix. Repair or replacement could be a more durable solution.
Considering Your Desired Outcome
Are you going from light to dark, or dark to light? Going darker is generally easier, as new stain pigment covers old. Going significantly lighter means removing almost all existing stain. This requires more aggressive stripping and sanding – a much more intensive process. Weigh your aesthetic goals against the effort involved in learning how to restain kitchen cabinets for your specific vision.
Gathering Your Arsenal: Tools and Materials You’ll Need
Once you’ve decided restaining is your mission, it’s time to equip yourself. Having all your tools and materials ready before you start will make the process smoother. It prevents frustrating trips to the hardware store mid-project. This section covers everything you need to master how to restain kitchen cabinets successfully.
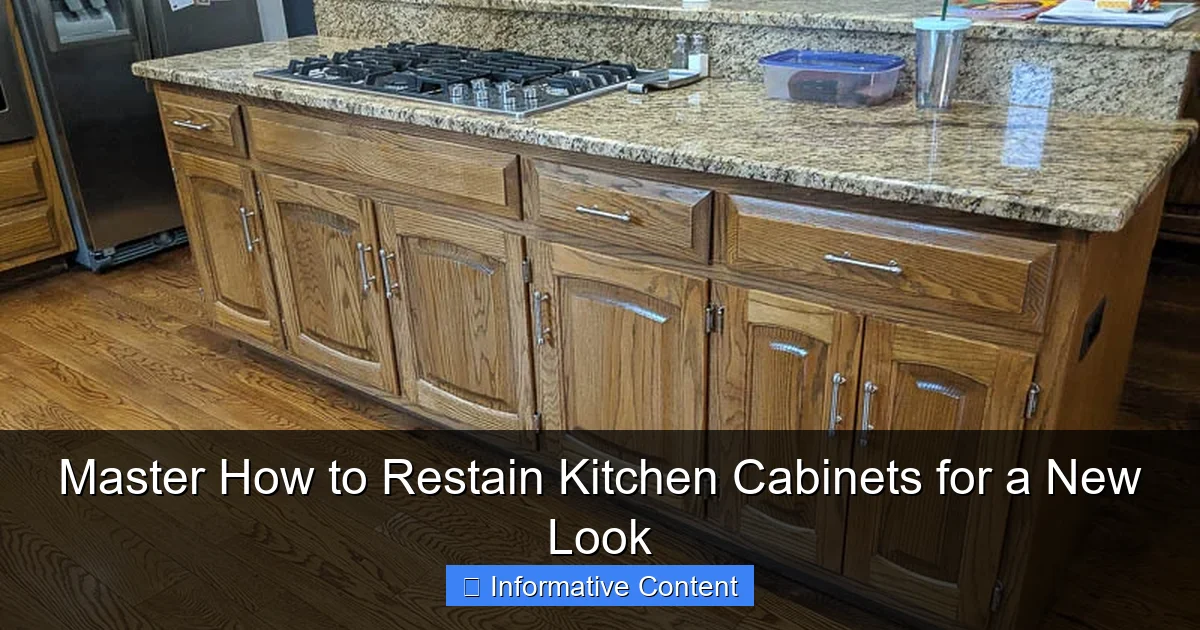
Visual guide about how to restain kitchen cabinets
Image source: wheatlandcabinets.com
Essential Tools and Materials Checklist
Here’s a comprehensive list of what you’ll want to have on hand:
| Category | Item | Purpose/Notes |
|---|---|---|
| Disassembly | Screwdriver/Drill | For removing doors, drawers, hinges, and hardware. |
| Labels/Masking Tape & Pen | To keep track of door/drawer placement. Crucial! | |
| Preparation | Drop cloths/Plastic Sheeting | To protect floors and countertops. |
| Painter’s Tape | To mask off areas not being stained. | |
| Degreaser/Wood Cleaner | To remove grease and grime. | |
| Chemical Stripper (Optional) | To remove old finish. Use with ventilation. | |
| Putty Knife/Scrapers | For applying stripper and scraping. | |
| Orbital Sander and Sanding Blocks | For smooth, even sanding. Hand sanding for details. | |
| Assorted Sandpaper (80, 120, 150, 180, 220 grit) | Start coarse, finish fine. | |
| Application | Wood Pre-Stain Conditioner | Ensures even stain absorption. Highly recommended! |
| Wood Stain (Oil-based or Water-based) | Your chosen color. Buy samples to test first! | |
| Wood Finish/Topcoat (Polyurethane, Polycrylic) | For protection and durability. Match base type. | |
| Brushes, Foam Applicators, Rags (Lint-free) | For applying conditioner, stain, and topcoat. | |
| Safety & Cleanup | Gloves (Nitrile or Chemical-resistant) | Protect your hands. |
| Safety Glasses/Goggles | Protect your eyes. | |
| Dust Mask/Respirator | Essential for sanding and chemical use. | |
| Miscellaneous | Tack Cloths | To pick up fine dust. |
| Sawhorses or Drying Racks | For drying doors and drawers horizontally. |
Choosing Your Stain and Topcoat
This is where your vision comes to life!
- Stain Type: Oil-based stains offer rich color and longer open time. They require mineral spirits for cleanup and have stronger fumes. Water-based stains dry faster, have less odor, and clean up with water. They can raise the wood grain more. If you want to know how to restain kitchen cabinets with a specific look, consider the stain type carefully.
- Topcoat: Polyurethane is incredibly durable. Polycrylic is a water-based alternative, great for lighter woods as it won’t yellow. Always match your topcoat type to your stain type for best adhesion and finish (e.g., oil-based stain with oil-based poly).
Pro Tip: Buy small sample cans of a few different stain colors. Test them on an inconspicuous area of your cabinet or scrap wood. Colors can look very different on wood than on the can! This is a vital step when learning how to restain kitchen cabinets.
The Art of Preparation: Why It’s 90% of the Job
I can’t stress this enough: preparation is everything when you’re learning how to restain kitchen cabinets. Skimp on prep, and you’ll regret it. A rushed cleaning or sanding job will show through your beautiful new stain, creating an uneven finish.
Step 1: Disassembly and Organization
- Empty Cabinets: Remove everything from your cabinets and drawers.
- Remove Doors and Drawers: Carefully unscrew hinges and remove doors. Remove drawer fronts if detachable. Keep all hardware (hinges, pulls, screws) in labeled bags. Label each door and drawer front with a corresponding number (e.g., “Upper Left #1”) on its inside edge and on the cabinet frame. This saves huge reassembly headaches!
- Remove Hardware: Take off all handles, pulls, and other hardware. Store them safely.
Step 2: Deep Cleaning
Kitchen cabinets accumulate grease and grime like magnets. This residue absolutely *must* be removed for stripper and stain to work properly.
- Degrease: Use a strong degreaser or a 50/50 mix of TSP (Trisodium Phosphate, follow safety instructions) and water. Wipe down all surfaces thoroughly. Rinse with clean water and wipe dry. Repeat until no greasy residue remains.
Step 3: Stripping the Old Finish (If Necessary)
If going from dark to light, or if the finish is peeling, stripping is essential. Otherwise, thorough sanding might suffice, especially if going darker.
- Apply Stripper: Work in a well-ventilated area. Apply an even layer of chemical stripper according to instructions.
- Scrape and Remove: Allow stripper to work. Use a plastic putty knife to gently scrape off the softened finish. Use an old toothbrush for intricate areas.
- Clean Residue: Wipe down the stripped surface with a clean cloth dampened with mineral spirits or a neutralizer.
Step 4: Sanding, Sanding, and More Sanding
Sanding is the most critical step for a smooth, even finish. It removes old stain, opens the wood grain for new stain, and smooths imperfections. Patience pays off when you want to know how to restain kitchen cabinets professionally.
- Start Coarse: Begin with 80 or 100-grit sandpaper (if stripped) or 120-grit (if just sanding off finish). Use an orbital sander for flat surfaces and a sanding block for edges. Always sand with the grain.
- Progress to Finer Grits: Gradually move to finer grits – 150, then 180, and finally 220-grit. Each grit removes scratches from the previous one. Don’t skip grits!
- Dust Removal: After each sanding stage, thoroughly wipe down surfaces with a tack cloth or vacuum. Dust left behind will embed in your new finish.
- Smoothness Check: Run your hand over the sanded surface. It should feel perfectly smooth. Rough patches will show up once stained.
By the time you’re done with prep, you’ll feel like you’ve finished half the project – and you will have! The canvas is now ready. This thorough prep is the secret to mastering how to restain kitchen cabinets.
The Staining Process: Bringing Your Vision to Life
With your cabinets meticulously prepped, the exciting part begins! This is where you transform the bare wood into your desired aesthetic. Taking your time and applying the stain correctly ensures beautiful, even color that enhances the wood’s natural grain. Understanding these steps is key to mastering how to restain kitchen cabinets with confidence.
Step 1: Apply Wood Pre-Stain Conditioner
This step is often overlooked but makes a huge difference, especially on softwoods or blotchy woods. Conditioner helps wood absorb stain evenly, preventing splotches and streaks.
- Application: Apply generously with a brush or clean cloth, following manufacturer’s instructions.
- Dwell Time: Allow it to penetrate for the recommended time (usually 5-15 minutes).
- Wipe Excess: Wipe off any excess conditioner with a clean, lint-free cloth before it dries.
- Stain Within Window: Apply your stain within the conditioner’s specified window (e.g., within 2 hours).
Step 2: Applying the Stain
Now for the color! Always stir your stain thoroughly before and during application; pigments settle. Do not shake.
- Test First: Always test your stain on an inconspicuous area or scrap wood to confirm the color. This is critical when you learn how to restain kitchen cabinets and want specific results.
- Apply Evenly: Use a clean brush, foam applicator, or lint-free rag. Apply a generous, even coat of stain to a small section at a time, always working with the grain. Let it penetrate for a few minutes; longer for darker color.
- Wipe Off Excess: With a clean, lint-free cloth, wipe off all excess stain, always with the grain. Be diligent – pooled stain dries sticky. Use a fresh part of the rag frequently.
- Feather Edges: As you move between sections, feather the edges of the wet stain to avoid harsh lines.
Step 3: Building Color with Multiple Coats
Achieving desired depth often requires more than one coat.
- Dry Time: Allow the first coat to dry completely per manufacturer’s instructions (4-24 hours). Adequate drying is crucial.
- Light Sanding (Optional): If grain raised, lightly sand with 220-grit (or 320-grit) sandpaper after the first coat, being careful not to sand through the stain. Wipe off dust.
- Second Coat: Apply subsequent coats just as you did the first, allowing each to dry completely and wiping off excess. Continue until you reach your desired depth.
Patience is Your Best Friend: Resist the urge to rush drying times. Each layer needs to fully cure to prevent issues. This diligence is part of truly mastering how to restain kitchen cabinets.
Sealing the Deal: Protecting Your Hard Work
You’ve poured your heart and soul into stripping, sanding, and staining. Now for the grand finale: applying a protective topcoat. This layer is absolutely critical. It shields your beautiful new stain from moisture, scratches, and everyday wear, ensuring your renewed cabinets last for years. This final step is vital to truly complete your project of learning how to restain kitchen cabinets.
Step 1: Choosing Your Topcoat
Choose a topcoat compatible with your stain.
- Polyurethane: Popular for durability. Oil-based poly may amber; water-based stays clearer and dries faster.
- Polycrylic: A water-based clear coat with good durability, won’t yellow, great for light stains. Generally less durable than oil-based polyurethane.
Step 2: Applying the First Coat of Topcoat
Ensure your stained cabinets are completely dry and fully cured (24-72 hours or more).
- Stir, Don’t Shake: Gently stir your topcoat. Shaking creates bubbles.
- Apply Thin, Even Coats: Use a high-quality synthetic brush (for water-based) or natural bristle (for oil-based), or a foam applicator. Apply a very thin, even coat. Work with the grain, avoiding drips. Several thin coats are better than one thick coat.
- Work in Sections: Apply to one door or cabinet frame section at a time.
Step 3: Sanding Between Coats
This step is vital for a smooth, professional finish and proper adhesion of subsequent coats.
- Dry Time: Allow the first coat to dry completely (2-4 hours for water-based; 6-12 hours for oil-based).
- Light Sanding: Using 220-grit or 320-grit sandpaper or a sanding sponge, very lightly sand all surfaces to “de-nib” (remove dust or raised grain). Don’t sand through the finish.
- Dust Removal: Wipe away all sanding dust thoroughly with a tack cloth or vacuum.
Step 4: Applying Subsequent Coats
Repeat the process: apply a thin coat, let it dry, lightly sand, and clean off dust.
- Number of Coats: For kitchen cabinets, aim for at least 3-4 coats of topcoat for maximum durability.
- Final Coat: For your final coat, sand very lightly (if at all). Ensure no dust is present. Apply a perfectly smooth, even coat.
Step 5: Curing Time
This is perhaps the hardest part: waiting! The topcoat needs significantly longer to fully cure and reach maximum hardness.
- Light Use: You can typically reassemble your cabinets and put them into light use after 24-72 hours.
- Full Cure: Avoid heavy use, harsh cleaners, or placing heavy objects for at least 1-4 weeks, depending on the product and humidity. Rushing this risks damaging your new finish.
By properly sealing and curing your cabinets, you’ll enjoy your beautifully restained kitchen for many years. You’ve truly learned how to restain kitchen cabinets from start to finish!
Troubleshooting and Tips for a Professional Finish
Even with the best intentions, DIY projects can sometimes throw a curveball. But don’t despair! Many common issues when you learn how to restain kitchen cabinets have simple solutions. Plus, a few insider tips can elevate your work from “DIY” to “did you hire someone?”
Common Troubleshooting Scenarios
-
Blotchy Stain: Usually means uneven sanding or skipping pre-stain conditioner.
- Fix: If wet, wipe more evenly. If dry, re-sand to bare wood and re-stain, using conditioner.
-
Sticky Finish: Too much stain left on, or insufficient drying time.
- Fix: Minor stickiness might be wiped with mineral spirits (oil-based) or denatured alcohol (water-based). Severe stickiness requires stripping and re-staining.
-
Bubbles in Topcoat: Shaking the can, applying too thickly, or overworking the brush.
- Fix: If wet, gently “tip off” with brush. If dry, lightly sand (220-320 grit), clean, and apply a thin, even coat.
-
Dust Nibs: Small bumps in your finish are dust.
- Fix: Lightly sand (220-320 grit) after drying, clean with tack cloth, and apply another coat. Ensure a dust-free work area.
Expert Tips for a Professional Finish
- Set Up a Dedicated Workstation: Designate a clean, well-ventilated area for sanding, staining, and drying. Use sawhorses or painter’s pyramids to elevate doors and drawers. This is essential for anyone learning how to restain kitchen cabinets efficiently.
- Ventilation is Key: Always work in a well-ventilated space. Open windows, use fans, and wear a respirator.
- Work Clean: Keep your work area dust-free. Use tack cloths religiously. Change rags and applicators frequently.
- Patience is a Virtue: Rushing drying times or skimping on prep leads to a subpar finish. This isn’t a race. When you learn how to restain kitchen cabinets, you learn patience.
- Read the Labels: Every product has specific instructions, drying times, and recoat windows. Read and follow them.
- Gloves and Eye Protection: Always wear appropriate PPE.
- Proper Disposal of Rags: Rags soaked with oil-based stain or finish can spontaneously combust. Lay them flat to dry outdoors or immerse them in water in a metal container before disposal. This is a critical safety tip when learning how to restain kitchen cabinets.
- Consider New Hardware: New handles and pulls are the perfect finishing touch, giving that “new kitchen” feel.
By keeping these tips in mind and tackling minor issues, you’ll find that mastering how to restain kitchen cabinets is not just achievable, but truly enjoyable!
Conclusion: Embrace Your Transformed Kitchen
And there you have it – a comprehensive guide to mastering how to restain kitchen cabinets. From initial inspiration to the final, gleaming topcoat. What began as a vision for a refreshed kitchen has now become a tangible reality, born from your own hands and determination. I hope this journey has demystified the process, showing you that while it requires patience and effort, the rewards are truly magnificent.
Remember the empathy I mentioned at the start? It’s okay to feel a little overwhelmed at times. But by breaking it down into manageable steps – careful assessment, thorough preparation, precise application, and diligent protection – you empower yourself to achieve professional-level results. You’ve not only saved significant money compared to a full replacement but have also gained invaluable DIY skills and deep satisfaction.
Step back and admire your handiwork. Your kitchen cabinets are no longer tired and dated; they are vibrant, rich, and full of new character. You’ve brought a new look to the heart of your home, and that’s something to be incredibly proud of. Enjoy your beautiful, restained kitchen – you’ve earned it!
Frequently Asked Questions
What essential preparation steps are needed before I restain my kitchen cabinets?
Thorough preparation is crucial for a successful restaining project. Begin by emptying your cabinets, removing all hardware, and meticulously cleaning the surfaces to remove grease and grime. After cleaning, light sanding is often required to create a smooth, even surface for the new stain to adhere properly.
What tools and materials will I need to restain kitchen cabinets effectively?
You’ll need sandpaper (various grits), a tack cloth, your chosen wood stain, and appropriate applicators like brushes or staining pads. Don’t forget protective gear such as gloves, safety glasses, and a respirator, along with a high-quality topcoat for durability.
Is sanding always necessary when you restain kitchen cabinets?
While it might seem like extra work, sanding is almost always necessary for the best results when restaining. It helps remove old finish, smooth out imperfections, and creates “tooth” for the new stain to penetrate and adhere evenly, preventing a splotchy appearance.
What’s the best way to apply stain to kitchen cabinets for an even finish?
After proper preparation, apply the stain in the direction of the wood grain using a brush or rag, working in small sections. Allow the stain to penetrate for the recommended time (check product instructions), then wipe off any excess thoroughly before it dries to prevent stickiness or uneven color.
How long should I wait between coats of stain, and how many coats do kitchen cabinets usually need?
Drying times vary significantly depending on the stain type, humidity, and temperature, but generally, allow 4-8 hours between coats, or as specified by the manufacturer. Most kitchen cabinets benefit from 1-2 coats of stain to achieve the desired depth of color, followed by a protective topcoat.
Do I need to apply a topcoat or sealer after I restain my kitchen cabinets?
Absolutely, applying a durable topcoat or sealer is essential after restaining kitchen cabinets. This protective layer shields the wood from moisture, scratches, and daily wear and tear, ensuring your newly stained cabinets last for years to come.