Featured image for how to repair a leaking kitchen faucet
Image source: images.pexels.com
Fixing a leaking kitchen faucet yourself is an achievable and cost-effective DIY project that often requires just basic tools and readily available parts. This guide empowers homeowners to quickly troubleshoot common leaks, identify the specific faucet type, and replace worn components like O-rings or cartridges, saving money and preventing water waste. Stop that annoying drip today!
Hey there, fellow home hero! Have you ever stood in your kitchen, minding your own business, only to be taunted by that relentless drip, drip, drip from your faucet? It’s like a tiny, persistent drummer trying to drive you absolutely bonkers, isn’t it? Not only is a leaking kitchen faucet an irritating soundtrack to your day, but it’s also a silent siphon for your money, wasting precious water and potentially hiking up your utility bills. Plus, that constant moisture can lead to unsightly mineral buildup and even mold if left unchecked. Trust me, I’ve been there – staring at a tiny puddle forming around the sink, feeling utterly defeated by what seems like a complex plumbing mystery.
But here’s a little secret: most leaking kitchen faucet issues aren’t nearly as intimidating as they appear. You don’t always need to call in a pricey professional to repair a leaking kitchen faucet. With a few basic tools, a little patience, and this friendly guide by your side, you can totally tackle this DIY project yourself! Imagine the satisfaction of quieting that drip, knowing you fixed it with your own two hands. It’s a fantastic feeling of accomplishment, and it saves you some serious cash. So, let’s roll up our sleeves and get ready to empower ourselves to fix a leaking kitchen faucet once and for all!
This comprehensive guide is designed to walk you through everything you need to know, from identifying the source of the problem to successfully replacing the culprit part. We’ll break down common faucet types, necessary tools, and step-by-step instructions in a super easy-to-understand way. No plumbing degree required, just a willingness to learn and save yourself from that annoying drip. Let’s dive in and learn how to repair a leaking kitchen faucet with confidence!
Key Takeaways
- Turn off water supply: Always shut off the water valves before beginning any repair.
- Identify faucet type: Knowing your faucet type helps pinpoint the correct repair method.
- Gather necessary tools: Have the right screwdrivers, wrenches, and pliers ready.
- Replace worn parts: O-rings, washers, and gaskets are common culprits; replace them first.
- Tighten loose connections: Check and tighten all accessible nuts and mounting screws.
- Consider cartridge replacement: For single-handle faucets, a new cartridge often stops leaks.
- Test thoroughly afterward: Turn water on slowly and inspect carefully for any remaining drips.
Quick Answers to Common Questions
Where is my kitchen faucet leaking from?
The most common spots for a **leaking kitchen faucet** are the spout, base, or handle. Observe carefully to pinpoint the exact origin, as this will guide your repair.
What’s the most common reason for a leaking kitchen faucet?
Often, a **leaking kitchen faucet** is caused by worn-out O-rings, rubber washers, or a faulty cartridge inside the faucet. These components simply degrade over time and need replacement.
What basic tools do I need to fix a leaking kitchen faucet?
You’ll typically need an adjustable wrench, screwdrivers (Phillips and flathead), pliers, and replacement parts like O-rings or a new cartridge. Having plumber’s grease and a utility knife on hand can also be helpful for your **leaking kitchen faucet** repair!
Can I fix any leaking kitchen faucet myself, or are some too complex?
Many minor leaks are DIY-friendly, but if your **leaking kitchen faucet** is very old, has internal damage, or the repair seems overwhelming, don’t hesitate to call a professional plumber. Sometimes, replacement is more cost-effective than a complex repair.
How can I prevent my kitchen faucet from leaking again in the future?
Regular maintenance, like gently operating handles and occasionally checking for drips, can help. Also, consider replacing internal components every few years, even if there’s no visible **leaking kitchen faucet**, to stay ahead of wear and tear.
📑 Table of Contents
Understanding Your Leaking Faucet: The Common Culprits
Before you grab your toolbox and start dismantling your faucet, it’s super helpful to play detective for a moment. Observing exactly where the water is coming from can give you a major head start in figuring out how to repair a leaking kitchen faucet. Different leak locations often point to different internal parts needing attention. Think of it like a medical diagnosis for your faucet!
The Dripping Spout
This is probably the most common type of leaking kitchen faucet, and it’s the one that drives everyone crazy with its rhythmic “drip, drip, drip.” If water is steadily dripping from the end of the faucet spout even when it’s turned off, the problem almost always lies within the faucet’s internal sealing components. Depending on your faucet type, this could be:
- Worn-out Washers: Common in older compression-style faucets. These rubber or neoprene washers get stiff, cracked, or simply wear down over time, losing their ability to create a tight seal.
- Faulty Cartridge: Many modern single-handle faucets use a cartridge. This small, cylindrical component controls the water flow and temperature. If it’s cracked, clogged with mineral deposits, or if its internal seals are compromised, you’ll get a drip. This is a very common reason to need to repair a leaking kitchen faucet.
- Damaged O-Rings: Also found in cartridge and some disk faucets, these small rubber rings help seal different parts. If they dry out, crack, or become dislodged, water can seep through.
Leaks Around the Faucet Base
If you see water pooling around the bottom of your faucet, where it meets the sink or countertop, the issue is typically with the connection or seals below the counter, or within the faucet body itself. This type of leaking kitchen faucet can sometimes be a bit trickier to spot, as the water might drip down into your cabinet.
- Loose Mounting Nuts: Over time, the nuts that secure the faucet to the sink or counter can loosen, allowing water to seep through.
- Worn O-Rings: Some faucets have O-rings at their base or within the swivel mechanism of the spout itself. If these are worn, water can escape when the faucet is turned on or swiveled.
- Faulty Gaskets: Similar to washers, gaskets provide a seal between the faucet and the sink. If they degrade, water can leak past them.
Leaks from the Handle
A leak coming directly from around the handle or handles of your faucet often means the issue is localized to the internal valve assembly beneath the handle. This is another prime candidate for needing to repair a leaking kitchen faucet by replacing specific parts.
- Cartridge Issues: Again, a worn or faulty cartridge is a prime suspect in single-handle faucets. The seals within it can fail, causing water to escape around the handle.
- Stem or Valve Problems: In two-handle faucets, the hot and cold water are controlled by separate stems or valves. Worn packing nuts, O-rings, or washers on these stems can cause leaks around the handles.
- Loose Packing Nut: Specifically in compression faucets, a packing nut around the stem can loosen, allowing water to escape. Tightening it might be a quick fix.
Puddled Water Under the Sink
This is the sneakier leak, often only discovered when you reach for the dish soap and find a soggy mess. Puddles under the sink, or water dripping from supply lines, usually point to issues with the connections rather than the faucet body itself.
- Loose Supply Lines: The hot and cold water supply lines connecting the faucet to your home’s water pipes can become loose or develop cracks.
- Damaged Sprayer Hose: If your kitchen faucet has a pull-out sprayer, the hose connecting it to the main faucet body can kink, crack, or have loose connections, causing significant leaks.
- Drain Assembly Leaks: Sometimes, what looks like a faucet leak is actually a problem with the sink drain or P-trap. Double-check these connections too.
Practical Tip: Before you do anything else, grab a flashlight and some paper towels. Dry the entire faucet and the area beneath it thoroughly. Then, turn the water on and watch carefully to pinpoint the exact source of the leak. This initial detective work is crucial for a successful leaking kitchen faucet repair!
Gather Your Tools and Supplies: Be Prepared!
Alright, detective work done! Now that you have a better idea of what might be causing your leaking kitchen faucet, it’s time to gather your arsenal. Having all your tools and potential replacement parts on hand before you start will save you a ton of frustration and trips to the hardware store. Trust me, there’s nothing worse than being halfway through a project and realizing you need one tiny, crucial item!
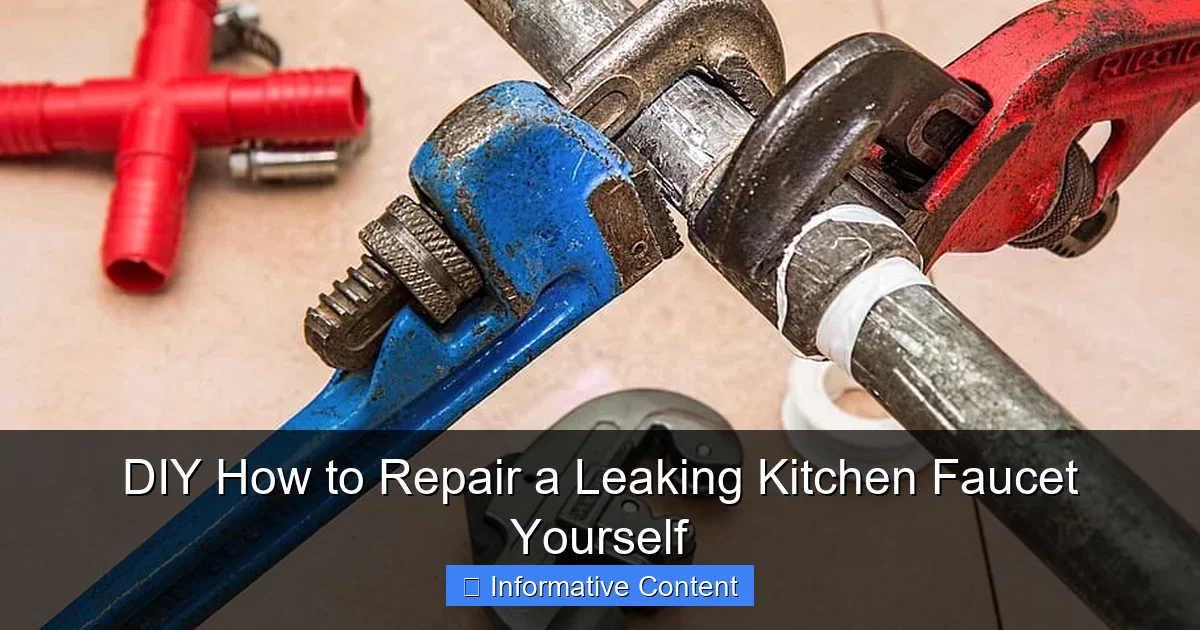
Essential Tools for Faucet Repair
Most leaking kitchen faucet fixes can be accomplished with a handful of common household tools. Here’s what you’ll likely need:
- Adjustable Wrench: Your best friend for tightening and loosening nuts and bolts.
- Screwdriver Set: You’ll likely need both a flathead and a Phillips head screwdriver, especially for handle screws.
- Basin Wrench: This funky-looking tool is a lifesaver for reaching those awkward nuts that secure the faucet from underneath the sink. If you don’t have one, consider borrowing or buying one – it makes life so much easier!
- Pliers: Channel lock pliers or needle-nose pliers can be handy for gripping small parts or stubborn nuts.
- Utility Knife or Small Flathead Screwdriver: Useful for prying off decorative caps on handles.
- Flashlight or Headlamp: Crucial for seeing clearly in the dim confines under your sink.
- Old Towels or a Small Bucket: Absolutely essential for catching any residual water and protecting your cabinet.
- Wire Brush or Old Toothbrush: For cleaning away mineral deposits.
Replacement Parts and Materials (General)
This is where knowing your faucet type comes in handy. While you might not know the exact part you need until you open up the faucet, having some general supplies on hand is smart. When it comes to how to repair a leaking kitchen faucet, the right parts are key!
- Replacement O-Rings: A pack of assorted O-rings is a good idea. They are inexpensive and a common culprit for leaks.
- Replacement Washers: If you have an older compression faucet, you’ll need new rubber washers.
- Plumber’s Grease (Silicone Grease): This is vital for lubricating new O-rings and other moving parts. It helps them seal better and last longer. Do NOT use petroleum jelly, as it can degrade rubber.
- White Vinegar or Calcium, Lime, and Rust (CLR) Remover: Excellent for dissolving mineral deposits that can cause clogs and damage seals.
- Replacement Cartridge: If you suspect a faulty cartridge, this is the main component you’ll need. Important: You’ll need to know your faucet’s brand and model to get the correct cartridge. Taking a picture of the old one and bringing it to the hardware store is a great strategy.
- Teflon Tape (Plumber’s Tape): Good for sealing threaded connections, although not always necessary for internal faucet parts.
Practical Tip: If possible, take a photo of your entire faucet, and if you know it, jot down the brand and model number. Many manufacturers stamp this information on the underside of the faucet or on a tag on the supply lines. This information will be incredibly helpful when buying replacement parts, especially if you need a specific cartridge to repair a leaking kitchen faucet.
Safety First: Preparing Your Workspace
Alright, you’ve got your tools, your potential parts, and your investigative hat is firmly on. Before you dive into the heart of your leaking kitchen faucet, a few crucial safety steps will make the whole process smoother, cleaner, and much safer. You wouldn’t start driving without checking your mirrors, right? Think of these steps as your pre-flight check for faucet repair.
Turn Off the Water Supply
This is arguably the most important step. Forgetting this can lead to an unexpected indoor fountain and a very messy situation.
- Under the Sink Shut-Off Valves: Most kitchen sinks have two small valves (one for hot, one for cold) on the supply lines directly under the sink. Turn these clockwise until they are completely closed.
- Main House Valve: If your sink doesn’t have individual shut-off valves, or if they seem stuck, you’ll need to turn off the main water supply to your entire house. This is usually located in your basement, garage, or outside your home. Make sure everyone in the house knows the water will be off for a bit!
Practical Example: “I once forgot to turn off both valves when working on my own leaking kitchen faucet. Let’s just say my dog was very confused by the sudden jet of water, and I had a lot of mopping to do!”
Depressurize the Lines
Even after turning off the water, there will still be some water pressure and residual water in the lines.
- Open the Faucet: Turn on both the hot and cold handles of your kitchen faucet. Let the remaining water drain out until it completely stops flowing. This releases any pressure in the lines and empties the faucet body.
- Open the Sprayer (if applicable): If your faucet has a pull-out sprayer, activate it briefly to ensure any water trapped in its hose also drains out.
Protect Your Cabinets and Floor
Even with the water off and depressurized, there will likely be some drips and residual water as you disassemble the faucet.
- Lay Down Towels: Spread several old towels or a bucket under the sink directly beneath the faucet connections. This will catch any drips and protect your cabinet’s base from water damage.
- Clear the Area: Remove everything from under your sink – cleaning supplies, trash cans, etc. You’ll need plenty of space to work comfortably.
Ensure Good Lighting
Working in a cramped, dimly lit cabinet is a recipe for frustration.
- Use a Flashlight or Headlamp: A good light source is crucial for seeing small screws, clips, and the parts you’re trying to manipulate. A headlamp is fantastic because it keeps your hands free.
Practical Tip: Double-check that the water is completely off by trying to turn the faucet on again. If no water comes out, you’re good to go! Taking these initial steps seriously is key to a smooth and successful leaking kitchen faucet repair.
Step-by-Step Faucet Disassembly and Inspection
Okay, it’s showtime! Your workspace is prepped, the water is off, and your tools are ready. Now, we’re going to carefully take apart your leaking kitchen faucet to get to the root of the problem. Remember, organization is your friend during this process. A little patience here will prevent a lot of headaches later!
Handle Removal: Getting Inside
The first step is usually removing the handle(s) to access the internal workings. This can vary depending on your faucet type:
- Single-Handle Faucets:
- Look for a small decorative cap (usually on the front or side of the handle) that you can pry off with a utility knife or a small flathead screwdriver. Underneath, you’ll typically find a Phillips head screw.
- Unscrew this, and the handle should lift straight off.
- Sometimes, the screw is hidden under a small plastic button or plug on the handle itself.
- Two-Handle Faucets:
- Similar to single-handle, look for decorative caps on the top or front of each handle.
- Pry them off, expose the screw, and unscrew it.
- Lift the handles off.
Practical Tip: As you remove screws and small parts, place them in a specific order on a towel or in small bowls. This makes reassembly a breeze! You want to know exactly how to put your leaking kitchen faucet back together.
Accessing the Cartridge, Stem, or Ball Valve
Once the handle is off, you’ll see the main working mechanism. This is the heart of your leaking kitchen faucet and where the problem usually lies. The type of faucet dictates what you’ll find:
- Cartridge Faucets (very common for single-handle):
- You’ll likely see a dome-shaped cap or a retaining nut covering a cylindrical cartridge.
- Unscrew the cap or use your adjustable wrench to loosen the retaining nut.
- There might be a small retaining clip (often brass or plastic) holding the cartridge in place. Use needle-nose pliers to gently pull it straight up.
- Carefully pull the cartridge straight out. You might need to twist it slightly or use pliers.
- Compression Faucets (older, two-handle):
- After removing the handle, you’ll see a stem and a packing nut.
- Use an adjustable wrench to loosen and remove the large packing nut.
- The stem assembly should then lift out. At the bottom of the stem, you’ll find a rubber washer held by a screw.
- Ball Faucets (often older Delta single-handle):
- After removing the handle, you’ll see a cap and collar. Use a basin wrench or special tool (sometimes included with repair kits) to loosen the collar nut.
- Remove the cap and then you’ll find the rotating ball assembly, springs, and rubber seats.
- Ceramic Disk Faucets (newer, single-handle):
- These have two ceramic discs that slide against each other. After removing the handle, you’ll see a cylindrical metal or plastic casing.
- Unscrew the mounting screws or retaining nuts that hold this casing in place and lift it off. You’ll then expose the ceramic disks and seals.
Inspecting O-Rings, Washers, and Seals
Now that the faucet’s guts are exposed, it’s time for a close inspection. This is the critical step in figuring out how to successfully repair a leaking kitchen faucet.
- O-Rings: Look at all visible O-rings. Are they flattened, brittle, cracked, or stretched out? If so, they need replacing. They should be pliable and round. Gently pry them off with a small screwdriver.
- Washers: For compression faucets, examine the rubber washer at the bottom of the stem. Is it flattened, worn, or cracked? If yes, remove the screw holding it and replace it.
- Cartridge/Ball/Disk:
- Cartridge: Look for visible cracks, chips, or excessive mineral buildup. Feel the movement – does it feel sticky or rough?
- Ball: Check the ball for scratches or pitting. Inspect the rubber seats and springs underneath the ball – are they worn, flattened, or damaged?
- Ceramic Disks: Look for any chips or deep scratches on the disks. Often, the rubber seals underneath the disks are the problem.
- Mineral Deposits: Look for white, crusty buildup (calcium and lime) on any of the parts, especially inside the spout and on the aerator. These deposits can interfere with proper sealing.
Practical Example: “My last leaking kitchen faucet repair revealed a cartridge that looked like it had been through a war zone – covered in gunk and with a hairline crack. No wonder it was dripping!”
The Repair: Replacing Worn Parts and Reassembly
You’ve found the culprit! Excellent work, detective! Now comes the satisfying part: installing the new parts and putting your leaking kitchen faucet back together. This is where you actually fix the leak, so let’s be meticulous and careful.
Replacing O-Rings and Washers
If your inspection pointed to these small but mighty seals, here’s how to replace them:
- Remove Old Parts: Gently pry off the old, worn O-rings or unscrew the old washer from the stem.
- Clean Surfaces: Use your wire brush or an old toothbrush to thoroughly clean the grooves and surfaces where the new seals will sit. Remove any mineral deposits or gunk.
- Lubricate New O-Rings: This step is crucial for longevity and a good seal! Apply a thin, even coat of plumber’s silicone grease to the new O-rings. This helps them slide into place smoothly and prevents premature wear.
- Install New Seals: Carefully roll or slide the new O-rings into their grooves. Ensure they are seated properly and not twisted. For washers, screw the new one firmly onto the stem.
Installing a New Cartridge, Ball, or Disk Assembly
This is often the main event for a leaking kitchen faucet repair, especially with modern faucets.
- Cartridge:
- Ensure the faucet body is clean.
- Carefully insert the new cartridge into the faucet body. Many cartridges have specific alignment tabs or notches that need to line up with the faucet body. Don’t force it! It should slide in relatively easily.
- Reinstall the retaining clip (if applicable) and then the retaining nut or cap. Tighten gently but firmly with your wrench.
- Ball Faucet:
- Place the new springs and rubber seats into their respective holes in the faucet body. The wider end of the spring goes down, and the flat side of the seat goes on top.
- Drop the new ball into place, ensuring its slot aligns with the pin in the faucet body.
- Reassemble the cap and collar, tightening the collar nut.
- Ceramic Disk Faucet:
- Replace the rubber seals at the base of the ceramic disk assembly.
- Carefully place the new disk assembly into the faucet body, ensuring alignment tabs are correct.
- Reinstall the mounting screws or retaining nuts.
Cleaning Mineral Deposits and Aerator
While you’re at it, it’s a perfect time to clean other parts of your leaking kitchen faucet.
- Spout Aerator: Unscrew the aerator from the end of the faucet spout (you might need pliers wrapped in a cloth to prevent scratching). Disassemble it and soak the individual screens and parts in white vinegar or CLR for 30 minutes to an hour to dissolve mineral buildup. Use an old toothbrush to scrub away any remaining gunk. This will improve water flow and prevent future drips!
- Faucet Body: Gently scrub any visible mineral deposits inside the faucet body where parts were removed.
Putting It All Back Together
This is simply the reverse of your disassembly steps.
- Reinstall Handle(s): Place the handle(s) back onto the stem or cartridge. Reinsert and tighten the handle screw(s), then snap the decorative cap(s) back into place.
- Don’t Overtighten: While you want connections to be snug, avoid overtightening nuts and screws. This can strip threads or damage plastic parts, potentially creating another leaking kitchen faucet problem.
Practical Tip: Before fully reassembling, consider taking a quick peek at the internal parts one last time to ensure everything is seated correctly and nothing looks out of place. It’s much easier to adjust now than after it’s all put back together!
Testing Your Repair and Final Thoughts
You’ve done it! You’ve successfully navigated the disassembly, identified the problem, replaced the parts, and reassembled your leaking kitchen faucet. Now for the moment of truth: testing your handiwork. Don’t rush this part; a careful test can confirm your success or highlight any minor adjustments needed.
Slowly Restore Water Supply
This isn’t a race! Slowly open the hot and cold shut-off valves under the sink. Turn them counter-clockwise very gradually.
- Listen and Watch: As the water pressure returns, listen for any unusual noises and immediately look for any signs of new leaks around the faucet base, handles, or supply lines. A slow opening allows you to react quickly if something isn’t right.
- Check Under the Sink: Keep your flashlight handy and check the connections underneath for any drips.
Check Faucet Functionality
Once the water is fully on, it’s time to put your faucet through its paces.
- Hot and Cold: Turn the faucet on, testing both hot and cold water. Check the flow rate.
- Full Range of Motion: If you have a single-handle faucet, move the handle through its entire range of motion (hot, cold, full flow, low flow).
- Sprayer (if applicable): Test your pull-out sprayer. Make sure it extends, retracts, and sprays properly without any leaks from the hose connection or the sprayer head itself.
- Aerator: Ensure water flows smoothly from the aerator you just cleaned.
Monitor for Leaks
Even if everything looks good initially, it’s wise to monitor your repair for a bit.
- Paper Towel Test: Place a dry paper towel under the faucet connections and around the base of the faucet. Leave it there for several hours, or even overnight. A tiny bead of water can go unnoticed but will show up on the paper towel.
- Don’t Despair If You See a Drip: If you do notice a small leak, don’t worry! It might just mean a connection needs to be tightened a tiny bit more, or an O-ring didn’t seat perfectly. Turn off the water again, make the small adjustment, and retest. This is part of learning how to repair a leaking kitchen faucet.
Common Faucet Leak Symptoms and Likely Fixes
Here’s a quick summary to help you diagnose and fix any lingering issues after your initial repair attempt:
| Leak Symptom | Likely Culprit | Primary Fix |
|---|---|---|
| Drip from Spout | Worn cartridge, O-rings, or washers | Replace cartridge, O-rings, or washers; clean mineral deposits |
| Leak around Handle(s) | Worn cartridge, stem O-rings, or packing nuts | Replace cartridge, O-rings; tighten packing nut |
| Water pooling at Faucet Base | Loose mounting nuts, worn base O-rings/gaskets | Tighten mounting nuts; replace O-rings/gaskets |
| Puddle under Sink (not from drain) | Loose supply line connections, faulty sprayer hose | Tighten supply lines; replace sprayer hose/connections |
| Reduced Water Flow / Erratic Spray | Clogged aerator with mineral deposits | Clean or replace aerator |
Final Thoughts and Encouragement:
Phew! You’ve reached the end of your leaking kitchen faucet repair journey, and hopefully, that annoying drip is now a distant memory. By tackling this common household issue yourself, you’ve not only saved money but also gained valuable experience and confidence. That feeling of fixing something with your own hands is truly empowering, isn’t it?
Remember, knowing how to repair a leaking kitchen faucet is a fantastic skill to have. It’s a common problem, but often, the solution is surprisingly simple. You’ve learned how to diagnose the issue, gather the right tools, safely prepare your workspace, meticulously replace worn parts, and confidently test your repair. This guide has hopefully demystified the process and shown you that many household fixes are well within your reach.
So, next time you hear that unwelcome drip from your leaking kitchen faucet, you won’t dread it. Instead, you’ll know exactly what to do. Keep this guide handy, and enjoy the peace and quiet of a perfectly functioning, leak-free kitchen faucet. Go on, give yourself a pat on the back – you’ve earned it!
Frequently Asked Questions
What are the most common reasons my kitchen faucet is leaking?
Most kitchen faucet leaks stem from worn-out internal components like O-rings, washers, or the cartridge. These parts degrade over time from regular use and mineral buildup, leading to drips from the spout or leaks around the handle or base.
What tools will I need to repair a leaking kitchen faucet?
To repair a leaking kitchen faucet, you’ll typically need a Phillips head screwdriver, a flathead screwdriver, an adjustable wrench, and possibly a basin wrench for hard-to-reach nuts. It’s also helpful to have a flashlight, some rags, and replacement parts specific to your faucet model.
How difficult is it to repair a leaking kitchen faucet myself?
Repairing a leaking kitchen faucet is often a manageable DIY project for many homeowners, especially for common issues like a dripping spout. The difficulty can vary depending on your faucet type and the specific location of the leak, but many repairs only require basic tools and patience.
My kitchen faucet is dripping from the spout; how do I fix that?
A dripping spout on your kitchen faucet usually indicates worn-out washers, a faulty cartridge, or seals inside the faucet body. To fix this, you’ll typically need to turn off the water supply, disassemble the handle and spout components, and replace the worn parts with new ones.
What causes a leak at the base of my kitchen faucet, and how can I fix it?
A leak at the base of your kitchen faucet is often caused by loose mounting nuts underneath the sink or deteriorated O-rings or gaskets around the spout assembly. You can often fix this by tightening the mounting nuts or by disassembling the spout to replace any worn O-rings or seals.
When should I consider calling a plumber for a leaking kitchen faucet?
You should consider calling a plumber for a leaking kitchen faucet if you’ve attempted basic repairs without success, or if the leak is extensive and causing significant water damage. If you’re uncomfortable with the repair process or suspect a more complex issue with your plumbing lines, a professional can provide the necessary expertise.