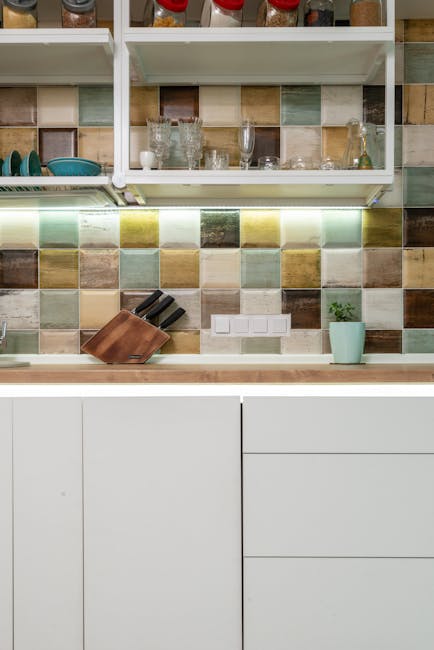
Are you looking to give your kitchen a fresh new look without breaking the bank? Tiling a backsplash might just be the perfect solution for you.
Not only does it add a splash of style, but it also protects your walls from cooking splatters and stains. Imagine the satisfaction of standing back and admiring a kitchen that reflects your personality and taste. With a bit of guidance, tiling a backsplash can be a simple, rewarding DIY project that transforms your space into a culinary haven.
Stick with us as we walk you through every step, ensuring your project is as smooth and successful as the tiles you’ll be laying. Ready to roll up your sleeves and get started? Let’s dive in and make your kitchen the heart of your home.
Choosing The Right Tile
Tilecomes in many shapes and sizes. It’s important to pick the right one. Tiles can be made of ceramic, glass, or stone. Each type has its own look and feel.
Coloris key. Choose a color that matches your kitchen. Bright colors can make a space lively. Soft colors can create a calm atmosphere.
Sizematters too. Big tiles cover more space quickly. Small tiles can add detail and texture.
Think about the pattern. Patternscan be simple or complex. Simple patterns are easy to install. Complex patterns might need more planning.
Check the durability. Durable tiles last longer. They are better for busy kitchens.
Consider your budget. Some tiles are more expensive than others. Plan wisely to stay within your budget.
Gathering Tools And Materials
Prepare your tools and materials before starting. A measuring tape is essential. It helps to measure the area accurately. Tile spacers keep tiles evenly spaced. You need a tile cutter to cut tiles to fit. Adhesive is crucial for sticking tiles to the wall. Choose the right type for your tiles. Grout fills gaps between tiles. It gives a neat finish. Trowel spreads adhesive evenly. Ensure you have a bucket for mixing adhesive and grout. Sponge is for cleaning tiles after grouting. Level ensures tiles are straight. Having these tools ready saves time.
| Tool | Purpose |
|---|---|
| Measuring Tape | Measure the area |
| Tile Cutter | Cut tiles to fit |
| Tile Spacers | Keep tiles evenly spaced |
| Adhesive | Stick tiles to the wall |
| Grout | Fill gaps between tiles |
| Trowel | Spread adhesive evenly |
| Bucket | Mix adhesive and grout |
| Sponge | Clean tiles after grouting |
| Level | Ensure tiles are straight |
Preparing The Surface
Cleaning the wall is very important. Use a damp cloth to wipe it. Remove any grease or dirt. The wall must be smooth and dry. Check for any holes or cracks. Fill them with putty or filler. Let it dry completely.
Next, gather your tools. You will need a tape measure and pencil. Measure the area carefully. Mark the spots where tiles will go. This helps in alignment.
Get a level to check straight lines. This ensures tiles don’t slant. Safety gear like gloves and goggles is essential. Protect yourself from sharp edges and dust. Now, you are ready to start tiling!
Measuring And Cutting Tiles
Always measure the wall area carefully. Use a tape measure for precision. Mark the dimensions on the tiles. Draw a straight line using a pencil and ruler. This ensures a clean cut. Cutting tiles requires a tile cutter or a wet saw. Both tools work well for different tile types. Use the tile cutter for ceramic tiles. Wet saws are best for stone tiles. Always wear safety goggles and gloves. Safety first!
Make sure to measure twice before cutting. Double-checking avoids mistakes. Align the tile with the cutting guide. Apply steady pressure when cutting. This ensures a smooth edge. Practice on a spare tile if unsure. This helps build confidence. With practice, cutting becomes easy. Enjoy the process. Happy tiling!
Applying Adhesive And Setting Tiles
The adhesive must be spread evenly to ensure tiles stick well. Use a notched trowel to spread adhesive on the wall.
Hold the trowel at a 45-degree angle and press it firmly against the wall. This helps create a uniform thickness of adhesive.
Use a level to ensure the adhesive is spread straight. This is important for a stable tile installation.
Once the adhesive is spread, use a notched trowel to create a textured surface for the tiles to stick to.
Start placing tiles in the center of the wall and work your way outwards to prevent uneven spacing.
Use a spirit level to ensure the tiles are straight and level.
Tap each tile gently with a rubber mallet to secure it in place.
Leave space for grout between each tile to allow for easy grouting.
Continue placing tiles until the entire wall is covered.
Use a grout float to spread grout between tiles and smooth out the surface.
Clean excess grout from the tiles with a damp cloth.
Allow the grout to dry before sealing the tiles.
Grouting And Finishing Touches
Mix grout according to package instructions. Ensure it is smooth and lump-free. Use a rubber float to apply grout. Press grout into spaces between tiles. Wipe away excess grout with a damp sponge. Let grout dry for 24 hours.
Seal grout lines to protect from stains. Use a small brush for even coverage. Allow sealer to dry as directed. Polish tiles with a clean cloth. This creates a shiny finish. Check for any missed spots or uneven grout.
Install outlet covers carefully. Ensure they fit snugly against tiles. Clean the backsplash thoroughly. Remove any dust or residue. Stand back and admire your work. Your kitchen now has a fresh look.
Frequently Asked Questions
What Tools Do I Need To Tile Backsplash?
To tile a backsplash, you’ll need a tile cutter, trowel, spacers, and a level. Also, have adhesive, grout, and a sponge ready. These tools will help ensure precise cutting, even spacing, and secure placement. Proper tools make the installation process smoother and more efficient.
How Do I Prepare The Wall For Tiling?
Clean the wall surface to remove grease, dust, and old paint. Ensure it’s smooth and dry. Fill any holes or cracks with spackle. Sand the area lightly for better adhesion. This preparation helps tiles adhere properly, ensuring a durable and long-lasting backsplash.
How Long Does It Take To Tile A Backsplash?
Tiling a backsplash usually takes two to three days. This includes preparation, tiling, and grouting. Drying time is crucial for adhesive and grout. The actual tiling process might only take a few hours. However, waiting for materials to set is essential for a successful installation.
Can I Tile Over Existing Backsplash Tiles?
Yes, you can tile over existing tiles if they’re in good condition. Ensure the old tiles are clean, dry, and securely fixed. Roughen the surface with sandpaper for better adhesion. Using a suitable adhesive, you can achieve a fresh look without removing old tiles.
Conclusion
Tiling your kitchen backsplash can be a rewarding project. Follow steps carefully. Choose tiles that match your style. Prepare your surface. Measure twice, cut once. Apply adhesive evenly. Set tiles with precision. Use spacers for uniform gaps. Let tiles dry completely.
Grout between tiles for a finished look. Wipe away excess grout. Seal tiles for protection. Enjoy your new backsplash. It adds charm and value to your kitchen. Remember, patience and attention to detail matter. Happy tiling! Your kitchen will shine with your personal touch.
Celebrate your accomplishment with a tasty meal.