Have you ever noticed a strange odor wafting from your kitchen sink or heard mysterious gurgling noises? If so, it might be time to check on your plumbing, specifically the P trap under your sink.
This small yet essential component plays a crucial role in preventing unpleasant smells and ensuring smooth water flow. Installing a P trap might sound daunting, but with a little guidance, you can tackle it like a pro. Imagine the satisfaction of fixing it yourself and knowing your kitchen is free from plumbing hiccups.
Dive into this guide, and discover how you can effortlessly install a P trap under your kitchen sink, transforming your space into a fresher, more functional area. Let’s get started so you can enjoy a hassle-free kitchen experience!

Credit: www.youtube.com
Tools And Materials Needed
Gathering the right tools makes the job easier. Here’s what you need:
- P-trap kit: This is the main part you will install.
- Adjustable wrench: Helps tighten nuts and bolts.
- Plumber’s tape: Ensures a leak-proof connection.
- Basin wrench: Useful for tight spaces.
- Bucket: To catch any water spills.
- Gloves: Protects your hands while working.
- Safety goggles: Shields your eyes from debris.
- Cloth or towel: For cleaning any mess.
Ensure you have all these before starting. It saves time and effort.
Preparing The Workspace
Gather all needed tools and materialsbefore starting. A wrench, plumber’s tape, and the P-trap kit are essential. Clear out any items under the sink. This makes room for you to work. Lay down a towel or bucket to catch any water spills.
Turn off the water supplyunder the sink. This prevents any accidental leaks. Check the pipes for any existing leaks or damage. Ensure everything is in good condition. If needed, clean the area around the pipes. A clean workspace is safer and easier to work in.
Removing The Old P Trap
Before removing the old P trap, turn off the water. Place a bucket under the sink to catch spills. Loosen the nuts on the trap using a wrench. Carefully remove the trap from the pipes. Be gentle so you don’t damage anything. If the trap is stuck, wiggle it gently.
Once the trap is off, clean the area around the pipes. Check for any leaks or cracks. Ensure the pipes are in good condition. If they look worn, consider replacing them. Proper cleaning helps the new trap fit well.
Dispose of the old trap responsibly. Recycle if possible. Keep the area clean and dry. The kitchen will stay tidy and fresh.

Credit: onpointplumber.com
Choosing The Right P Trap
The P Trap is a vital part of your kitchen sink. It helps prevent bad smells. Choose a size that fits your sink pipe. Standard P Traps come in 1 1/4 inches or 1 1/2 inches. Measure your pipe before buying.
P Traps are made from different materials. Plastic P Traps are cheap and easy to install. Metal P Traps last longer but cost more. Think about where you live. In cold areas, metal might be better.
Check the shape of the P Trap. Some are curved, others are straight. Make sure it fits the space under your sink. A tight fit can lead to leaks. Installation instructions should be clear and simple. If not, ask for help.
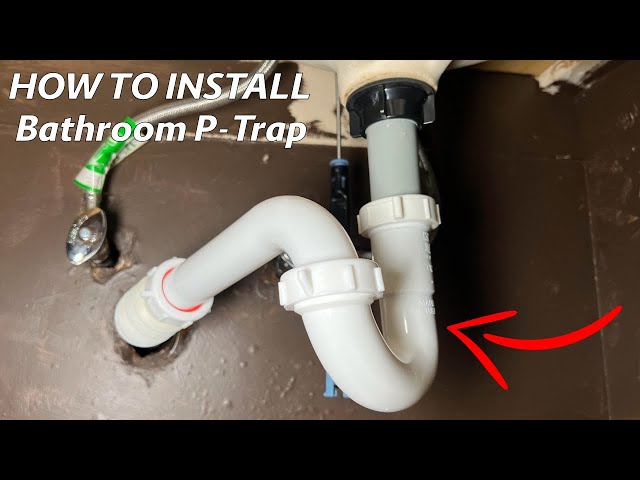
Installing The New P Trap
First, get the new P trapready. Ensure it fits well under the sink. Place it between the sink drainand the wall pipe. Use your hands to tighten the connections. Remember, it should be snug but not too tight.
Next, align the trap with the drainpipe. Adjust its position for a proper fit. Once aligned, secure it with slip nuts. Tighten these nuts with a wrench. Make sure there are no leaks.
Finally, run water to test for leaks. Check all connections. If there’s a leak, adjust the nuts. Everything should be dry and secure now.

Credit: www.facebook.com
Checking For Leaks
Turn the water on slowly. Look under the sink for any drops. Use a flashlight to spot leaks. Check all the joints and connections. Make sure the pipes are tight.
If you see water, tighten the connections. Use a wrench if needed. Dry the area with a towel. Wait a few minutes. Look again for any leaks.
Feel around the pipes for moisture. Listen for dripping sounds. If leaks persist, check the washers. They might need replacing.
- Keep a bucket handy for spills.
- Ensure all connections are secure.
- Consider using plumber’s tape for extra seal.
Regular checks prevent bigger problems. Always ensure everything is dry.
Frequently Asked Questions
What Is A P Trap In A Kitchen Sink?
A P trap is a plumbing component that prevents sewer gases from entering your home. It consists of a curved pipe, typically in the shape of a “P,” which holds a small amount of water. This water creates a seal, blocking the gases and ensuring the kitchen remains odor-free.
Why Install A P Trap Under The Sink?
Installing a P trap is essential for maintaining a hygienic kitchen environment. It helps prevent sewer gases from escaping into your home. It also catches debris, preventing clogs and ensuring smooth drainage. Proper installation can enhance the functionality and longevity of your kitchen plumbing system.
How Do I Install A P Trap?
To install a P trap, first connect the trap to the sink’s drain pipe. Then, attach the trap arm to the wall pipe, ensuring all connections are tight. Check for leaks and adjust as needed. Tools required include a wrench, plumber’s tape, and the P trap components.
Can A P Trap Clog Easily?
Yes, P traps can clog, but regular maintenance prevents this. Clogs typically occur due to debris buildup inside the trap. Cleaning the trap periodically and using strainers can help minimize clogs. If a clog occurs, remove the trap and clean it thoroughly to restore proper drainage.
Conclusion
Installing a P Trap under your kitchen sink is simple and essential. It helps prevent odors and keeps your plumbing efficient. Follow each step carefully for a leak-free result. Check connections to ensure everything is tight and secure. These steps can save you from future plumbing issues.
It’s a small task with big benefits. Now, you can enjoy a fresh and clean kitchen. If challenges arise, professional help is always an option. With this guide, you’re ready to tackle the task confidently. Happy plumbing!


