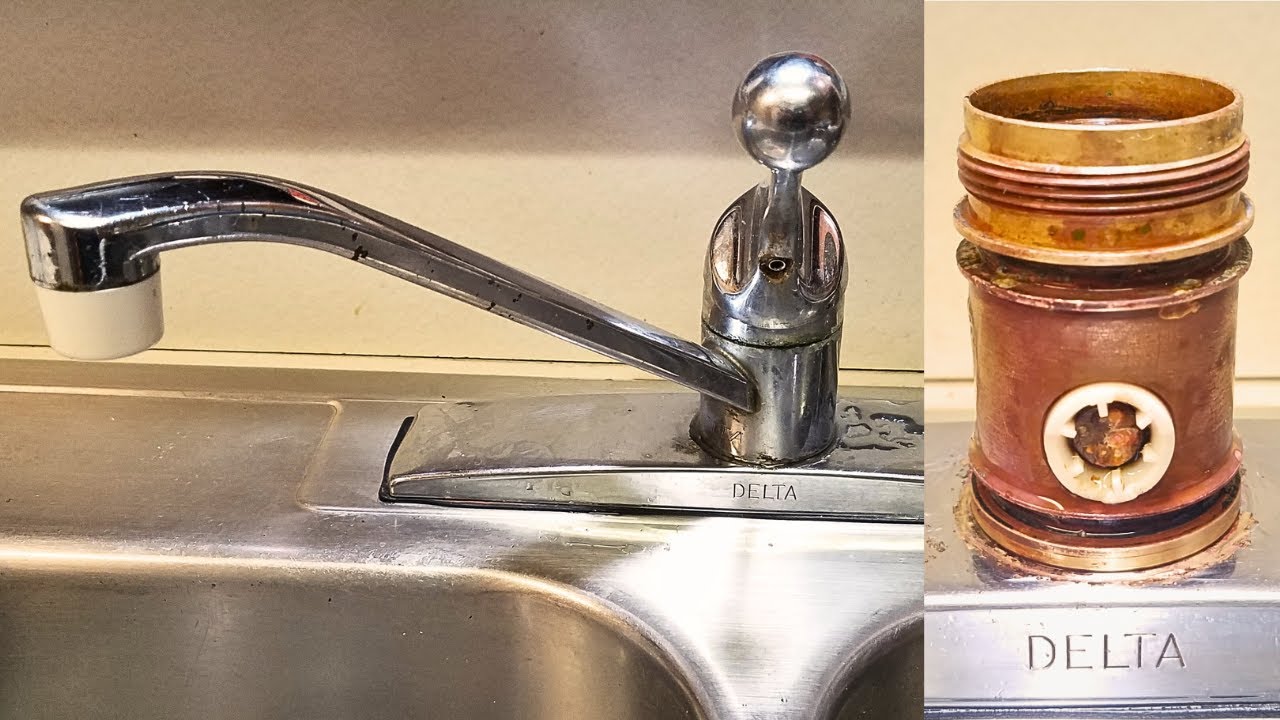
Is your Delta kitchen faucet leaking and driving you crazy? A dripping faucet not only wastes water but can also hike up your bills and damage your sink area.
But don’t worry—you don’t have to call a plumber right away. You can fix it yourself, even if you’re not a DIY expert. In this guide, you’ll learn simple, step-by-step ways to stop that annoying leak fast. Keep reading, and by the end, your faucet will be working like new again.

Credit: www.youtube.com
Identify The Leak Source
Start by checking the faucet handle for any signs of dripping or looseness. A loose handle can cause water to leak inside the faucet. Tighten the handle if needed and see if the leak stops.
Next, inspect the spout and base where the faucet meets the sink. Look for water pooling or dripping around these parts. Cracks or worn-out seals here often cause leaks.
Lastly, examine the water supply lines under the sink. Look for any wet spots, corrosion, or loose connections. Tighten the fittings gently and replace damaged hoses to prevent leaks.

Credit: www.youtube.com
Gather Necessary Tools
Gathering the right toolsis key to fix a Delta kitchen faucet leak. Here is a list of essential toolsneeded for the repair:
- Adjustable wrench
- Phillips and flat-head screwdrivers
- Allen wrench set
- Plumber’s grease
- Replacement O-rings and cartridges
- Bucket or bowl to catch water
- Towels for cleanup
Selecting the correct replacement partsis important. Check the faucet model number to get parts that fit perfectly. Using wrong parts may cause more leaks. Visit a hardware store or order online with your faucet model for the best match.
Shut Off Water Supply
First, locate the shutoff valves. These are usually under the sink. Turn them clockwise to stop water flow.
Some homes have a main water valve near the water meter. This valve also stops water to the whole house.
After closing the valves, open the faucet to drain remaining water. This step reduces mess during repair.
Keep a small bucket or towel handy. Water may still drip out after draining.
Disassemble The Faucet
To start, gently lift the handlefrom the faucet. This part usually hides a small screw or cap.
Next, use a screwdriver or an Allen wrench to remove the retaining clips. These clips hold the cartridge in place.
After clips are off, carefully extract the cartridgeby pulling it straight out. It may need a firm pull but avoid forcing it.
Inspect And Replace Cartridge
First, turn off the water supply under the sink. Then, remove the handle by loosening the screw. This gives access to the cartridge inside the faucet. Check for dirt or mineral buildup around the cartridge. Use a soft brush and vinegar to clean the area. Wipe everything dry with a cloth.
After cleaning, pull out the old cartridge carefully. Take it to the store to find an exact replacement. Installing the new cartridge is simple: align it correctly and push it into place. Tighten any screws or nuts to secure it. Finally, turn the water back on and test the faucet for leaks.
Replace O-rings And Seals
Start by turning off the water supply to the faucet. Use a wrench to loosen and remove the faucet handle carefully. Pull out the cartridge to access the old O-rings. These small rubber rings often cause leaks if worn out or cracked. Remove them gently to avoid damage to the cartridge or faucet body. Clean the area around the seals to remove dirt and debris.
Next, take the new seals and O-rings, ensuring they match the old ones exactly. Lightly coat them with plumber’s grease for a better fit and longer life. Insert the new rings carefully into their correct grooves. Reassemble the faucet by putting the cartridge and handle back in place. Turn the water supply on and check for any leaks. Properly installed seals stop leaks and keep water flowing smoothly.
Reassemble The Faucet
Carefully reattach all partsof the faucet in the order they were removed. Make sure each component fits snugly into place to avoid leaks.
Check for any worn-out washers or seals and replace them before assembling. This helps stop future drips.
- Align handles, spout, and base correctly.
- Push components gently but firmly.
- Ensure no parts are forced or bent.
Secure the faucet by tightening screws and clips. Use the right tools to avoid stripping screws or damaging parts.
Test the faucet for leaks after assembly. Tighten more if needed, but do not over-tighten to prevent damage.
Test For Leaks
Turn on the water supplyto your kitchen faucet. Ensure the handles are in the correct position. Water should flow smoothly without any interruptions. Check for any signs of leakagearound the faucet base. If water leaks, the faucet might need repair or tightening.
Watch how the faucet works. Open and close the handles gently. Look for drips or unusual noises. The water flow should be steady. If there are any issues, you might need to replace some parts. Ensure the handles turn smoothly without resistance.
Prevent Future Leaks
Regularly check and replace worn-out parts to keep your Delta kitchen faucet leak-free. Tighten connections and clean seals to avoid future drips. Simple care helps maintain faucet performance and stops leaks early.
Regular Maintenance Tips
Check the faucet for drips and leaksweekly. Tighten any loose parts gently. Clean the faucet with a soft cloth. Avoid using harsh cleaners that can damage it. Clean the aerator to remove debris. This keeps water flowing smoothly. Inspect the seals and washers for wear. Replace them if they look old or damaged.
Use Quality Parts
Always choose high-quality partsfor repairs. Cheap parts may fail quickly. This can cause more leaks and problems. Look for parts made by Delta. They fit better and last longer. Use the right tools to install them. This prevents damage to the faucet. Proper installation ensures a good seal. This keeps your kitchen dry and leak-free.

Credit: www.youtube.com
Frequently Asked Questions
How Do I Stop My Delta Kitchen Faucet From Leaking?
First, turn off the water supply. Then, disassemble the faucet and check the O-rings and seals. Replace damaged parts to stop leaks effectively.
What Tools Are Needed To Repair A Delta Faucet Leak?
You will need an adjustable wrench, screwdriver, replacement O-rings, plumber’s grease, and possibly a faucet repair kit specific to Delta models.
How Can I Identify The Source Of My Faucet Leak?
Check under the sink and around the faucet base. Inspect the spout, cartridge, and connections to locate where water is dripping.
Is It Necessary To Replace The Entire Faucet To Fix Leaks?
Usually not. Most leaks are fixed by replacing worn-out parts like cartridges or O-rings without changing the whole faucet.
Conclusion
Fixing a Delta kitchen faucet leak is easier than it seems. Follow the steps carefully and take your time. Small leaks can cause big problems over time. Regular checks help keep your faucet in good shape. Simple repairs save money and avoid water waste.
Stay patient and use the right tools. Your kitchen will feel fresh and dry again. Keep this guide handy for future leaks. A little effort goes a long way.





