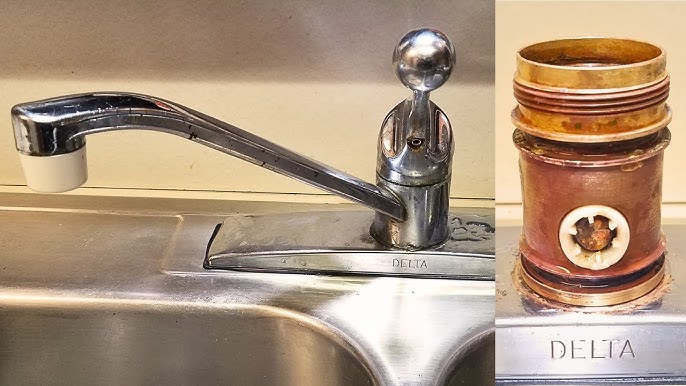
Your Delta kitchen faucet is more than just a tool; it’s a cornerstone of your daily routine. Whether you’re washing dishes, filling pots, or just grabbing a quick drink of water, you rely on it every day.
So, what happens when it starts to drip, leak, or lose its shine? The frustration can be overwhelming, but don’t worry—you’re not alone, and you don’t need to call a plumber just yet. Imagine being able to fix your faucet quickly and easily, saving both time and money.
This guide will show you exactly how to do that. By the end of it, you’ll not only have a fully functioning faucet but also the satisfaction of knowing you did it yourself. We’re about to unravel the mysteries of your Delta kitchen faucet, arming you with the knowledge and confidence to tackle the problem head-on. Ready to dive in and reclaim your kitchen’s efficiency and charm? Let’s get started!
Identifying Common Issues
A leaking faucet can waste water and money. Check the faucet’s O-ring for wear. Replace if needed. Inspect the valve seat for damage. Clean or replace it to stop leaks. Tighten any loose connections. Ensure the washer is not worn out. A new washer can fix leaks.
Low water pressure can be frustrating. Inspect the aerator for clogs. Clean it to improve flow. Look at the water supply lines for kinks. Straighten them to boost pressure. Make sure the valve is fully open. Adjust it if needed. Check for sediment in the faucet. Clean it out to restore pressure.
A stuck handle can be tricky. Check for corrosion on the handle. Clean it to ensure smooth movement. Tighten any loose screws on the handle. Make sure the cartridge is not blocked. Replace it if necessary. Ensure the handle aligns with the stem. Adjust it for proper function.
Gathering Necessary Tools
Gather necessary tools like a wrench, screwdriver, and plumber’s tape before starting the Delta kitchen faucet repair. Having these tools ready ensures a smooth and efficient fixing process without unnecessary interruptions.
Wrench And Screwdriver
A wrenchand screwdriverare essential for fixing a faucet. Use the wrench to loosen and tighten nuts. The screwdriver helps remove and secure screws. Always have these tools ready.
Replacement Parts
Check for replacement partslike washers or cartridges. These parts fix leaks and drips. Ensure you buy parts that fit your faucet model. Proper parts make repairs easier.
Plumber’s Tape
Plumber’s tapeseals threaded connections. Wrap tape around threads before assembly. It prevents leaks and ensures tight fits. Always keep plumber’s tape handy for repairs.
Turning Off Water Supply
Find the shut-off valves under the sink. They are usually round knobs. Turn them clockwise to close the water. This stops the water from flowing. Always check both hot and cold water valves. Make sure they are tight.
Turn on the faucet to test. No water should come out if valves are closed. If water flows, check the valves again. Make sure they are completely shut. This step is crucial to avoid any mess.
Fixing A Leaking Faucet
Repairing a Delta kitchen faucet involves turning off the water supply and removing the handle. Replace worn washers or seals to stop the leak. Ensure all parts are tightly reassembled for proper function.
Replacing O-rings
O-Rings keep the faucet from leaking. They are small rubber rings. To replace them, turn off the water supply. Then, take apart the faucet handle. Find the old O-Rings and remove them. Make sure the new O-Rings are the same size. Put the new ones in place. Finally, reassemble the faucet handle. Turn the water supply back on. Check if the faucet still leaks.
Tightening Connections
Loose connections can cause leaks. Check all connections under the sink. Use a wrench if needed. Tighten any loose screws or nuts. Be careful not to over-tighten them. This could damage the faucet. Turn on the water to see if it stops leaking. Ensure everything is secured tightly.
Addressing Low Water Pressure
Fixing a Delta kitchen faucet with low water pressure involves checking the aerator for blockages. If necessary, clean or replace it to ensure smooth water flow. Regular maintenance helps in preventing recurring issues and keeps the faucet functioning optimally.
Cleaning The Aerator
The aerator might be clogged. This can cause low water flow. Start by twisting the aerator off the faucet. Rinse it under running water. Use a brush to scrub away debris. If it’s stubborn, soak in vinegar for an hour. Rinse again and reattach. This should improve the water pressure.
Checking Supply Lines
Ensure the supply lines are clear. Turn off the water valves first. Then, disconnect the lines from the faucet. Look inside for blockages. Use a thin wire to clear any debris. Reattach the lines carefully. Turn the water back on and test the faucet. The water pressure should be better now.

Credit: www.youtube.com
Repairing Handle Problems
Loose handles can be annoying. First, look for a small screw under the handle. Use a screwdriver to tighten it. Make sure it’s snug but not too tight. Loose handles can cause leaks. Fixing it helps prevent water waste. If the screw is missing, get a new one. Hardware stores usually have them.
Sometimes, handles need new parts. Remove the handle by unscrewing it. Check for worn-out parts inside. Common parts include washers and nuts. Replace any damaged parts with new ones. Make sure the new parts fit well. Put the handle back and tighten it. Test the handle to ensure it’s working smoothly.
Reassembling The Faucet
Fit the faucet parts back together with care. Each part has its place. Align the pieces correctly to ensure smooth operation. Check that washers and screws are tight and secure. This step is crucial for a leak-free faucet. Use the instructions provided with the faucet for guidance. They often include helpful diagrams.
Ensuring Proper Alignment
Align the faucet handle with the base. This alignment helps it turn smoothly. Misalignment can cause unwanted drips. Check the spout to ensure it sits properly. Make sure all parts fit together tightly. This reduces the risk of leaks. Proper alignment makes the faucet work better.
Testing For Leaks
Turn on the water slowly. Watch for any leaks around the faucet. If you see drips, tighten the connections. Check under the sink for leaks too. This ensures everything is sealed right. Run the water for a minute. Make sure no leaks appear. A leak-free faucet saves water.

Credit: www.youtube.com
Turning On The Water Supply
First, locate the main water valve. This is usually under the sink. Turn the valve in a clockwise direction to open it. This allows water to flow to the faucet. Check if the water is coming out smoothly.
Turn on the faucet handle. Water should flow evenly without splashing. If the flow is weak, the aerator might be clogged. Remove the aerator carefully and rinse it under water. Make sure there is no debris blocking it. Reattach it and test the flow again.
Look at the faucet spout and handle. Do you see any drips or leaks? Tighten the nuts around the faucet if needed. If the drip continues, the washer might be worn out. Replace the washer to stop the drip. Check again to ensure no leaks are present.
Maintenance Tips
Keep your Delta kitchen faucet shiny. Use a soft cloth for wiping. Avoid harsh cleaners. They can damage the finish. Warm water is great for cleaning. Add mild soap if needed. Rinse thoroughly to remove soap residue. Dry with a clean towel. This prevents water spots.
Check your faucet regularly. Look for leaks. Leaks waste water. Tighten loose parts. Inspect the aerator. It can get clogged. Clean it with vinegar. Check the handles. They should move smoothly. If not, they may need lubrication. Regular checks keep your faucet working well.

Credit: www.youtube.com
Frequently Asked Questions
How Do I Identify My Delta Faucet Model?
To identify your Delta faucet model, check the manual or look for a model number. This is often found on the faucet’s back or underside. If unavailable, visit Delta’s website and use their identification tool, which helps match your faucet’s features with their database.
Why Is My Delta Kitchen Faucet Leaking?
A leaking Delta kitchen faucet often results from a worn-out washer or seal. Replacing these components usually resolves the issue. Ensure you turn off the water supply before starting repairs. If the problem persists, consult Delta’s customer service or a professional plumber for further assistance.
How Do I Tighten A Loose Delta Faucet Handle?
To tighten a loose Delta faucet handle, first, turn off the water supply. Then, use an Allen wrench to tighten the set screw located beneath the handle. Ensure the handle is secure but not overly tight to avoid damage. Finally, turn the water supply back on and test the handle.
Can I Replace Delta Faucet Parts Myself?
Yes, you can replace Delta faucet parts yourself with basic tools and guidance. First, identify the faulty part. Purchase genuine Delta replacement parts for compatibility. Follow Delta’s instructional videos or guides for step-by-step assistance. If unsure, consider hiring a professional plumber to avoid further complications.
Conclusion
Fixing a Delta kitchen faucet doesn’t need to be hard. With clear steps, you can solve common issues quickly. Remember to check for leaks first. Tighten any loose parts and replace worn-out washers. You save time and money by doing it yourself.
Keep your tools handy. Regular maintenance prevents future problems. Now, your faucet works smoothly, and your kitchen stays dry. Feel confident with your repair skills. A little effort goes a long way. Enjoy a hassle-free kitchen experience every day. Happy fixing!


